9
4
3
15
17
16
14
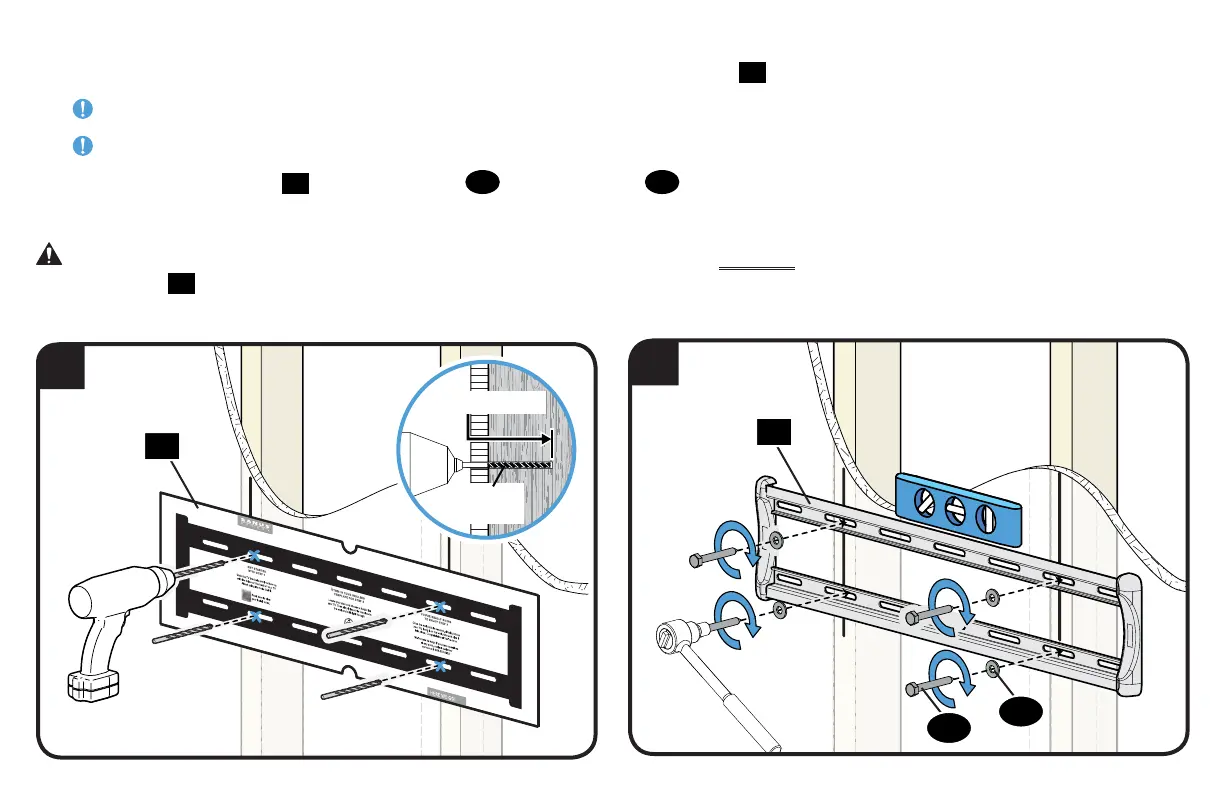
3. Drill pilot holes using a 7/32 in. (5 mm) diameter drill bit. Remove wall plate template
14
.
IMPORTANT: Be sure to drill into the center of the studs.
IMPORTANT: Pilot holes must be drilled to a depth of 3 in. (75 mm).
4. Install wall plate assembly
15
using four lag bolts
17
and four washers
16
. Tighten the lag bolts only until they are pulled firmly against the
wall plate.
CAUTION: Avoid potential personal injury or property damage! All four lag bolts MUST BE firmly tightened to prevent unwanted movement
of the wall plate
15
.
Ensure the wall plate is securely fastened to the wall before continuing on to the next step.
3 in. (75 mm)
7/32 in.
(5.5 mm)