18
a
c
b
d
S1
S1
S1
P
16
4X
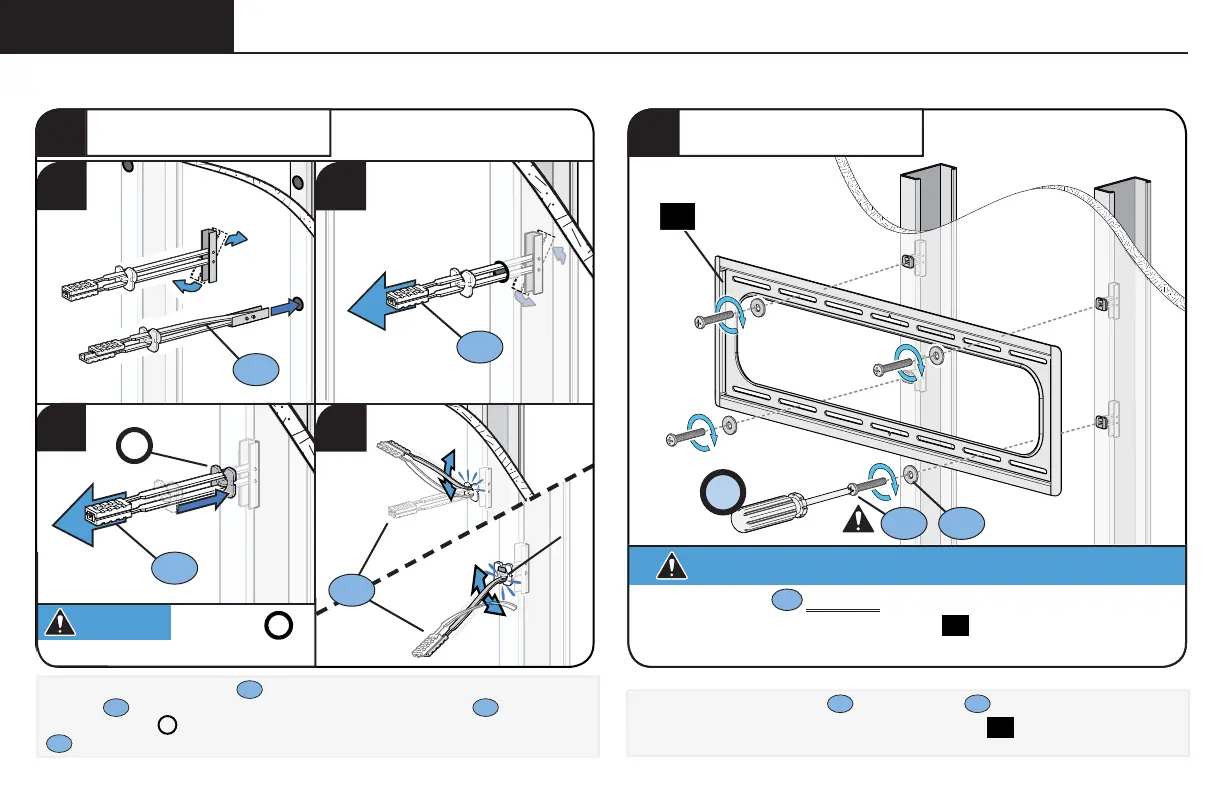
STEP 2C (continued)
Install the four screws
S2
and washers
S3
, and firmly tighten until
they are pulled flush against the wall plate
16
.
6
INSTALL ANCHORS
7
SECURELY TIGHTEN
All four screws
S2
MUST BE firmly tightened to prevent
unwanted movement of the wall plate
16
.
Ensure the wall plate is
securely fastened to the wall before continuing on to the next step.
CAUTION:
Avoid potential personal injury or property damage!
S1
a. Insert the four anchors
S1
* into the drilled holes. b. Pull to rotate the
anchor
S1
* inside the wall. c. Hold the end of the anchor
S1
*
, while
sliding the cap
P
against the drywall. d. Snap off the ends of the anchor
S1
*
to lock in place.
CAUTION:
Be sure cap
P
is
seated against the drywall surface.
S3 S2
 Loading...