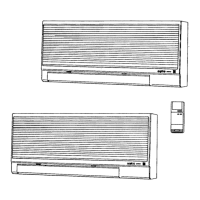
This document is an instruction manual for a Sanyo Dual-Zone Split System Air Conditioner. The system consists of two indoor units (KMS0912) and one outdoor unit (CM1812). The manual provides comprehensive information on the product, its operation, safety, and maintenance.
Function Description:
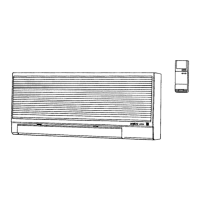
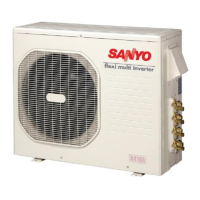
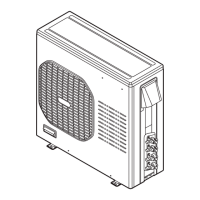
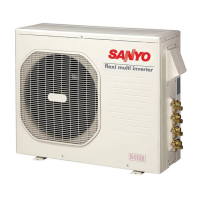
The Sanyo Dual-Zone Split System Air Conditioner is designed to provide comfortable room conditions by cooling the air. It's a split system, meaning it has separate indoor and outdoor units connected by refrigerant tubes. The "Dual-Zone" aspect indicates that it can control the temperature in two separate areas using the two indoor units, which can be operated simultaneously or independently. The system works by drawing in room air through air filters, cooling it, and then blowing the conditioned air back into the room. Moisture in the room condenses and drains off through a hose. The outdoor unit houses the compressor, fan motor, heat exchanger coil, and other electrical components necessary for the cooling cycle.
Important Technical Specifications:
- Model Combination: 2 indoor units KMS0912 + 1 outdoor unit CM1812.
- Power Supply: 60Hz, single-phase, 230/208 volts.
- Cooling Temperature Range:
- Maximum Indoor Air Intake: 95°F DB / 75°F WB
- Minimum Indoor Air Intake: 67°F DB / 57°F WB
- Maximum Outdoor Air Intake: 115°F DB
- Minimum Outdoor Air Intake: 67°F DB
- Set Temperature Range (Cooling): 64°F minimum to 84°F maximum.
- Compressor Delay Circuit: Built-in 3-minute time delay for reliable operation after power-on or power failure.
Usage Features:
The air conditioner is primarily controlled by a wireless remote control unit, which acts as both a transmitter for commands and a sensor for room temperature.
- Remote Control Unit Functions:
- ON/OFF Operation: Turns the unit on and off.
- Mode Selection: Allows selection between "COOL" (cooling) and "FAN" (circulation only) modes.
- Temperature Setting: "COOLER" and "WARMER" buttons adjust the set temperature in 2°F increments.
- Fan Speed Selection: Options include "AUTO," "HIGH," "MED," and "LOW." In "AUTO" mode, a microcomputer automatically adjusts fan speed based on the difference between room and set temperatures.
- Timer Setting: Allows programming for ON, OFF, or daily ON/OFF operations. The remote displays current time, ON time, and OFF time.
- Night Setback Mode: In "COOL" mode, this feature automatically raises the set temperature by 2°F after 30 minutes, and again by 2°F after another 30 minutes, to save energy while providing gentle cooling. A star mark appears on the display when activated.
- Airflow Direction Adjustment:
- Horizontal: Adjusted manually by moving the vertical vane left or right.
- Vertical: Adjusted manually by holding both ends of the flap and moving it up or down. A 30° downward limit is recommended in COOL mode to prevent condensation drip.
- Indoor Unit Display and Operation Selector:
- Remote Control Receiver: Picks up infrared signals from the remote.
- Operation Lamp: Lights up in continuous COOL or FAN mode.
- Timer Lamp: Lights up when the system is timer-controlled.
- Operation Selector:
- ON Position: For normal operation with the remote control.
- OFF Position: For when the unit won't be used for several days or longer (does not disconnect power completely).
- TEST Position: For servicing only.
- Operation without Remote Control: If the remote is lost or malfunctioning, the indoor unit's operation selector can be used to turn the unit ON (by switching from OFF to ON) or OFF. The set temperature and fan speed will default to the latest selections before stopping.
Maintenance Features:
Regular maintenance is crucial for optimal performance and longevity.
- Safety Precautions: Always turn off and disconnect power before cleaning. Do not pour water on the indoor unit to prevent damage and electric shock.
- Casing and Grille (Indoor Unit): Clean with a vacuum cleaner brush or a clean, soft cloth. For stains, use a cloth moistened with mild liquid detergent. Exercise care not to force vanes out of place.
- Air Filter:
- Frequency: Check and clean at least once every two weeks.
- Removal: Move the air outlet flap to its lowest position, then hold the air filter by the tab at the bottom and pull downward.
- Cleaning: Use a vacuum cleaner for light dust. For sticky dust, wash in lukewarm, soapy water, rinse in clean water, and dry.
- Replacement: Ensure the "FRONT" mark on the filter faces you.
- Internal Coil and Outdoor Unit Components: Must be cleaned annually by a dealer or service center.
- Remote Control Batteries:
- Type: Two fresh leak-proof AAA alkaline batteries.
- Replacement: Replace when the remote control lamp fails to light or when it cannot change settings. Remove batteries if the unit won't be used for more than one month.
- Reset: Pressing the ACL button resets current time, ON time, and OFF time to 0:00.
Energy Saving Tips:
- Do not block the air intake and outlet of the unit.
- Prevent direct sunlight from entering the room by using sunshades, blinds, or curtains.
- Keep the air filter clean.
- Keep windows, doors, and other openings closed to prevent conditioned air from escaping.