Programme edit recording
The desired selections can be rearranged and recorded on the tape within a designated tape length.
—
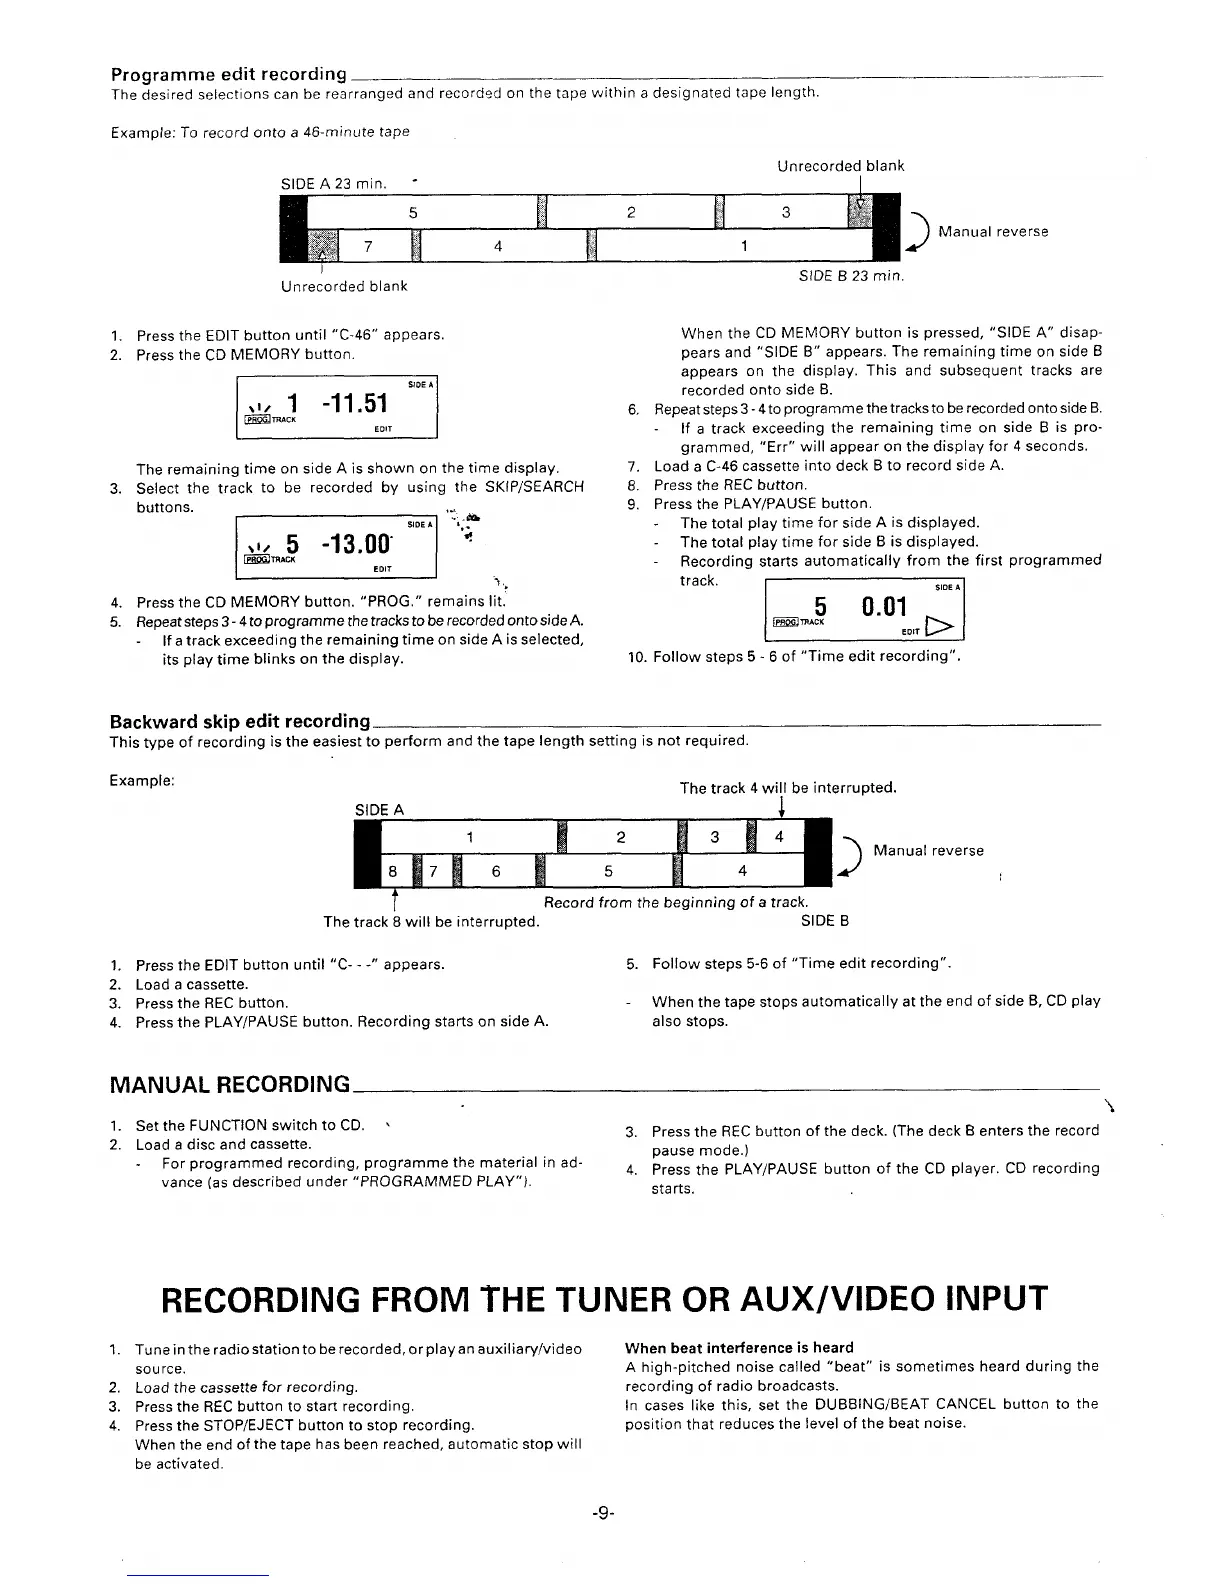
Example: To record onto a 46-minute tape
Unrecorded blank
SIDE A 23 min. “
Manual reverse
I
Unrecorded blank
1. Press the EDIT button until “C-46” appears.
2. Press the CD MEMORY button.
t
SIDE A
The remaining time on side A is shown on the time display.
3. Select the track to be recorded by using the SKtP/SEARCH
buttons.
m“;’
1
I
‘“l.,
4. Press the CD MEMORY button. “PROG.” remains lit.
5. Repeat steps 3-4 to program me the tracks to be recorded onto side A.
If a track exceeding the remaining time on side A is selected,
its playtime blinks on the display.
Backward skip edit recording
StDE B 23 min.
When the CD MEMORY button is pressed, “SIDE A“ disap-
pears and “SIDE B“ appears. The remaining time on side B
appears on the display. This and subsequent tracks are
recorded onto side B.
6. Repeat steps 3-4 to programme the tracks to be recorded onto side B.
If a track exceeding the remaining time on side B is pro-
grammed, “Err” will appear on the display for 4 seconds.
7. Load a C-46 cassette into deck B to record side A.
8. Press the REC button.
9. Press the PLAY/PAUSE button.
The total play time for side A is displayed.
The total playtime for side B is displayed.
Recording starts automatically from the first programmed
track.
I
SIDE A
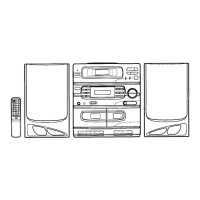
Example:
10. Follow steps 5-6 of “Time edit recording”.
This type of reco~ding is the easiest-to perform and the tape length setting is not required.
The track 4 wi!l be interrupted.
SIDE A
4
1
1!
2
M
3
a
4
B
[ B
lJ
Manual reverse
6
5
4
t
Record from the beginning of a track.
The track 8 will be interrupted.
1. Press the EDIT button until “C- - -“ appears.
5.
2. Load a cassette.
3. Press the REC button.
4. Press the PLAY/PAUSE button. Recording starts on side A.
MANUAL RECORDING
SIDE B
Follow steps 5-6 of “Time edit recording”.
When the tape stops automatically at the end of side B, CD play
also stops.
\
1. Set the FUNCTION switch to CD. ‘
2, Load a disc and cassette.
3. Press the REC button of the deck. (The deck B enters the record
For programmed recording, programme the material in ad-
pause mode.)
4. Press the PLAY/PAUSE button of the CD player. CD recording
vance (as described under “PROGRAMMED PLAY”).
starts.
RECORDING FROM THE TUNER OR AUX/VIDEO INPUT
1. Tuneinthe radio station to rerecorded, orplayan auxiliary/video
When beat interference k heard
source.
A high-pitched noise called “beat” is sometimes heard during the
2. Load the cassette for recording.
recording of radio broadcasts.
3. Press the REC button to start recording.
In cases like this, set the DUBBING/BEAT CANCEL button to the
4. Press the STOP/EJECT button to stop recording.
position that reduces the level of the beat noise.
When the end of the tape has been reached, automatic stop will
be activated.
-9-