Do you have a question about the Sanyo DC-DA280 and is the answer not in the manual?
Advisories regarding exposure to liquids, temperature extremes, and direct sunlight.
Instructions for connecting speakers, FM aerial, and AM loop aerial for optimal reception.
Identification and function of buttons on the main unit, including power, function, and volume.
Details on buttons for CD playback, track selection, tuning, and radio band switching.
Explanation of buttons for tape playback, recording, fast forward, and rewind functions.
Description of number buttons, cassette deck controls, CD player controls, and tuner operations.
Steps to turn the unit on and off, and how to select different playback functions.
Starting, stopping, pausing, skipping tracks, and selecting desired tracks for playback.
Procedure for recording audio from a compact disc onto a cassette tape.
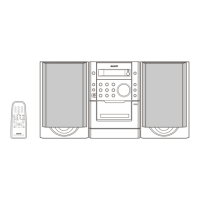
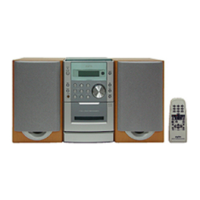
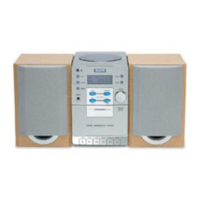
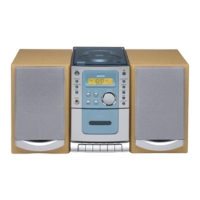
This document describes the Sanyo DC-DA280 Micro Component System, a versatile audio device combining a tuner, CD player, and cassette deck, designed for home entertainment. The manual provides comprehensive instructions for its operation, maintenance, and safety.
The Sanyo DC-DA280 is controlled via a combination of front panel buttons and a remote control. The main power button allows users to switch the unit on and off, with the display illuminating when active. A "FUNCTION" button enables selection between the various modes: CD, TAPE, TUNER (TU), and LINE (LinE). The system automatically switches to the appropriate function when CD play or tape playback is initiated, or when the TUNER/BAND button is pressed (except during recording). When the function is changed, any ongoing CD play or tape playback automatically stops.
Volume control is managed by a dedicated knob on the unit or via the "+/- VOLUME" buttons on the remote control, with the current volume level (ranging from VOL 0 to VOL 40) displayed on the screen.
The system incorporates several sound enhancement features. The "SURROUND" button activates a 3-dimensional sound effect, indicated by "SURR" on the display. For bass enhancement, the "BASS" button can be pressed, displaying "BASS" on the screen. Additionally, a "SOUND PRESET" button allows users to select from various sound modes tailored to different music genres, such as POP, ROCK, JAZZ, and CLASSIC.
In case of abnormal operation or display issues, the manual recommends a simple troubleshooting sequence: disconnect the mains lead, press the CD button on the unit for at least 30 seconds, reconnect the mains lead, and then attempt to operate the unit again.
The tuner allows reception of FM, MW, and LW radio broadcasts. Users can select the desired band using the "TUNER/BAND" button.
Automatic Tuning: To automatically tune into a station, the "TUNING -" or "TUNING +" button should be pressed for at least one second. The unit will then scan the band and stop at the next receivable station. This can also be done using the corresponding buttons on the remote control.
Manual Tuning: For manual tuning, the "TUNING -" or "TUNING +" button should be pressed briefly until the desired frequency is displayed.
Preset Stations: The system supports presetting up to 24 FM stations, 12 MW stations, and 4 LW stations. To preset a station, first tune into it, then press the "MEMORY" button on the remote control. While "PROG." is blinking, use the "PRESET -" or "PRESET +" buttons on the front panel (or the remote control) to select a channel number, and then press the "MEMORY" button again. If the next step is not taken within 10 seconds, the preset operation is cancelled. Previously preset stations are cleared when a new station is saved to the same channel. To listen to a preset station, select the desired band, then use the "PRESET -" or "PRESET +" buttons to select the channel number. Number buttons on the remote control can also be used for direct selection.
FM Stereo Reception: When an FM stereo broadcast is received, "ST" appears on the display. If the signal is weak, pressing the "FM MODE" button can switch to mono mode, which may improve reception quality, though the sound will be monaural.
Beat Interference: If a high-pitched "beat" noise is heard during radio reception, users can press the "MEMORY" button, and while "PROG." is blinking, press the "FM MODE" button to select "bc-A" or "bc-b" to find the setting that minimizes the noise.
MW Reception Frequencies: For regions outside Europe, the MW reception frequencies can be changed. While "MW" is selected, pressing the "TUNER/BAND" button and the "▷▷▷▷" button on the front panel simultaneously allows switching between 522-1611 kHz (9kHz steps) and 520-1610 kHz (10 kHz steps).
The CD player supports conventional 12 cm CDs and 8 cm CDs without an adapter.
Loading a Disc: To play a CD, first select the "CD" function. Press the "▲ CD OPEN/CLOSE" portion to open the CD compartment lid. Place the disc with the label facing up on the turntable, ensuring only one disc is loaded at a time. Close the lid by pressing the "▲ CD OPEN/CLOSE" portion again. The total number of tracks and playing time will then appear on the display. If a disc is loaded incorrectly or is badly scratched, "Cd" will be displayed.
Basic Playback: Press the "CD" button to start playback from the first track. The current track number and elapsed playing time are displayed. To stop playback, press the "■" button. The player stops automatically after the last track. It is important to press the "■" button and wait for the disc to stop rotating before opening the CD compartment.
Track Selection: To start play from a desired track, use the "K" or "▷▷▷▷" buttons to select the track, then press the "CD" button. On the remote control, two number buttons can be pressed within 2 seconds (e.g., "0" then "3" for track 3).
Temporary Stop (Pause): Press the "CD" button (or "►/II" button on the remote control) to temporarily stop playback, indicated by a blinking "►". Press the button again to resume.
Skip Play: During playback, repeatedly press the "K" or "▷▷▷▷" buttons to skip to the desired track. The track number will appear on the display. Remote control number buttons can also be used for direct track skipping (e.g., "0" then "6" for track 6).
Search (Forward/Reverse): During playback, pressing and holding the "K" or "▷▷▷▷" button will search at high speed in the reverse or forward direction. Releasing the button resumes normal play.
Repeat Play: Press the "REPEAT" button before or during play to repeatedly play all tracks or programmed tracks. "►" appears on the display. To cancel repeat play, press the "REPEAT" button again, and "►" disappears.
Programmed Play: Up to 24 tracks can be programmed to play in any order. This must be done in stop mode after selecting the "CD" function and loading a disc.
Checking and Changing Programs (Remote Control Only): In stop mode, pressing the "MEMORY" button repeatedly displays the programmed details sequentially. To add a new track: In stop mode, press "MEMORY" repeatedly until "- -,- - -" is displayed, select the new track, and press "MEMORY". To change a track: In stop mode, press "MEMORY" repeatedly until the track to be replaced is displayed, select the new track, and press "MEMORY". Programmed details cannot be partially deleted or inserted.
The cassette deck supports normal (TYPE 1) tapes. Endless tapes and C-100 (or longer) tapes are not recommended as they may jam the mechanism.
Loading a Cassette: Select the "TAPE" function. Press the "EJECT" portion to open the cassette holder. Load the cassette, then push the holder back into position.
Playback: Press the "TAPE" button to begin playback. Press the "■" button to stop playback at any time. Press it again to remove the cassette. The deck features automatic stop at the end of the tape.
Fast Forward and Rewind: Press the "K" or "▷▷▷▷" button. Press the "■" button when the desired location is reached.
The system allows recording from CD, tuner, or other sources onto a cassette tape. Users are reminded that recording copyright material without permission is an infringement.
Recording Compact Discs (Synchronous Recording):
Recording from Tuner or Other Sources:
Beat Interference during Recording: If a high-pitched "beat" noise is heard during radio recording, press the "MEMORY" button. While "PROG." is blinking, press the "TUNING -" button to select "bc-1" or "bc-2" to find the best setting.
Automatic Record Muting (Remote Control Only): This feature allows omitting undesirable parts of a program. While recording, press the "O" button once. "REC" blinks, a 5-second unrecorded blank space is created, and the deck enters recording pause mode. "REC" remains lit, and "►" blinks. Pressing the "O" button again adds another 5-second blank space. To resume recording, press the "TAPE" button.
Safeguards Against Accidental Erasure: To prevent accidental erasure, break out the tabs on the end of the cassette tape (where the tape is not exposed) using a screwdriver. If a tab is broken out in error, it can be blocked with adhesive tape to allow re-recording.
The manual details how to connect the system components and external devices.
Speakers: Connect the left speaker lead connector to the "L" SPEAKERS socket and the right speaker lead connector to the "R" socket. If difficulty is encountered, turn the connector over and reinsert it.
FM Aerial: The FM indoor aerial wire should be extended as straight as possible and secured in a position that minimizes distortion and noise.
AM Loop Aerial: The loop aerial needs to be assembled as shown in the figure. Unwind the aerial wires and connect them to the AM LOOP terminals. Position the aerial for best AM reception, or attach it to a wall or other surface.
Video/Auxiliary Equipment: Audio leads (not supplied) from the audio output sockets of video/auxiliary equipment can be connected to the "LINE IN" sockets.
Headphones: Stereo headphones (not supplied) can be connected to the "PHONES" socket for monitoring or private listening. The speakers are automatically disconnected when headphones are connected.
Mains Connection: The mains lead should not be connected to an AC outlet until all other connections have been made. The system is not completely disconnected from the mains when the power button is in the OFF position.
Safety Precautions for Connections: To minimize noise, speaker, mains, and any other leads should not be placed close to the indoor or external aerial lead and AM loop aerial.
Regular maintenance is crucial for the continued high performance of the Sanyo DC-DA280.
Cleaning the Tape Heads: After approximately every 10 hours of use, the heads, pinch roller, and capstan of the cassette deck should be cleaned with a cotton swab. If dirt persists, soak the swab in a little methylated spirit or head cleaning fluid.
Cleaning the CD Player Lens: The lens should never be touched. If dust is on the lens, it should be blown off using a camera lens blower. Users are advised to consult their dealer if necessary.
Cleaning the Unit: The outside of the unit should be cleaned with a clean, soft cloth moistened with lukewarm water. Benzene, thinner, or alcohol should not be used as they may mar the finish of the surfaces.
The device is a Class 1 laser product. Users are cautioned not to remove any covers or attempt to access the inside of the product to ensure continued safety. All servicing should be referred to qualified personnel.
The apparatus should not be exposed to dripping or splashing, and no objects filled with liquids, such as vases, should be placed on it. It should not be used in extreme temperatures (below 5°C or exceeding 35°C) or in direct sunlight.
Due to the CD player's low noise and wide dynamic range, users are warned against setting the amplifier volume unnecessarily high, as this could damage speakers. Sudden changes in ambient temperature may cause condensation on the optical lens; if this occurs, the disc should be removed, and the unit left for about an hour before operation.
The system's speakers use powerful magnets, so timepieces, credit cards, cassette tapes, or video tapes should not be placed near them. The equipment should not be installed in a confined space, such as a bookcase or built-in cabinet.
Mains Plug and Fuse: If the supplied plug is not suitable for the socket outlets, it should be cut off and replaced with the correct type. The removed plug should be disposed of carefully to avoid shock hazards. The detachable fuse cover must be replaced after changing the fuse. Only a 3A fuse (complying with BS1362 and carrying the ASTA mark) should be used. The wires in the mains lead are colored blue (neutral) and brown (live). These must be connected to the corresponding terminals in the plug (N or Black or Blue for neutral, L or Red or Brown for live). Neither wire should be connected to the earth terminal. If the mains plug contains a fuse, it should be 3A; if a plug without a fuse is used, the distribution board fuse should not be greater than 5A.
| FM reception frequency | 87.5 - 108 MHz |
|---|---|
| AM reception frequency (9 kHz step) | 522 - 1710 kHz |
| AM reception frequency (10 kHz step) | 520 - 1710 kHz |
| channels | 2-channel stereo |
|---|---|
| sampling frequency | 44.1 kHz |
| laser output | 0.6 mW |
| track system | 4-track, 2-channel stereo |
|---|---|
| frequency response | 80 Hz to 15 kHz |
| signal-to-noise ratio | 40 dB |
| output power | 4W x 2 |
|---|---|
| power requirements | AC 230 V, 50 Hz |
| power consumption | 21 W |
| type | Full range bass reflex |
|---|---|
| unit used | 10 cm cone type |
| maximum power-handling capacity | 8 W |
| dimensions | 150(W) x 230(H) x 205(D) mm |
|---|---|
| weight | 2.3 kg |
| speaker dimensions | 145(W) x 230(H) x 170(D) mm |