EasyManua.ls Logo

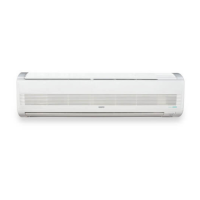
Sanyo KMHS1872 User Manual

Sanyo KMHS1872
25 pages
To Next Page IconTo Next Page
Page #1 background imageLoading...
Page #1 background image
© SANYO 2006
Pub. OI-85264180809000
• INSTRUCTION MANUAL
• MODE D’EMPLOI
Inverter-Controlled Split System Air
Conditioner
Climatiseur de type séparé contrôlé par
inverseur
Save These Instructions!
Conserver ce mode d’emploi
KMHS1872
KMHS2472
This air conditioner uses the new refrigerant R410A.
COOL/DRY/HEAT Model
KMHS1872_Cover.fm Page 2 Wednesday, November 2, 2005 10:18 AM

Other manuals for Sanyo KMHS1872

Questions and Answers:

Sanyo KMHS1872 Specifications

General IconGeneral
BrandSanyo
ModelKMHS1872
CategoryAir Conditioner
LanguageEnglish

Summary

Features

Microprocessor Controlled Operation

Central unit control for automatic operation, easy to use.

Simple One-touch Wireless Remote Control

Remote control offers multiple features for automatic operation.

24-Hour ON or OFF Timer

Timer to automatically turn the unit on or off within a 24-hour period.

1-Hour OFF Timer

Timer to automatically turn off the unit one hour after setting.

Night Setback

Adjusts room temperature thermostat settings for comfort and energy saving.

Automatic and 3-step Fan Speed

Allows automatic or manual selection of fan speed (Auto, High, Medium, Low).

Air Sweep Control

Moves flap up/down to distribute air for comfort throughout the room.

Auto. Flap Control

Automatically sets flap position for heating, cooling, and drying.

Hot Start Heating System

Provides warm air immediately, preventing cold drafts during startup or defrosting.

Automatic Restart Function for Power Failure

Restarts operation with preset settings after a power outage.

High Power Operation

Operates at maximum output for 30 minutes, regardless of temperature.

Quiet Operation

Reduces fan speed for quieter operation.

ION Operation

Generates negative ions to freshen the air in the room.

Anti-Mold Filter

Filter inhibits the growth of mold and bacteria.

Air Clean Filter

Filter removes unpleasant odors and cleans the air.

Installation Location

Electrical Requirements

Safety Instructions

Names of Parts

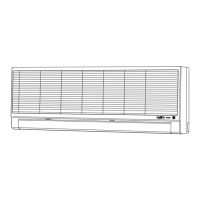
Air Intake

Air drawn from the room passes through filters to remove dust.

Air Outlet

Conditioned air is blown out from the air outlet.

Remote Control Unit

Controls power, mode, temp, fan speed, timer, and air sweep.

Refrigerant Tubes

Copper tubes connecting indoor/outdoor units for refrigerant gas flow.

Drain Hose

Carries condensed moisture from the room.

Outdoor (Condensing) Unit

Contains compressor, fan motor, heat exchanger, and electrical components.

Unit Display and Operation Button

REMOTE CONTROL receiver

Picks up infrared signals from the remote control transmitter.

OPERATION button

Enables heating/cooling when remote cannot be used.

OPERATION lamp

Indicates operation mode (Auto, Heat, Dry, Cool) or defrosting.

TIMER lamp

Lights when the system is controlled by the timer.

QUIET lamp

Lights during QUIET mode operation.

ION lamp

Lights during ION mode operation.

Remote Control Unit

Transmitter

Transmits setting changes to the air conditioner receiver.

Sensor

Senses room temperature for the remote control unit.

Display

Shows operating conditions, flap, and fan speed settings.

ION button

Turns negative ion generation on and off.

ON/OFF operation button

Turns the air conditioner on and off.

1 HR. TIMER button (1-HOUR OFF TIMER)

Operates unit for one hour then shuts down.

Remote Control Unit (continued)

Temperature setting buttons (TEMP.)

Increase or decrease the set temperature by 1°C or 2°F.

QUIET button

Reduces fan speed for quieter operation.

MODE selector button

Selects AUTO, HEAT, DRY, or COOL mode.

FAN SPEED selector button

Selects fan speed (Auto, High, Medium, Low).

NIGHT SETBACK button

Adjusts temperature automatically to save energy.

FLAP button

Sets airflow direction (auto, manual positions, or sweep).

HIGH POWER button

Increases unit output for 30 minutes, except in Auto mode.

ON TIME/OFF TIME setting buttons

Sets timer for unit to start, stop, or both.

Remote Control Unit (continued)

SENSOR button

Switches temperature sensing to the indoor unit sensor.

Temperature Display Selector button

Switches temperature display between °C and °F.

Time Display Selector button

Switches time display between 24-hour and 12-hour format.

ACL button (ALL CLEAR)

Resets remote control unit to pre-operation status after battery replacement.

ADDRESS switch

Prevents signal mixing for multiple air conditioners.

How to Install Batteries

Instructions for installing AAA alkaline batteries into the remote control.

Using the Remote Control Unit (continued)

Remote Control Unit Installation Position

Guidelines for optimal placement of the remote control unit.

Mounting the Remote Control Unit

Steps for mounting the remote control unit on a wall.

When Holding the Remote Control Unit

Proper handling and aiming of the remote control unit.

Operation with the Remote Control Unit

1. Automatic Operation

Unit automatically selects COOL or HEAT based on temperature difference.

Operation with the Remote Control Unit (continued)

2. Manual Operation

Allows manual selection of mode, temperature, fan speed, and airflow.

Operation with the Remote Control Unit (continued)

3. Adjusting the Fan Speed

Controls how fast the air is blown by the fan.

Operation with the Remote Control Unit (continued)

4. Night Setback Mode

Energy saving mode that adjusts temperature automatically over time.

Operation with the Remote Control Unit (continued)

5. QUIET Mode

Reduces fan speed for quieter operation.

6. HIGH POWER Mode

Increases output for 30 minutes, except in Auto mode.

7. ION Mode

Generates negative ions to freshen the air.

Special Remarks

"DRY" (0) Operation

Controls humidity by running fan at lower speed. Not effective if temp is too low.

Heating (*) Operation

Discusses heating performance, defrosting, and cold draft prevention.

Power failure during operation

Unit restarts automatically within 15 minutes after power resumes.

Clicking Sound

Normal sound from plastic parts expanding/shrinking due to temperature changes.

Remote Control Unit

Sends setting conditions to the air conditioner every five minutes.

Setting the Timer

1. How to set the present time

Steps to set the current time on the remote control.

2. How to set the OFF time

Steps to set the time for the air conditioner to turn off.

Setting the Timer (continued)

3. How to set the ON time

Steps to set the time for the air conditioner to turn on.

4. How to set DAILY ON/OFF REPEAT timer

Sets recurring daily ON/OFF schedules.

To cancel a timer program

Instructions for cancelling set timer programs.

Using the 1-Hour OFF Timer

1. 1-Hour OFF Timer

Function to operate the unit for one hour and then stop.

2. Operation together with the DAILY ON/OFF REPEAT Timer

Explains priority of 1-Hour OFF Timer over daily repeat timer.

Tips for Energy Saving

Adjusting the Airflow Direction

1. Horizontal

Adjusts horizontal airflow by moving vertical vanes manually.

2. Vertical

Adjusts vertical airflow by moving the flap with the remote control.

Operation without the Remote Control Unit

Care and Cleaning

Casing and Grille (Indoor Unit)

Instructions for cleaning the indoor unit casing and grille.

Care and Cleaning (continued)

Anti-Mold Filter

Instructions for removing, cleaning, and replacing the anti-mold filter.

Care and Cleaning (continued)

Air Clean Filter

Instructions for installing, cleaning, and replacing the air clean filter.

Cleaning the main unit and remote control unit

How to clean the main unit and remote control, including the negative ion generator.

Troubleshooting

Operating Range

Related product manuals