Do you have a question about the Sanyo VPC-X360E and is the answer not in the manual?
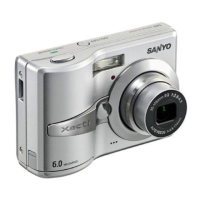
| Camera type | Compact |
|---|---|
| Sensor Type | CCD |
| Digital Zoom | 4x |
| Storage Media | SD Card |
| ISO Sensitivity | Auto, ISO 100, ISO 200, ISO 400 |
| Shutter Speed | 1/2 |
Details the main circuit components and their functions.
Lists the integrated circuits and their roles in the camera's operation.
Explains the structure and features of the CCD image sensor.
Describes the H and V driver ICs responsible for CCD clock generation.
Details the signal processing stages for the CCD output.
Explains the process of transferring and extracting charge from the CCD.
Converts interlaced CCD signals to signals for video monitors.
Covers circuits for digital clamp, white balance, gamma, color generation, matrix, and aperture.
Manages SDRAM operations and refresh.
Handles parallel port functions and serial communication interface.
Timing generation, audio conversion (A/D, D/A), and sound buffering.
Controls and displays image signals on the LCD screen.
PC serial interface and motion JPEG compression/decompression.
Describes the overall sequence of camera operation from shutter to data output.
Explains gamma conversion and data transfer for LCD display.
Details how freeze-frame images and playback data are shown on the LCD.
Overview of the main power circuit and its blocks.
Details the PWM switching regulator controller and its channels.
Lists and describes the 3.3V, 5V, Analog, LCD, and Backlight power outputs.
Explains power switch, supply filter, oscillation, rectifier, and monitoring.
Covers emission control, trigger, and light emitting elements.
Describes the SY1 board's configuration centered around an 8-bit microprocessor.
Illustrates the internal bus communication system between the microprocessor and ASIC.
Details the functions assigned to various key presses on the camera.
Explains how the 8-bit microprocessor controls the camera's power states.
Step-by-step guide for removing the front and back cabinet parts.
Instructions for removing SY1, TB2, and TB1 boards.
Procedure for removing the Lens VF and PW1 board.
Diagram showing the placement of major circuit boards within the camera.
Lists required tools, equipment, and system setup for adjustments.
Outlines the sequence and types of electrical adjustments to perform.
Procedure for establishing a connection between the camera and a PC for adjustments.
Procedure to adjust the frequency of the IC501 oscillator.
Steps to adjust various voltage levels (5.0V, 3.3V, 12.4V, 5.8V).
Procedure to detect and adjust for CCD sensor defects.
Process for calibrating the Auto White Balance.
Method for adjusting the lens flange-back focus.
Adjustments for LCD panel parameters including H AFC.
Adjusting LCD RGB offset and gain parameters.
Adjusting LCD blue and red brightness levels.
Troubleshooting steps for when the camera does not power on.
Steps to diagnose and resolve issues with taking pictures.
Troubleshooting steps for when the LCD screen shows no image.
Lists external and structural components of the camera.
Continues the list of external and structural components.
Lists capacitor and resistor part numbers and specifications.
Lists transistors, diodes, and ICs with their part numbers.
Lists the materials used for packaging the camera.
Diagram showing connector pinouts and their signals.