18
The Sapling Company, Inc.
670 Louis Drive
Warminster, PA 18974
USA
P. (+1) 215.322.6063
F. (+1) 215.322.8498
www.sapling-inc.com
Wall Mount Installation - Round Aluminum or Wood Clock - Battery Powered
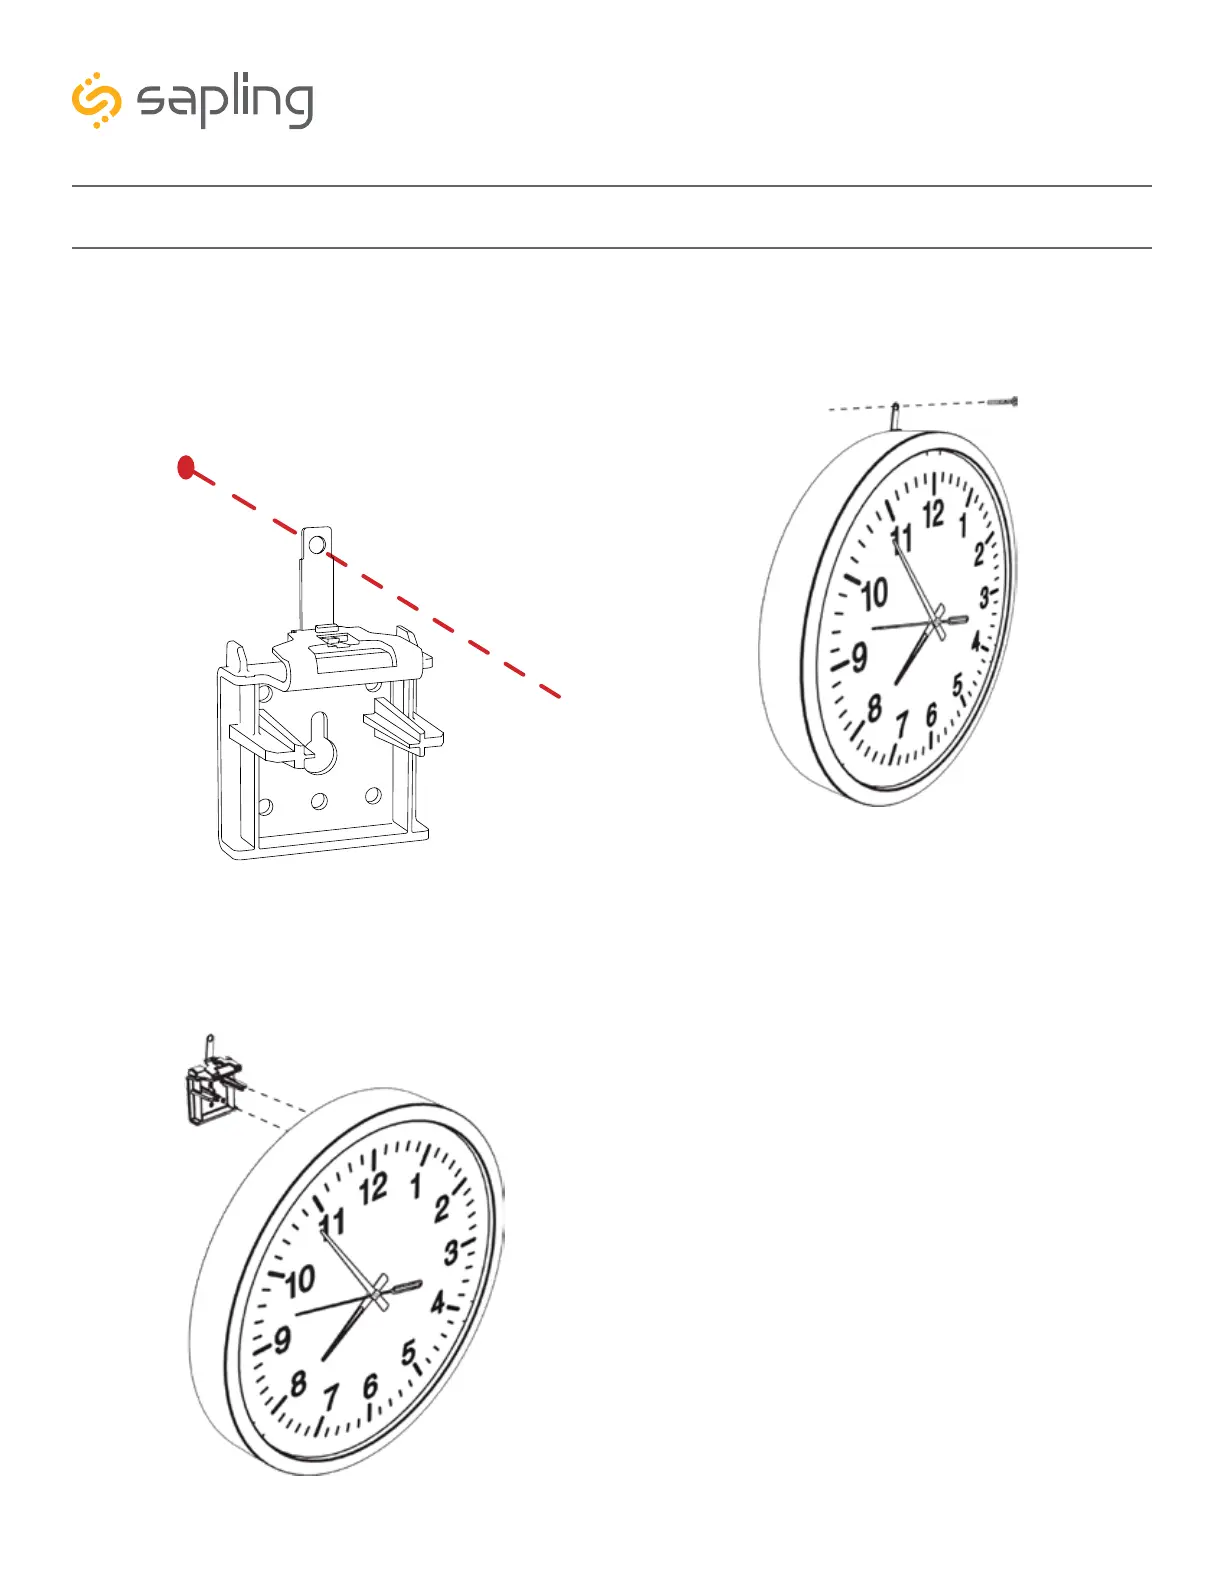
9) Use the pencil to mark the location of the hole
at the top of the release lever, and remove the
clock again (see step 11). Remove the mounting
piece and make a hole at the location you just
marked with the 1/8 inch drill bit.
10) Reattach the mounting piece and clock. Place
one of the self-tapping screws through the hole in
the top of the release lever and into the wall.
12) If you need to take the clock off the wall after
the installation has been completed AND you
accidentally broke off the release lever or forgot
to attach it during installation, take a thin flathead
screwdriver, thin ruler, or eyeglass screwdriver and
insert the end between the clock and the wall. Press
down on the latch until you are able to slide the
clock off the mounting piece.
11) If you need to take the clock off the wall after
the installation has been completed, remove the
screw from the release lever, press the release lever
down, then slide the clock off the mounting piece.