20
The Sapling Company, Inc.
670 Louis Drive
Warminster, PA 18974
USA
P. (+1) 215.322.6063
F. (+1) 215.322.8498
www.sapling-inc.com
Wall Mount Installation - Round Aluminum or Wood Clock - Locally Powered
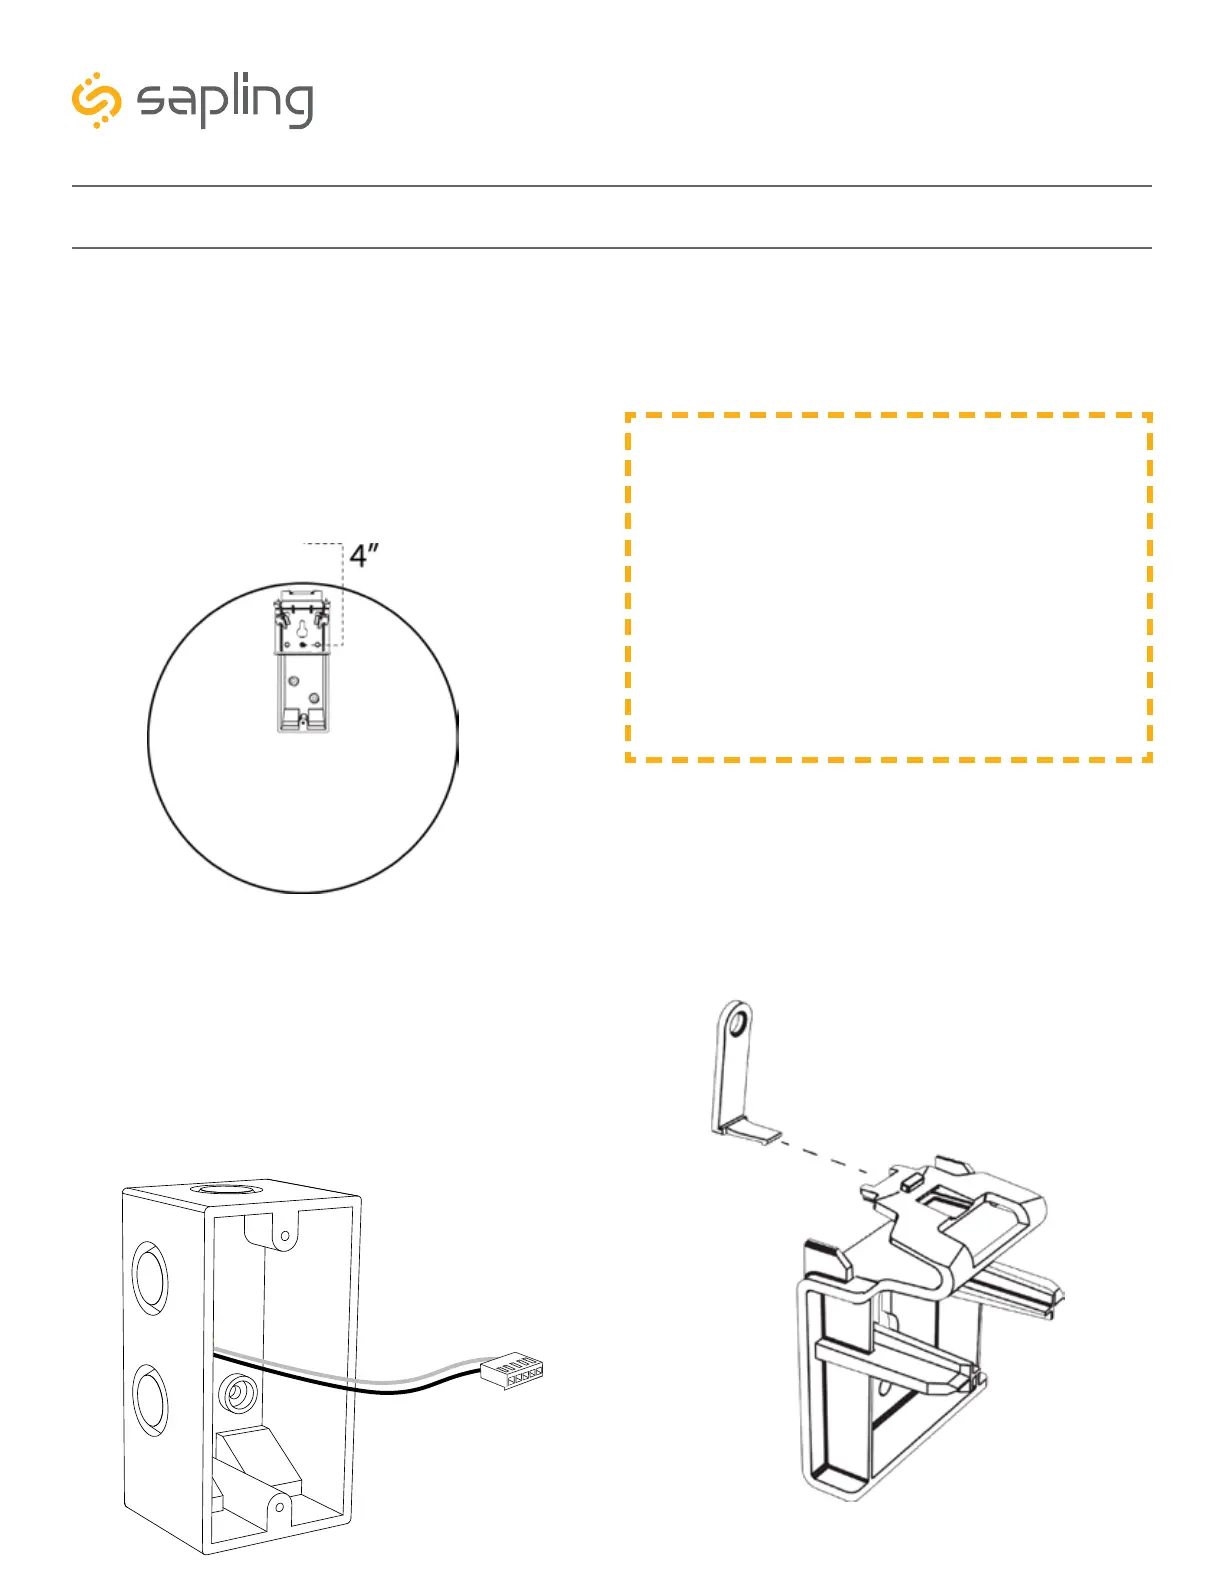
1) If you are installing a new gang box in the wall,
leave at least 4 inches between the top of the gang
box and ceiling. Confirm that the bottom of the
gang box is level with the floor.
If you are using an existing gang box, the top of the
gang box must be a minimum of four inches away
from the ceiling.
Ceiling
Minimum
4) Insert the release lever into the hole atop the
mounting piece latch.
2) Run power wiring to the gang box.
For 24V power use the ORANGE and YELLOW wires
For 110V power use the BLACK and WHITE wires
CHECK YOUR WIRING
The voltage between the white and black wires
should measure 105-126 volts AC in the 115
volt model, 207-253 volts AC in the 230 volt
model, or 21.5-26.5 volts AC in the 24
volt model.
If you are using the 24 volt model, make sure
that the wiring leading to the clock is from an
ISOLATED transformer.
3) Attach the power wires from your kit to the
power wires in the gang box.
• Attach the Hot wire to the connector’s black wire.
• Attach the Common wire to the connector’s
white wire.
• Attach the Ground wire to the connector’s
green wire.