Before switching on, ensure that the Volume control (1) is set to minimum
and the Tone control (2) is set in the normal position (12 ‘o’ clock).
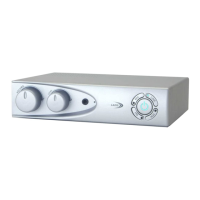
To switch on press the Power button (7), the blue indicator will illuminate.
To switch off press the Power button again and the blue indicator will
go off.
Set the television or other audio equipment to the normal listening level
for other members of the household. Switch your hearing aid to the ‘T’
position. Adjust the loop amplifier volume for best results.
Volume control (1)
Use to adjust the volume of the signal received by the hearing aid.
Tone control (2)
Use to vary the tone of the signal. In the clockwise direction the higher
frequencies will be emphasised and in the anti-clockwise direction the
lower frequencies will be emphasised.
Headphone socket (3)
The Headphone socket may be used with headphones that have a
stereo 3.5mm plug fitted. This may be used by a non-hearing aid user to
receive amplified sound. It can also be used to test that the loop system
is set up correctly. Headphones used in this way will not affect the
performance of the loop system for hearing aid users. The headphone
socket may be used without a loop cable being connected.
Loop level Indicator (4)
This indicates that a signal is being transmitted by the loop cable. It
flickers with a low volume and remains steady with louder volumes.
Testing the system can be done by speaking into a microphone and
seeing the light flash, this will indicate that a signal is flowing round the
cable.
OPERATION
Direct connections
The preferred method to connect the loop amplifier
to your TV or other sound system is to use the line
input of the Loop Amplifier. This uses the red/white
phono audio connectors on the rear of the Loop
Amplifier (13) or (14).
Using the lead kit supplied, connect the lead to a
similar set of phono sockets on the rear of the TV or other equipment.
If you are only connecting 1 piece of equipment use the two sockets
marked A (14). The second set marked B (13) can be used to connect
to a second piece of sound equipment. The line switch (9) selects the
sound from either channel A (no light) or B (lit)
If the TV or other sound source does not have a set of phono connectors
then use the SCART or jack adaptors accordingly to connect the
equipment. If you use the jack adaptor you may find that when plugging
into a headphone socket on your TV etc., this turns off the internal
speaker. On some TVs there may be a switch that allows the TV speaker
to be left on.
The line level control (12) can be used to alter the overall loudness of the
line inputs and can be used to balance them with the sound from a
microphone if necessary.
Microphones
If a direct connection is not possible then a microphone can be used to
pick up the sound from a TV or other loudspeaker. Microphones can
also be used for someone to speak directly into the loop system so they
can speak directly to the hearing aid user while they listen to TV. A
microphone can also be used in either a classroom or other public
speaking situations.
A microphone can be used at the same time as the line inputs to monitor
environmental sounds such as a doorbell or telephone bell.
Power
Plug the mains power lead into the 2 pin socket (10) on the rear of the
amplifier and then plug into a mains outlet. Switch on the power at the
outlet.
LA215 Instruction book 12/10/07 07:42 Page 9
 Loading...