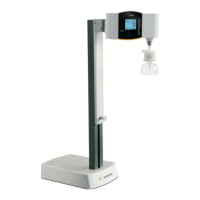
2. Initial Setup|Installation
2.1 Unpacking the Equipment
Remove the arium
®
display mounting kit from its packaging and check for
completeness:
Version Number
Stand 1
Slide with the attachment for the display|dispense unit 1
2.2 Setup
y Install the height adjustable stand as follows:
– Place the stand on a flat surface.
– Insert the slide into the stand from above.
y Install the display|dispense unit into the height adjustable stand as follows:
– Align the mounting bracket of the arium
®
display|dispense unit with the
mounting bracket of the slide of the display mounting kit.
– Secure the display|dispense unit to the mounting bracket from the outside
using two screws.
2.3 Connection
For the installation, make sure that you have a surface of approx. 19 + 26 + 56 cm
(W + D + H) that is level and can withstand a min. weight of 6 kg.
Improper surfaces can lead to injury to the operator and damage to the height
adjustable stand or display|dispense unit.
When connecting the arium
®
display|dispense unit to the arium
®
display
mounting kit, always note and follow the corresponding warning and safety
information in the corresponding t “arium
®
operating instructions.”
y Connect the HDMI cable and the two tubes to the display | dispense unit.
Make sure to observe the marking on the tubes.
6 Initial Setup|Installation

 Loading...