35
Setting the Heating Schedule Programs
The condition for setting the Heating schedule is that the Heating programs are turned on (it is turned off by default) in
the advanced settings.
Before proceeding, check the advanced thermostat settings. Depending on the set advanced thermostat settings, you
can set on how the schedule program works. In advanced settings, you can set your schedule for 7 days (each day) or
5 + 2 days or 5 + 1 + 1 days or just turn it off. Also you can set the number of daily switches to 4 or 6.
The Heating schedule can be easily edited via the main editing menu - the thermostat must be turned on, then hold (5
seconds) the middle menu button (button description 3). Now you’re in the program editing menu.
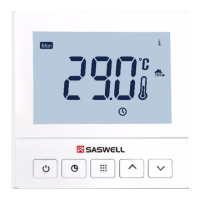
When you’re in the Heating schedule programs editing menu, you’ll see on the right side of the screen a blinking icon
(sun, moon, house…) which shows for which program switch you’re currently editing the program. Also at the top of the
screen, the day or days start to blink. That means that you’re editing for the selected day or days.
You change the values by pressing the and buttons and go to the next setting with the middle menu button
(button description 3). All the settings will be automaticly saved if you don’t press any button for more than 10 seconds.
Firstly you have to select for which day you’ll be setting the schedule. When you select the day or days, press the
menu button and then you’ll proceed to setting the time of when this schedule will start. When you’re done setting the
time, press the middle menu button and you’ll be setting the temperature for that schedule. Set the desired
temperature and again press the menu button. Now you’re done setting the settings for the first Heating schedule
switch of the program. Now a different icon on the right (sun, moon, house) should blink, which indicates that you’re
editing for the next Heating program switch.
You can take a look at examples of predefined Heating schedule programs on the next pages.
 Loading...