Step 9
401291 www.sauder.com/servicesPae 14
å
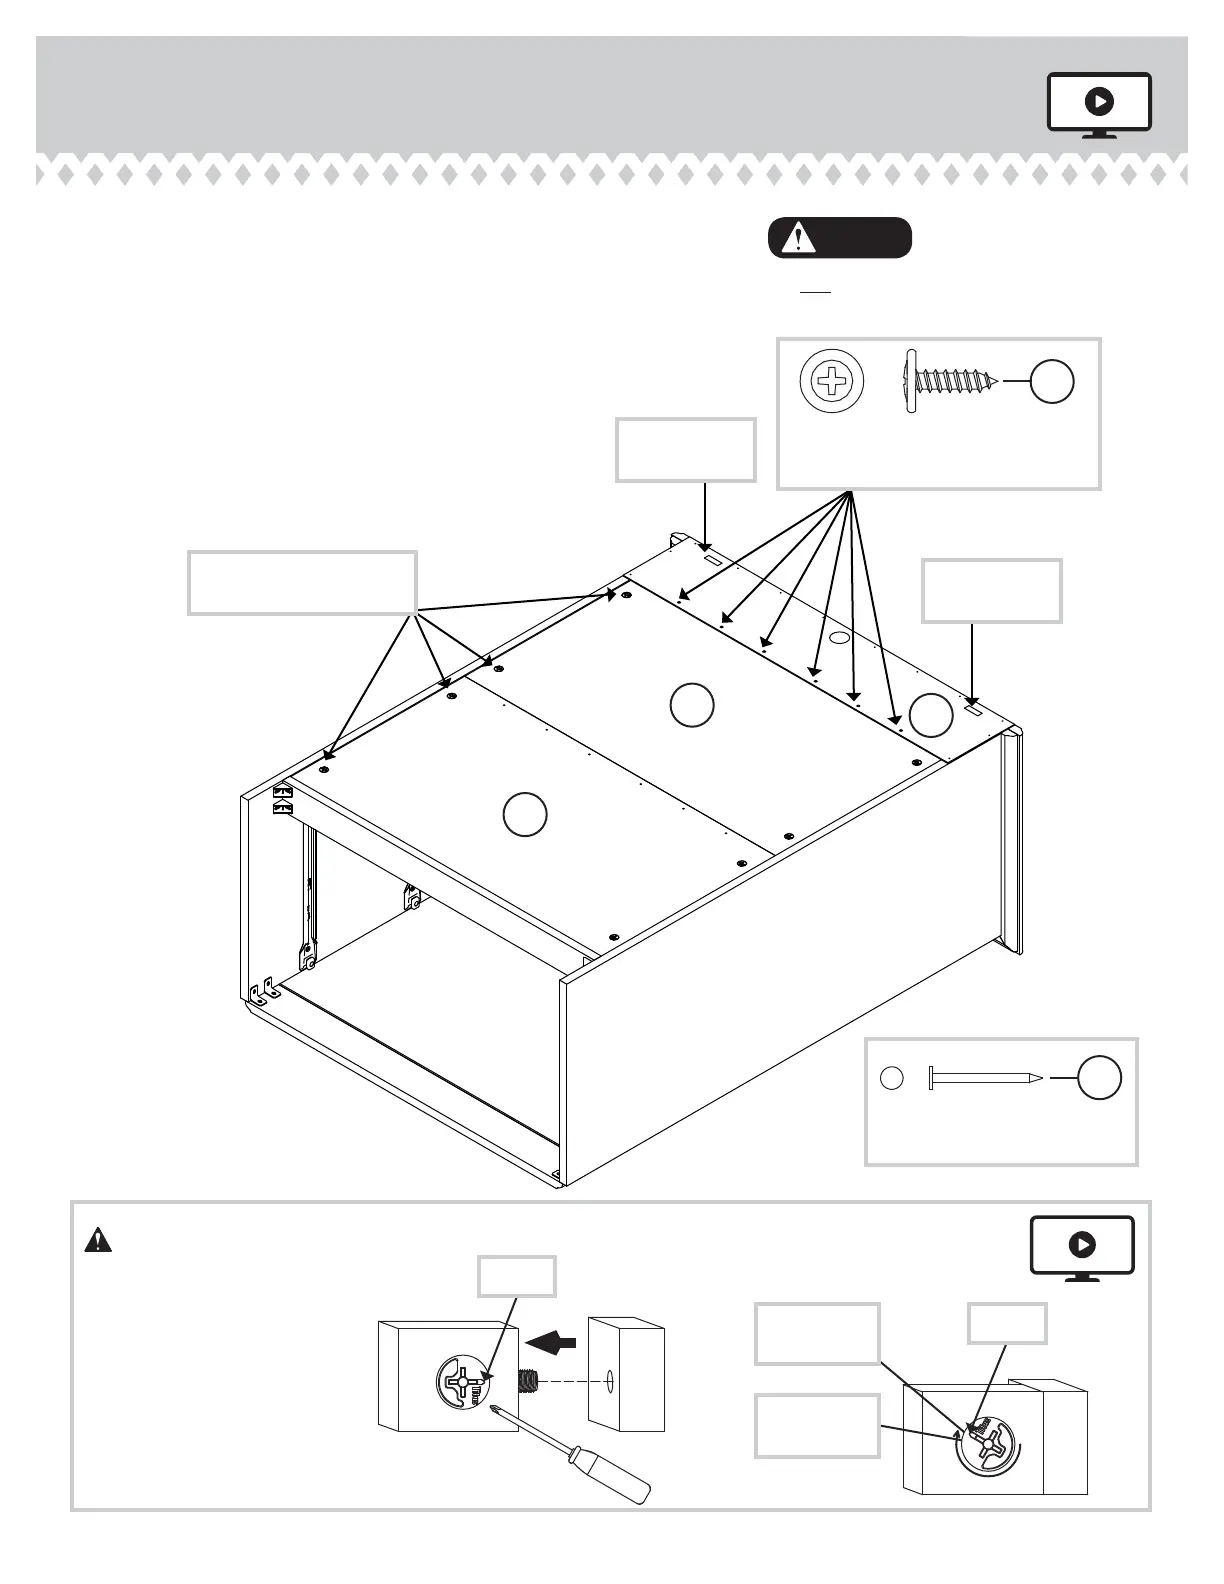
Carefully turn your unit over onto its front edes and
tihten the eiht HIDDEN CAMS in the BACKS (XX).
å
Then, lay the SMALL BACK (D2) over your unit.
å
Make equal marins alon the top and both side edes of
the SMALL BACK (D2). Push on opposite corners of your
unit if needed to make it "square".
å
Fasten the bottom ede of the SMALL BACK (D2) to the
BACK (XX). Use six BLACK 9/16" LARGE HEAD SCREWS (RR).
Fasten the top and both side edes of your SMALL BACK to
your unit usin the NAILS (UU).
NAIL
(12 used in this step)
UU
D2
XX
BLACK 9/16" LARGE HEAD SCREW
(6 used in this step)
RR
Cut-out are
used for liftin
Cut-out are
used for liftin
Start Tihten
Arrow
Minimum
190 derees
Caution
Risk of damae or
injury. HIDDEN CAMS
must be completely
tihtened. HIDDEN
CAMS that are not
completely tihtened
may loosen, and parts
may separate. To
completely tihten:
Arrow
Maximum
210 derees
XX
Tihten eiht HIDDEN
CAMS in the BACKS (XX)
Do not stand the unit upriht without the
BACK fastened. The unit may collapse.
Caution










 To Next Page