EasyManua.ls Logo

Sauder 402159 User Manual

Sauder 402159
36 pages
To Next Page IconTo Next Page
Page #1 background imageLoading...
Page #1 background image
Need help? Visit Sauder.com to view video assembly tips or chat with a live rep.
Prefer the phone? Call 1-800-445-1527.
Share your journey!
sauder.com
NOTE: THIS INSTRUCTION
BOOKLET CONTAINS IMPORTANT
SAFETY INFORMATION.
PLEASE READ AND KEEP FOR
FUTURE REFERENCE.
English pg 1-24
Français pg 25-28
Español pg 29-32
Lot # 374404 06/02/15
Purchased: __________________
Be sure to give us a ring before
making any returns. 1-800-445-1527
Get executive
with this decision.
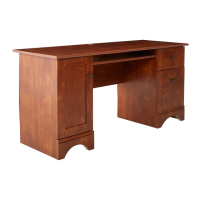
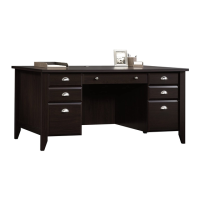
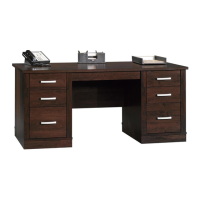
Executive Desk
Heritage Collection | Model 402159
Question and Answer IconNeed help?

Do you have a question about the Sauder 402159 and is the answer not in the manual?

Sauder 402159 Specifications

General IconGeneral
BrandSauder
Model402159
CategoryIndoor Furnishing
LanguageEnglish

Summary

Important Safety Information

Part Identification

Assembly Tools Required

Lists the necessary tools for product assembly.

Hardware Identification

Assembly Steps

Step 1: Base Panel and Brace Preparation

Attaching dowels, glue, and pins to base panels and braces.

Step 2: Left End Panel Assembly

Attaching feet, corner brackets, and pins to the left end panel.

Step 3: Left Upright Panel Assembly

Attaching feet, brackets, pins, lock, and cover to the left upright.

Step 4: Right Upright Panel Assembly

Attaching feet, brackets, and pins to the right upright panel.

Step 5: Right End Panel Assembly

Attaching feet, corner brackets, and pins to the right end panel.

Step 6: Attaching Side Moldings

Fastening side moldings to end panels and uprights with screws.

Step 7: Securing Braces and Bases

Securing braces to end/upright panels and attaching bases.

Step 8: Attaching Left Back Panel

Fastening back panel to left end and upright panels.

Step 9: Securing Right Braces and Bases

Securing braces to right upright/end panels and attaching bases.

Step 10: Attaching Right Back Panel

Fastening back panel to right end and upright panels.

Step 11: Attaching Modesty Panel

Securing modesty panel to uprights using glue and screws.

Step 12: Attaching Top Panel

Inserting cams and fastening the top panel to the unit.

Step 13: Keyboard Shelf Assembly

Assembling keyboard shelf, sides, back, and drawer slides.

Step 14: Keyboard Front Hinge Attachment

Fastening hinges to keyboard front and shelf, and attaching front.

Step 15: Keyboard Handle Attachment

Attaching handles and handle bases to the keyboard front.

Step 16: Small Drawer Assembly

Assembling small drawer parts with connectors and handles.

Step 17: Large Drawer Side Assembly

Attaching lock brackets and drawer sides to drawer box components.

Step 18: Small Drawer Front Assembly

Fastening drawer fronts to large drawer box front and attaching handles.

Step 19: File Drawer Rail Installation

Installing file rails and support onto large drawer sides and back.

Step 20: Final Drawer Insertion and Checks

Inserting drawers, grommet, and final assembly completion.

General Safety Warnings

Limited Warranty Information

Related product manuals