Step 10
419321 www.sauder.com/servicesPage 14
å
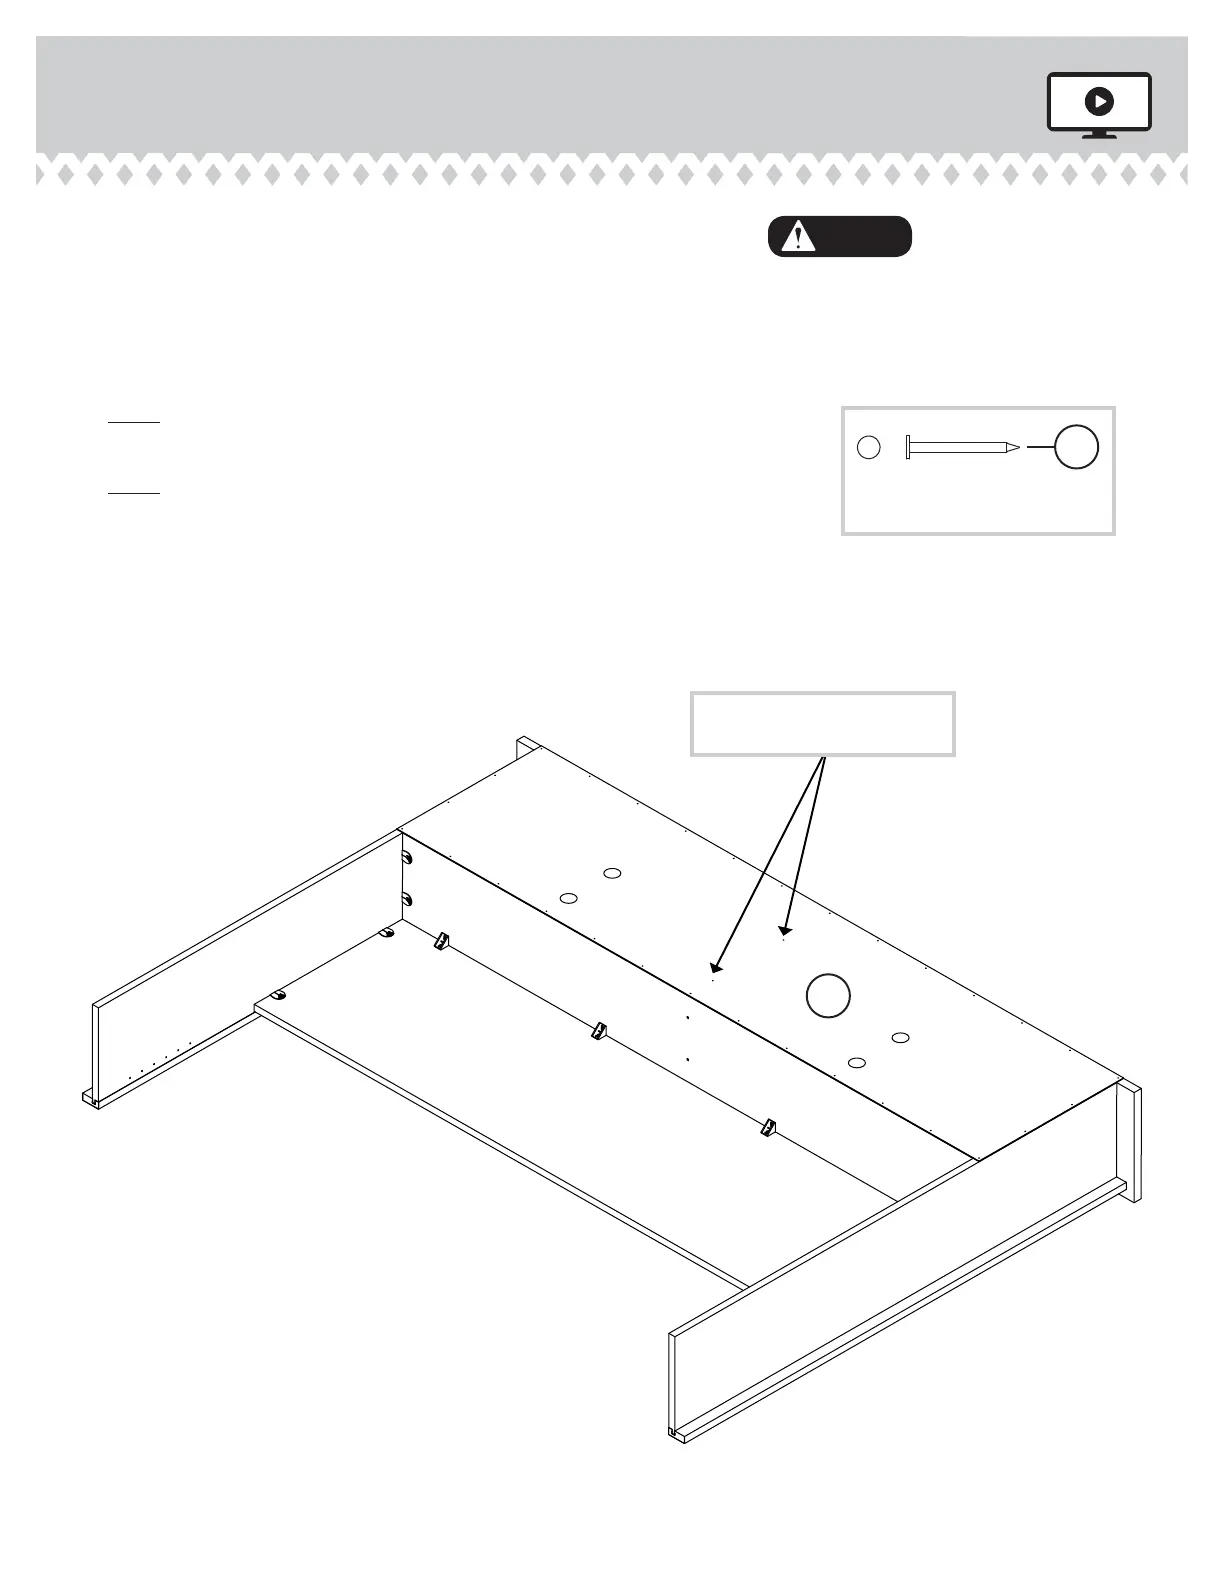
Carefully turn your unit over onto its front edges. Lay the
BACK (I) over your unit.
å
Make equal margins along all four edges of the BACK (I). Push
on opposite corners of your unit if needed to make it "square".
å
Fasten the BACK (I) to your unit using the NAILS (1N).
å
NOTE: Be sure to tap NAILS into the holes that line up over
the UPRIGHTS (C and D).
å
NOTE: Perforations have been provided for access through
the BACK. Carefully cut out the holes needed.
Do not stand the unit upright without the
BACK fastened. The unit may collapse.
Caution
Unfi nished surface
These holes must line up over
the UPRIGHTS (C and D).
NAIL
(32 used in this step)
1N
I