EasyManua.ls Logo

Sauder 419321 User Manual

Sauder 419321
24 pages
To Next Page IconTo Next Page
Page #1 background imageLoading...
Page #1 background image
NOTE: THIS INSTRUCTION
BOOKLET CONTAINS IMPORTANT
SAFETY INFORMATION.
PLEASE READ AND KEEP FOR
FUTURE REFERENCE.
English pg 1-16
Français pg 17-19
Español pg 20-22
Lot # 375321 09/01/15
Purchased: __________________
Be sure to give us a ring before
making any returns. 1-800-523-3987
Full/Queen Bookcase Headboard
County Line Collection | 419321
Need help? Visit Sauder.com to view video assembly tips or chat with a live rep.
Prefer the phone? Call 1-800-523-3987.
Share your journey!
sauder.com
You won't just fall in
love with it. You'll fall
asleep in it.
Question and Answer IconNeed help?

Do you have a question about the Sauder 419321 and is the answer not in the manual?

Sauder 419321 Specifications

General IconGeneral
Assembly RequiredYes
MaterialEngineered Wood
Product NameSauder 419321
CategoryIndoor Furnishing
StyleTraditional

Summary

Product Information

Required Assembly Tools

Lists the tools needed for assembly.

Component Part Identification

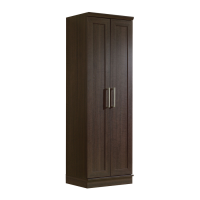
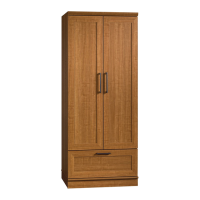
Identifies all furniture components with labels.

Hardware Identification Guide

Lists and identifies all necessary hardware.

Furniture Assembly Guide

Step 1: Prepare Fasteners

Insert twist-lock fasteners without tightening.

Step 2: Attach End Moldings

Slide end moldings onto notched edges.

Step 3: Connect Left End to Top

Fasten left end panel to the top panel.

Step 4: Attach Upper Upright

Insert pins and attach upper upright.

Step 5: Attach Upper Shelf

Insert pins and attach upper shelf.

Step 6: Attach Lower Upright and Shelf

Attach lower upright and shelf.

Step 7: Attach Angle Brackets

Fasten angle brackets to front panel.

Step 8: Attach Front Panel and Lower Shelf

Connect front panel to end and shelf.

Step 9: Attach Right End

Fasten right end to top, front, and lower shelf.

Step 10: Attach Back Panel

Secure back panel with nails.

Step 11: Attach Headboard Brackets

Fasten headboard brackets to end panels.

Step 12: Mount to Bedframe

Attach unit to bedframe using bolts and nuts.

Warranty, Support, and Compliance

5-Year Limited Warranty Details

Covers defects in materials or workmanship for five years.

Product Registration and Customer Service

Register product online and find customer support contact.

Product Compliance Information

Details on product safety compliance and manufacture.

Related product manuals