Step 23
Page 30
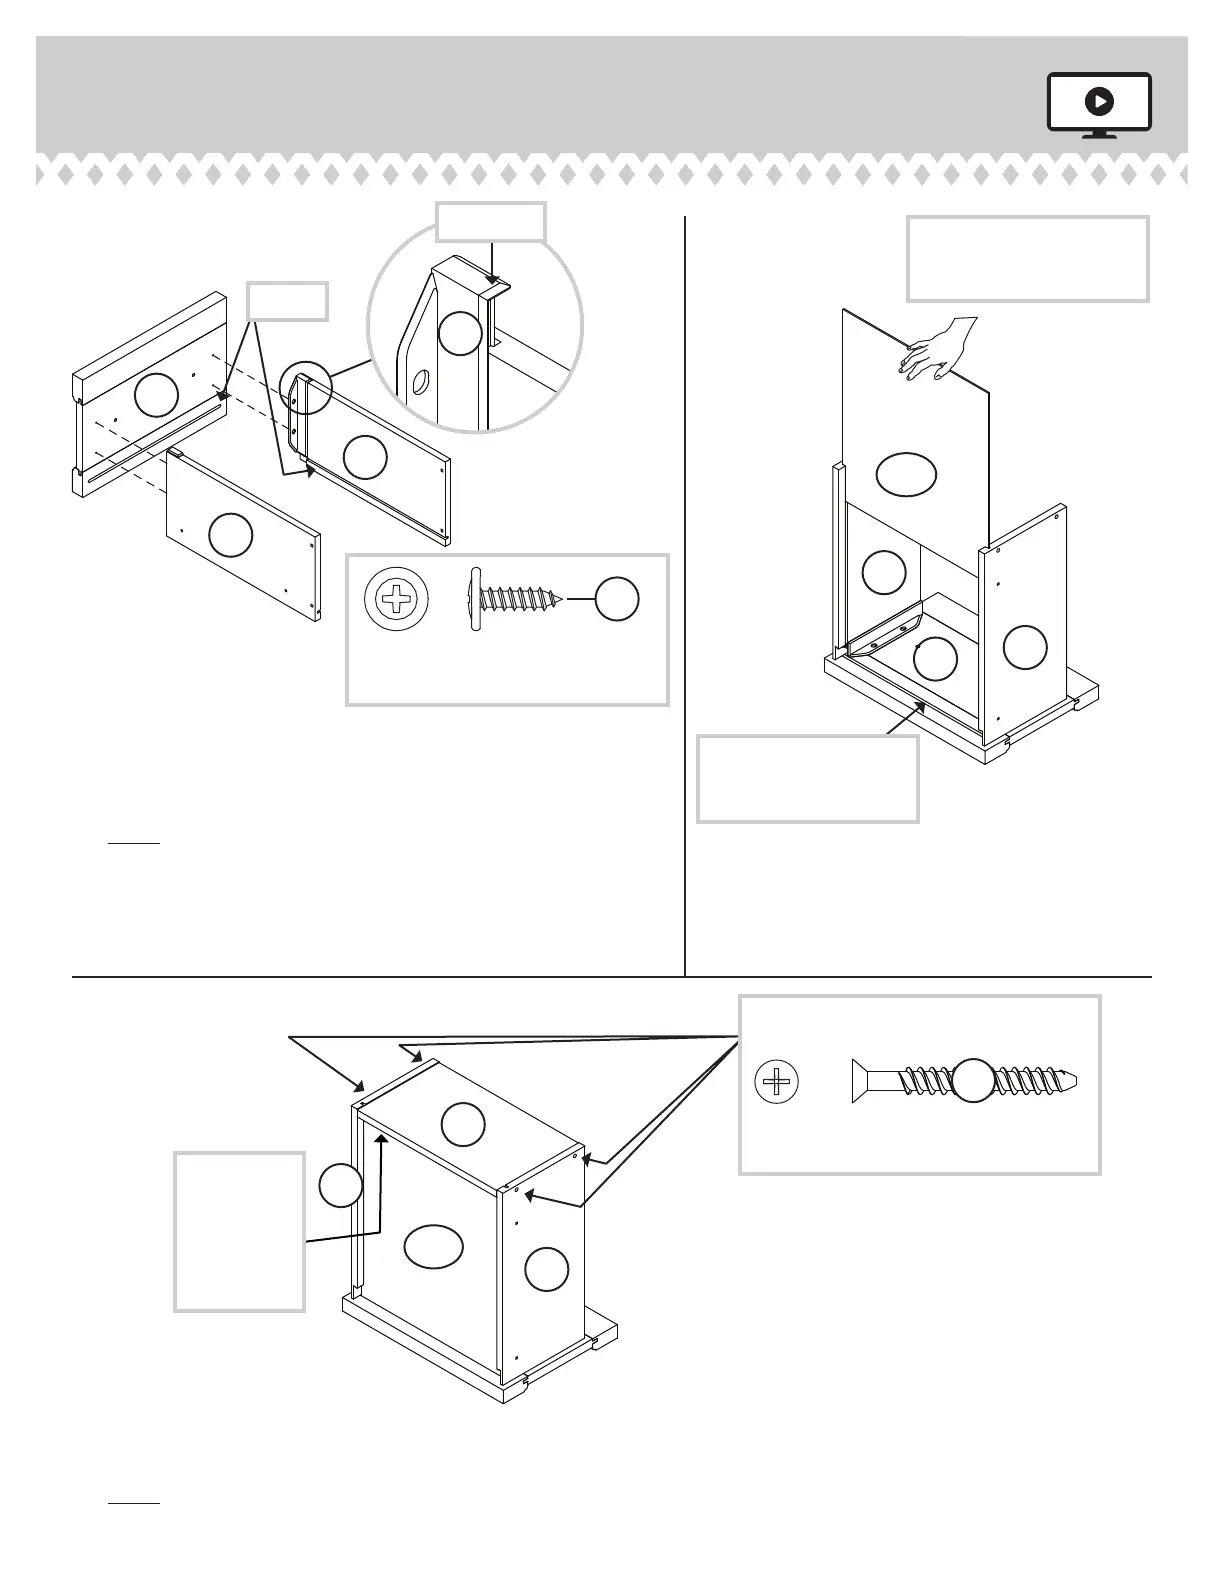
BROWN 9/16" LARGE HEAD SCREW
(4 used in this step)
40S
12
3
Unfi nished surface
Be sure the DRAWER
BOTTOM inserts into the
DRAWER FRONT groove.
Push down
With the palm of your hand,
tap the DRAWER BOTTOM
down into the groove.
å
Pull the DRAWER FRONT BRACKETS (9G) apart and slide them
into the grooves in the DRAWER SIDES (D36 and D37). You may
need to gently tap them in with a hammer.
å
NOTE: The DRAWER FRONT BRACKETS are marked "RH" and
"LH" for easy identifi cation.
å
Fasten the DRAWER FRONT (J) to the DRAWER FRONT
BRACKETS (9G). Use four BROWN 9/16" LARGE
HEAD SCREWS (40S).
å
Slide the SMALL DRAWER BOTTOM (D716)
into the grooves in the DRAWER SIDES (D36
and D37) and DRAWER FRONT (J).
å
Fasten the DRAWER BACK (D77) to the DRAWER SIDES (D36 and D37). Use four BLACK 1-9/16" FLAT
HEAD SCREWS (30S).
å
NOTE: Be sure the SMALL DRAWER BOTTOM (D716) inserts into the groove in the DRAWER BACK (D77).
D36
D77
D716
D37
D37
D36
D36
D37
J
J
9G
D716
30S
Start each screw a few turns before
completely tightening any of them.
BLACK 1-9/16" FLAT HEAD SCREW
(4 used in this step)
Groove
Be sure the
DRAWER
BOTTOM
inserts into
the DRAWER
BACK groove.
 Loading...