Do you have a question about the Sauder Carson Forge 416969 and is the answer not in the manual?
Prepare assembly area to prevent scratching.
Insert hidden cams into uprights and bottoms, then add cam dowels.
Install hidden cams and cam dowels into the short edges of the ends.
Thread cam screws into the legs (Q and R).
Attach cabinet right (U) and left (V) to keyboard uprights (G).
Attach corner accents (8E) to legs, then legs to ends (A, B, C, D).
Separate extension slides from rails, then attach rails to drawer ends.
Attach cabinet rights (40CA) to drawer right end (C) and lefts (40CB) to drawer left end (D).
Decide on drawer placement (right/left) and keyboard shelf position.
Select placement for the keyboard shelf (right or left).
Secure bottoms (J) to ends (A, B, C, D) and tighten cams.
Warning: Unit may collapse if not supported by the back.
Drill indicated holes in door right end (A) and drawer left end (D).
Drill indicated holes in drawer right end (C) and door left end (B).
Attach backs (M, N) to the unit using nails (1N).
Warning: Unit may collapse if not supported by the back.
Attach door ends (A, B) and drawer ends (C, D) to the top (H).
Connect the right upright (E) to the left upright (F).
Secure the uprights (E and F) to the top (H).
Attach modesty panel (K) to left upright (F) and drawer right end (A).
Attach modesty panel (K), feet (10E), and glides (12E).
Connect drawer ends (C and D) to the small top (I).
Fasten connector plates (14G) to the small top (I).
Stand unit upright and attach modesty panel (K) and small top (I).
Attach two hinges (14H) to the door (O).
Attach door (O) to door left end (B) and insert door stop (41).
Instructions for adjusting door position horizontally, vertically, and in/out.
Connect keyboard uprights (G) to the tops (H and I).
Fasten drawer slides (W, X) and cord clip (4P) to the keyboard shelf (L).
Assemble file drawer front (S) with sides (D14, D15), bottom (D716), and back (D78).
Fasten extension slides (Z) to file drawer sides (D14, D15) using cams (10A).
Attach drawer slides (40CC, 40CD) to drawer sides (D107, D108) using cams (10A).
Attach knobs (52K) to drawer fronts and file glides (4B) to drawer sides.
Insert drawers (T, S) and keyboard shelf (L), then cover cams and screws.
Insert grommets, sleeves, pins, and place adjustable shelf (P).
Adjust file drawer alignment and finalize assembly.
Warning about overloading shelves and drawers causing instability or breakage.
Warning about moving furniture not designed with casters.
Hazard of placing TVs on furniture not designed for support.
Warning about unstable furniture tipping over or breaking.
Details of Sauder's 5-year limited warranty on materials and workmanship.
Conditions not covered by warranty and limitations on liability.
Certificate of compliance for CPSC Ban on Lead-Containing Paint.
| Brand | Sauder |
|---|---|
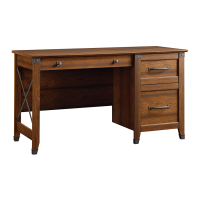
| Model | Carson Forge 416969 |
| Category | Indoor Furnishing |
| Language | English |