Operating and maintenance instructions
Installing optional attachments
Version 1.0 Page 33 of 56
6.2 Tachometer
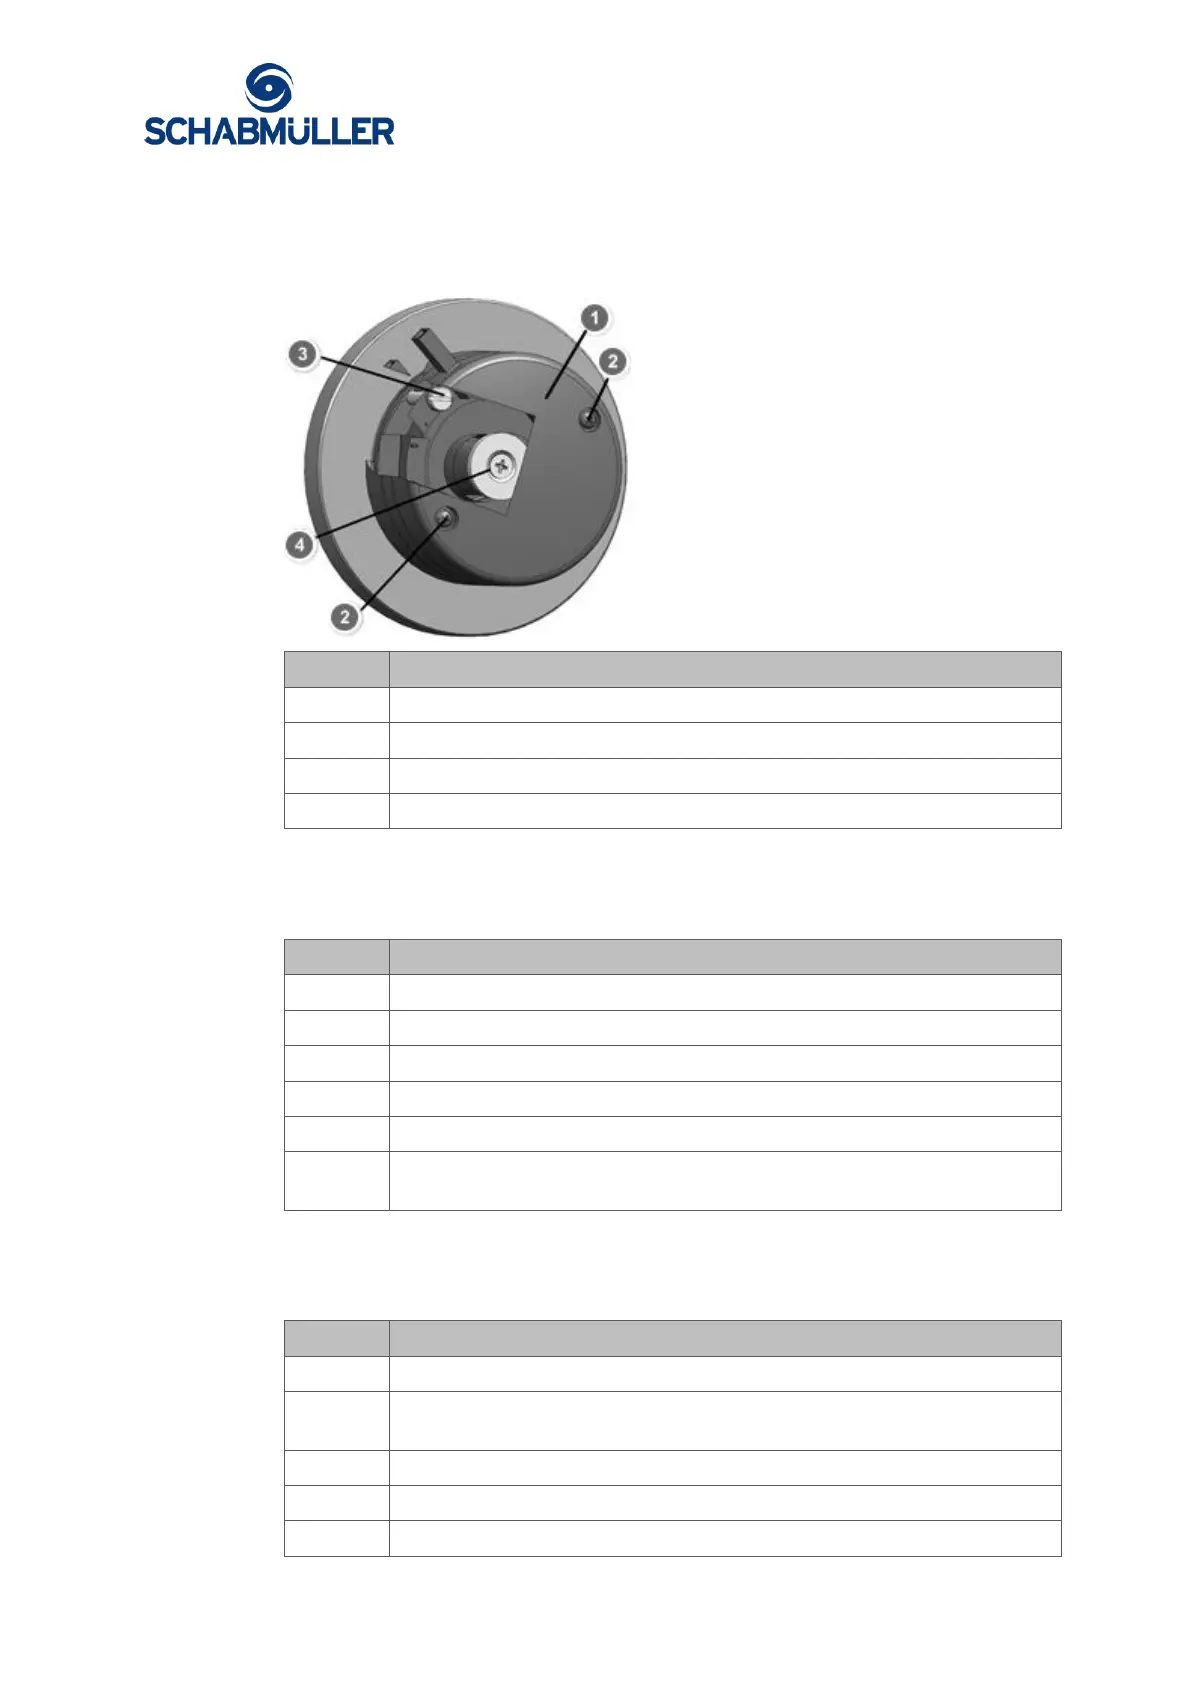
Example
Cap screw M3 (quality 4.8)
Fixing screw M3 (quality 4.8)
6.2.1 Disassembly
Proceed in the order given:
Loosen the two screws (item 2) and remove the cover (item 1).
Loosen and remove the two screws (item 3) with the locking element.
Remove the tachometer housing without the armature.
Loosen and remove the fixing screw (item 4).
Remove the armature from the shaft.
Check for abrasion of the carbon brushes (interval like motor carbon
brushes, see page 48).
6.2.2 Installation
Proceed in the order given:
Place the armature on the shaft.
Tighten the fixing screw (item 4) with a tightening torque of 1 Nm and
secure with medium strength adhesive (Three Bond 1344).
Put on the tachometer housing.
Tighten the two screws (item 3) with safety element.
Replace the cover (item 1) and tighten the two screws (item 2).


 To Next Page