Instruction Manual EBL 101 D / EBL 101 C with OVP
5
Date: 29.04.2010
811.554 BA / EN
Y
It is possible to swap lead acid batteries with lead gel batteries. Changing
from lead gel batteries to lead acid batteries is not possible without over-
head. Contact the vehicle manufacturer for more information.
³ Disconnect the battery from the Electroblock by activating the battery iso-
lation on the DT ... control and switch panel (see also section 3.4).
³ Remove the ”+ solar cell” connector on the solar charge regulator (if avai-
lable).
³ Isolate the Electroblock from the mains voltage (230V AC).
³ Replace the battery.
³ After changing the battery, recheck which type of battery has been inserted.
Y
DANGER!
Incorrect setting of the battery selector switch.
Risk of explosion due to build up of explosive gases:
F
Move the battery selector switch to the correct position.
Y
ATTENTION!
Incorrect setting of the battery selector switch.
Damage to the battery.
F
Move the battery selector switch to the correct position.
³ Disconnect the Electroblock from the mains before adjusting the battery
selector switch.
Y
When using AGM batteries, moving the battery selector switch to the
”Lead Gel” position is recommended. Experience tells us that AGM batte-
ries are charged perfectly this way.
However , suitability must be checked on a case-by-case basis using the
specifications from the battery manufacturer and the charging parame-
ters of the Electroblock.
The charging parameters are specified in Appendix ”Technical details”
(Section E).
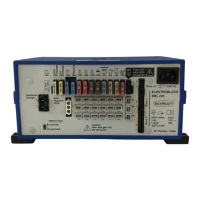
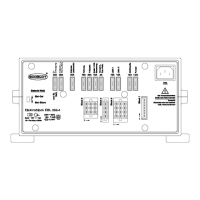
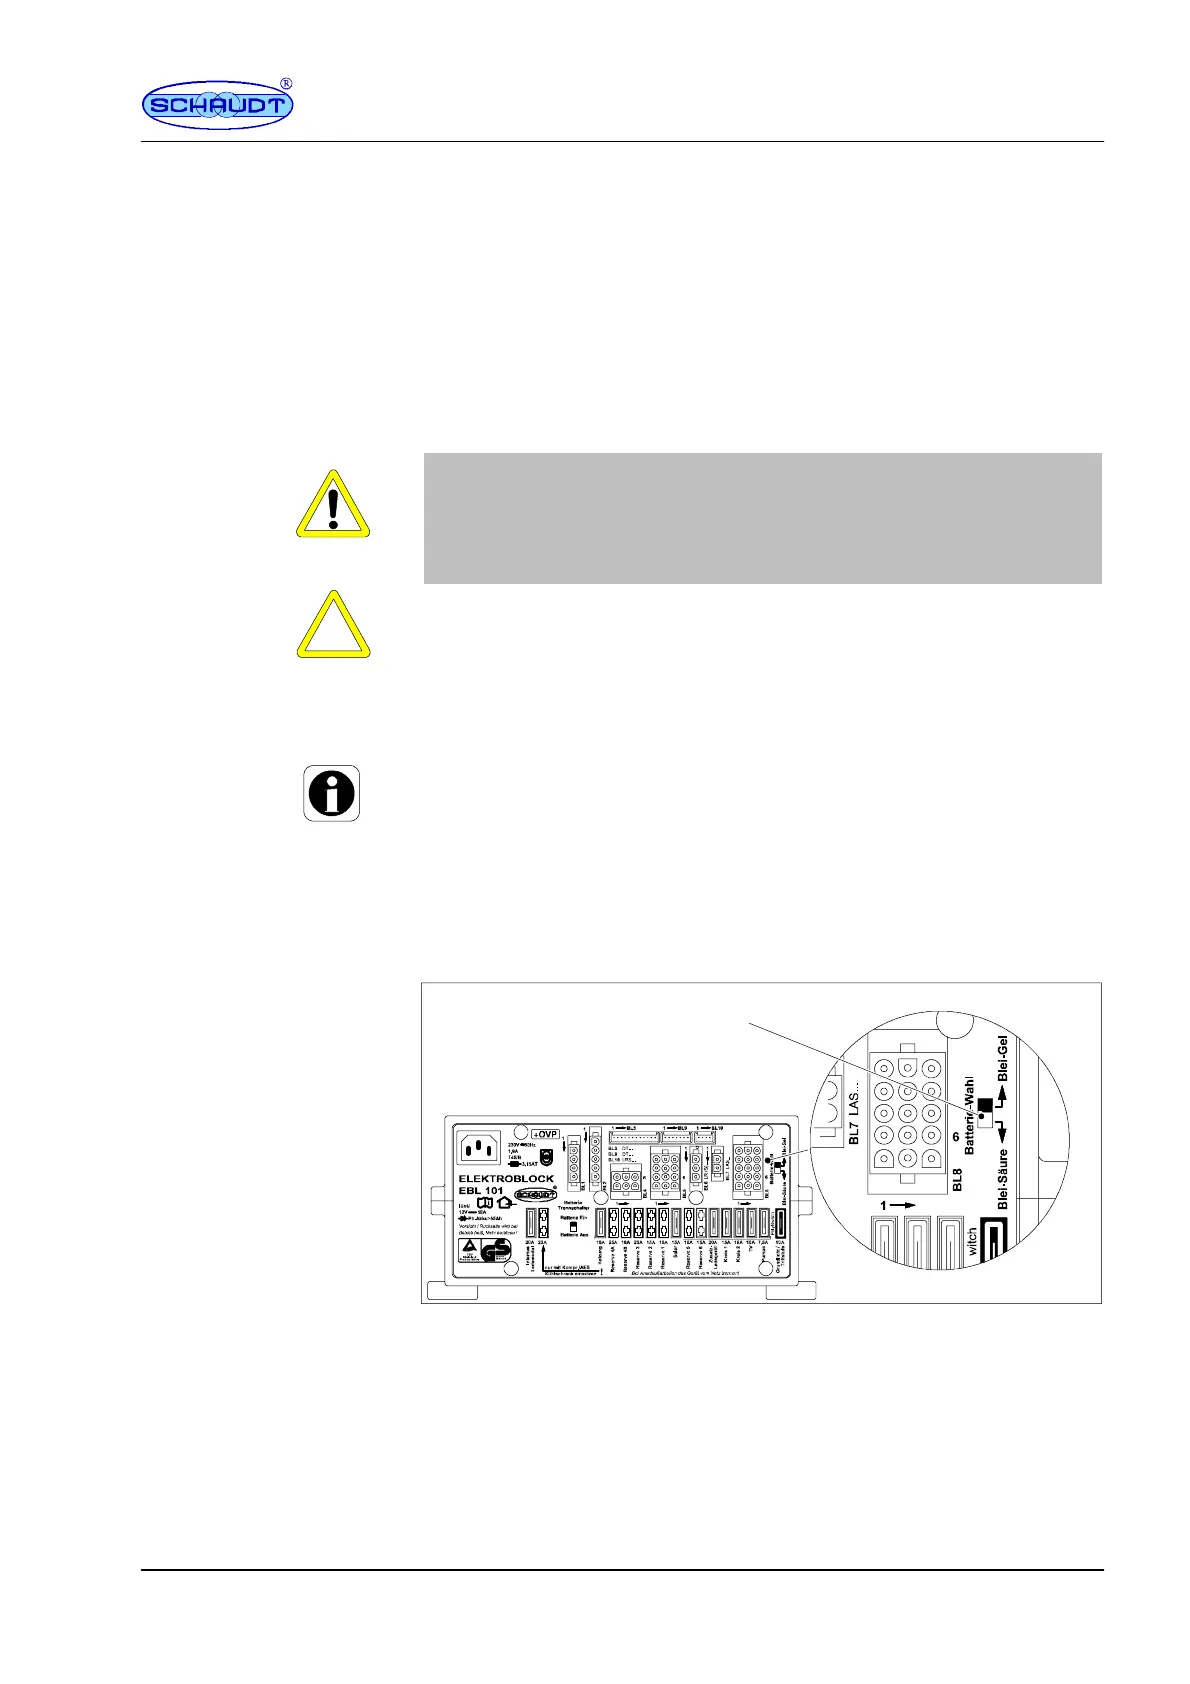
1
Fig. 1 Battery selector switch
³ Move the battery selector switch (Fig. 1, Pos. 1) to the correct position
using a thin object (such as a ballpoint pen):
F
Lead gel battery: Move the battery selector switch to ”Lead-gel”.
F
Lead acid battery: Move the battery selector switch to ”Lead-acid”.
³ Plug in the ”+ solar cell” connector on the solar charge regulator (if avai-
lable).
³ Start up the system as described in section 3.1.
Changing the battery
Starting up
the system