22 23
Gehrungsschnitt
• Stellen Sie sicher, daß die Anlagefläche in der korrek-
ten Position gesichert ist.
• Lösen Sie den Tisch- Klemmgriff (Abb.1./Pos.21) und
halten die Tischeinlage in der gewünschten Position.
Nach der Justierung den Tisch- Klemmgriff wieder zu
schrauben. Betätigen Sie den Schalter und drücken
Sie den Sägeblatt-Klemmhebel, um den Schneidkopf
zu senken.
Schrägschnitt
• Lösen Sie den Winkel-Klemmhebel und bewegen Sie
den Schneidkopf in den gewünschten Winkel. Ziehen
Sie den Winkel-Klemmgriff wieder an.
• Betätigen Sie den Schalter und drücken Sie den Säge-
blatt-Klemmhebel, um den Schneidkopf zu senken.
Kombinationsschnitt
• Ein Kombinationsschnitt ist eine Kombination aus
Gehrungs- und Schrägschnitt. Beziehen Sie sich für
solche Schnitte auf o.g. Verfahren.
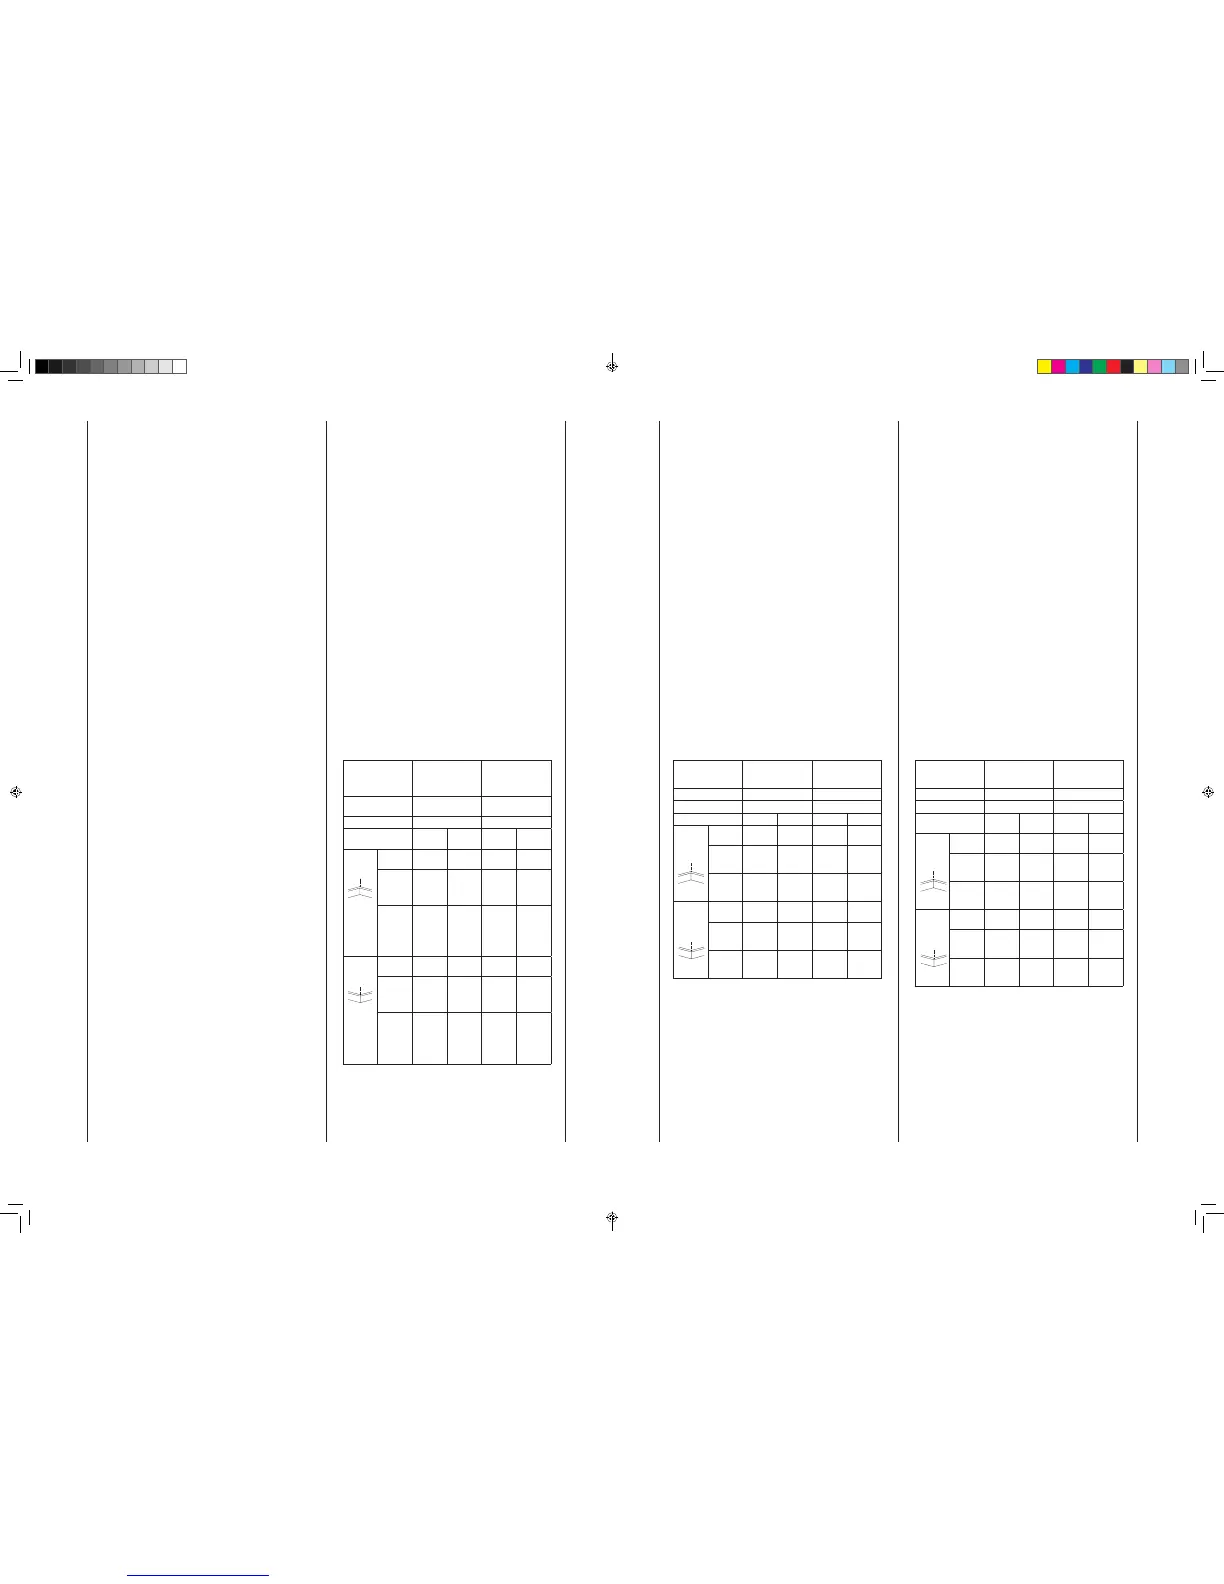
Sockelgesims
• Fußleisten können senkrecht an der Anlagefläche oder
flach auf dem Tisch geschnitten werden. Beziehen Sie
sich auf die Tabelle.
Einstellungen Senkrechtstellung
(Leistenrückseite
liegt flach an der
Anlagefläche an)
Horizontalstellung
(Leistenrückseite liegt
flach am Tisch an)
Verlängerungsanlage
fläche
Nahe am Sägeblatt Im Abstand zum
Sägeblatt
Schrägwinkel 0° 45°
Leistenposition Linke
Seite
Rechte
Seite
Links Rechts
Inneneck
Links
Rechts
Gehrungs-
winkel
45°/
0°/45°
45° rechts 0° 0°
Leisten-
position
Unterseite
am Tisch
Unterseite
am Tisch
Oberseite
an
Anlage-
fläche
Unterseite
an
Anlage-
fläche
Fertigseite Schnitt
links von
der Mar-
kierung
vorneh-
men
Schnitt
rechts von
der Mar-
kierung
vorneh-
men
Schnitt
links von
der Mar-
kierung
vorneh-
men
Schnitt
links von
der Mar-
kierung
vorneh-
men
Außeneck
Links
Rechts
Gehrungs-
winkel
45° rechts 45°/
0°/45°
0° 0°
Leisten-
position
Unterseite
am Tisch
Unterseite
am Tisch
Unterseite
an
Anlage-
fläche
Oberseite
an
Anlage-
fläche
Fertigseite Schnitt
links von
der Mar-
kierung
vorneh-
men
Schnitt
rechts von
der Mar-
kierung
vorneh-
men
Schnitt
rechts von
der Mar-
kierung
vorneh-
men
Schnitt
rechts von
der Mar-
kierung
vorneh-
men
Mitre Cut
• Make sure the extension fence is secured in the correct
position.
• Loosen the table clamp knob (Fig.1./Pos.21) and hold
the table insert in the desired position. After the adjust-
ment, tighten the table clamp knob again. Turn on the
switch and press the saw blade clamp knob to lower
the cutting head.
Bevel Cut
• Loosen the bevel lock handle and move the cutting
head to the desired angle. Tighten the bevel lock han-
dle.
• Activate the switch, then press the blade guard lock
lever to lower the cutting head down.
Compound Cut
• A compound cut is a combination of mitre cut and
bevel cut. Refer to the above procedures to perform
this cut.
Base Moulding
• Base moulding can be cut vertically against fence or flat
on the table. Follow the table below for reference.
Settings Vertical position
(Back of moulding is
flat against the fence)
Horizontal position
(Back of moulding is
flat on the table)
Extension fence Close to the blade Far from the blade
Bevel angle 0° 45°
Moulding position Left side Right side Left side Right side
Inside
corner
Left
Right
Mitre
angle
Left at
45°
Right at
45°
0° 0°
Moulding
position
Bottom
against
table
Bottom
against
table
Top
against
fence
Bottom
against
fence
Finished
side
Keep left
side of
cut
Keep right
side of
cut
Keep left
side of
cut
Keep left
side of
cut
Outside
corner
Left
Right
Mitre
angle
Right at
45°
Left at
45°
0° 0°
Moulding
position
Bottom
against
table
Bottom
against
table
Bottom
against
fence
Top
against
fence
Finished
side
Keep left
side of
cut
Keep right
side of
cut
Keep right
side of
cut
Keep right
side of
cut
Coupe d’onglet
• S’assurer que le guide-rallonge est assujetti dans la
bonne position.
• Desserrez la poignée de blocage de la table (Fig.1./
pos.21) et maintenez l’insert de table dans la position
souhaitée. Resserrez la poignée de blocage de la table
une fois les réglages effectués. Appuyez sur l’interrup-
teur et actionnez le levier de blocage de la lame de
scie pour abaisser la tête de coupe.
Coupe en biseau
• Tourner le guide-rallonge dans l’autre sens et l’installer
en position éloignée de la lame.
• Desserrer la manette de blocage et incliner la tête de
coupe à l’angle voulu. Serrer la manette de blocage.
• Mettre la scie en marche, puis appuyer sur le levier
du protège-lame supérieur pour abaisser la tête de
coupe.
Coupe combinée
• Une coupe combinée comprend une coupe à onglet et
une coupe en biseau. Pour l’exécuter, voir les instruc-
tions ci-dessus.
Plinthes
• On peut couper les plinthes verticalement contre le
guide ou à plat sur le plateau. Voir le tableau ci-des-
sous.
Réglages Position verticale (dos
de la moulure à plat
contre le guide)
Position horizontale
(dos de la moulure à
plat sur le plateau)
Guide-rallonge Près de la lame Loin de la lame
Angle de chanfrein 0° 45°
Position de la moulure Coté
gauche
Coté
droite
Coté
gauche
Coté
droite
Coin
intérieur
Gauche
Droite
Angle 45° à
gauche
45° à
droite
0° 0°
Position
de la
moulure
Dessous
contre le
plateau
Dessous
contre le
plateau
Top
against
fence
Bottom
against
fence
Cote fini Scier à
gauche du
trait
Scier à
droite du
trait
Scier à
gauche du
trait
Scier à
gauche du
trait
Coin
extérieur
Gauche
Droite
Angle 45° à
droite
45° à
gauche
0° 0°
Position
de la
moulure
Dessous
contre le
plateau
Dessous
contre le
plateau
Dessous
contre le
guide
Dessus
contre le
guide
Cote fini Scier à
gauche du
trait
Scier à
droite du
trait
Scier à
droite du
trait
Scier à
droite du
trait
 Loading...