EasyManua.ls Logo

Scheppach Capas 5

Scheppach Capas 5
122 pages
Go to English
To Next Page IconTo Next Page
Loading...
Capas 5
Art.-Nr. 8800 1945
07-2009
9322 0421
U2
D
Kapp-Zugsäge
Original-Anleitung
GB
Crowned saw
Translation from the original instruction manual
FR
Scie à débiter à traction
Traduction du manuel d’origine
I
Sega trasversale
Traduzione dalle istruzioni d’uso originali
NL
Kap-trekzaag
Vertaling van originele handleiding
E
Sierra de cortar y oblicua
Traducción de la instrucción de original
P
Serra de traçar seccionada
Tradução do manual de instruções original
DK
Kaptræksav
Oversættelse fra den originale brugervejledning
NO
Kapp-gjæringssag
Oversettelse fra original brukermanual
FIN
Katkaisusaha liukukiskolla
Käännös alkuperäisestä käyttöohjeesta
SE
Klyv- kapsåg
Översättning av original-bruksanvisning
PO
Piła ukośnica
Tłumaczenie oryginału instrukcji obsługi
D 3–12
GB 13–21
FR 22–31
I 32–41
NL 42–51
E 52–61
PT 62–71
DK 72–80
NO 81–89
FIN 90–98
SE 99–107
P 108–117
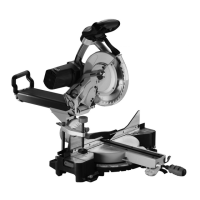
Table of Contents

Questions and Answers:

Scheppach Capas 5 Specifications

General IconGeneral
BrandScheppach
ModelCapas 5
CategorySaw
LanguageEnglish

Summary

General Considerations

Technical Data

Information on the subject of noise development

General Safety Issues

Additional Safety Measures for Crown and Mitre Box Saws

Specific safety guidelines for operating Crown and Mitre Box Saws, including protective gear and handling.

Residual Risks

Transportation

Assembly

Freeing the Intake Slit

Releasing the blocking knob of the intake slit for transport or storage.

Assembling the Hand Grip

Instructions for turning and tightening the hand grip on the front side.

Assembly of the Dust Bag

Installing the dust bag by connecting the collar opening to dust supports.

Assembly of the Screw Vice

Placing the screw vice into the prepared drill holes on the machine body.

Saw Blade Key

Location of the clip for practical storage of the saw blade key.

Start Up

Tool Operation

Connecting the machine to power and understanding safety notes before use.

Basic Operation of the Crown and Mitre Box Saw

Guidance on holding materials, hand placement, and unlocking the saw head.

Cutting Functions

Instructions for performing straight, bevelled, and slanted cuts on the material.

Special Cuts and Features

Details on ceiling molding cuts, automatic intake, and wave-laser system usage.

Changing the Saw Blade

Removal of the Saw Blades

Steps to detach the saw blade, including releasing screws and bracing clamps.

Installing the Saw Blade

Procedure for fitting a new saw blade, ensuring correct alignment and tightening.

Electrical Connections

Defective Electrical Connections

Identifying causes and risks associated with damaged or faulty electrical connections.

Means of Correction

90-Position Adjustment

Adjusting the saw unit to a precise 90° angle using the clamping lever and angle gauge.

Indicator Position for Saw Blade Slant

Setting the indicator to 0° on the sliding scale after achieving the 90° position.

Chock Adjustment for 45

Adjusting the chock to achieve a 45° angle for left or right cuts.

33.9 Slanted Position

Setting the saw arm to a 33.9° angle using the chock peg and screw thread.

Bevel Angle Position

Setting the bevel angle by moving the rotating table using the spring grip.

Maintenance

General Maintenance

Regular cleaning and lubrication of the machine's rotating parts.

Changing the Table Covers

Procedure for removing and reinstalling table covers, checking blade movement.

Changing the Battery

Replacing batteries in the laser unit, ensuring proper cleaning and voltage.

Changing the Belts

Steps for replacing drive belts, including loosening screws and adjusting the motor.

Inspecting the Brushes

Checking motor brushes for wear and replacing them if necessary.

Troubleshooting

Related product manuals