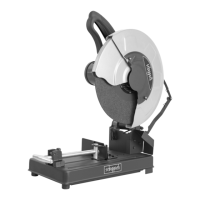
19
Setting of the angular stops to 45° (Fig. 4)
• Forsettingtheangularstopto45°movethecutting
head to the left and adjust the screw (4) with the
Allen key until the 45° position on the scale (3) is
reached.
Adjusting the Fence
• Lowerthecuttingheadandpushinthelockpin.Make
sure the table is in 0 mitre position.
• Placeacombinationsquareagainstthefenceandnext
to the saw blade.
• Ifthebladedoesnotcontactthesquare,loosenthe
screws .
• Adjustthefencesothatthefencehasfullcontactwith
the square. Tighten the screws.
Calibrating of the laser line (fig. 5)
• Inordertocalibratethelaserbeamuseashelf(approx.
200 mm x 300 mm). Mark a right angle line and put
the shelf onto the bearing surface of the table.
• Nowalignthemarkingcentredtothesawbladeand
lock it with the clamping shoe.
• Turnonthelaserusingtheon/offswitchonthebattery
cover.
• Inordertocalibratethelaserline,releasethetwoslot-
ted screws 1. Now move the laser unit until the laser
line matches the marked line.
Attention: You can calibrate the laser line to be running
at the side or in the middle of the cut.
• Tightentheslottedscrewsagainandrecalibratethem
as and when required.
Connecting to the Power Supply
Check that the power supply and outlet used are in ac-
cordance with your mitre saw. Have a look at the rat-
ing plate of the motor or the rating on the mitre saw.
Any changes should always be carried out by a qualified
electrician.
This is a double insulated tool which eliminates the need
for an earthed power supply system.
WARNING! Avoid contact with the terminals on the plug when
installing (removing) the plug to (from) the power supply
outlet. Contact will cause a severe electrical shock.
Using an Extension Lead
The use of any extension lead will cause some loss of
power. To keep this to a minimum and to prevent over-
heating and possible motor burn-out, ask advice from a
qualified electrician to determine the minimum wire size
of the extension lead.
The extension lead should be equipped with an earthed
type plug that fits the power supply outlet at one end,
Réglage des butées d’angle sur 45° (Fig. 4)
• Pourréglerlabutéeà45°,déplacerlatêteporte-scie
vers la gauche et régler la vis (4) à l’aide de la clé Allen
jusqu’à ce que la graduation (3) atteigne la position
45°.
Adjustement du guide
• Abaisserlatêtedecoupeetlabloqueraveclagoupille
de sécurité. S’assurer que le plateau est dans la posi-
tion d’onglet 0.
• Placerl’undesbrasd’uneéquerrecombinéecontrele
guide et l’autre contre la lame de scie.
• Silalamenetouchepasl’équerre,desserrerlesvis.
• Ajusterleguidedefaçonqu’iltouchel’équerretout
au long. Serrer les vis.
Ajustement du rayon laser (Fig. 5)
• Pourajusterlerayonlaser,prendreuneplanche(en-
viron 200 mm x 300 mm). Marquer une ligne à angle
droit et approcher la planche de la surface portante de
la table.
• Centrerlemarquageparrapportàlalamedescieet
serrer à l’aide de la bride de serrage.
• Allumer lelaser avec le boutonmarche/arrêt sur le
couvercle de la batterie.
• Pourréglerlalignelaser,desserrerlesdeuxvisàtête
fendue 1. Ensuite déplacer l’unité laser jusqu’à ce que
la ligne laser corresponde à la ligne marquée.
à noter: La ligne laser peut être réglée de manière à se
situer sur le côté ou au centre de la découpe.
• Resserrerlesvisàtêtefendueetréajustersibesoin.
Branchement de la scie
S’assurer que le courant et la prise utilisée correspondent
à ce dont la scie a besoin. Voir les spécifications qui fi-
gurent sur la plaque signalétique du moteur ou celles qui
figurent sur la scie. Tout changement doit être effectué
par un électricien qualifié.
Ayant une double épaisseur d’isolement, la scie n’a pas
besoin d’une alimentation mise à la terre.
ATTENTION: Eviter tout contact avec les pointes de la fiche
quand on l’enfiche dans la prise de courant ou qu’on l’en
retire. Tout contact causera un choc électrique dangereux.
Emploi d’une rallonge
L’emploi d’une rallonge entraîne automatiquement une
certaine perte de courant. Pour minimiser cette perte et
empêcher le moteur de s’échauffer et de griller, deman-
der à un électricien qualifié quel calibre minimal de fil
la rallonge doit avoir.
La rallonge doit être munie, à une extrémité, d’une fiche
mâle avec mise à la terre, qui s’enfiche dans la prise de