www.scheppach.com
GB
|
27
3 Grip the saw tightly with both hands ensuring that
one hand is placed on the main handle and the
other on the front handle.
4 When using a guide rail, it must be fastened with
screw clamps.
5 Make sure the power cable is not placed in the
sawing direction.
Sawing
1 Place the front part of the machine onto the work
piece.
2 Switch the machine on using the on/o switch (4).
3 Press the plunge-cut trigger (3).
4 Push the saw downwards to reach the sawing
depth.
5 Push the saw forward evenly.
6 After nishing the sawing cut, switch the machine
o and move the saw blade upwards.
Plunge-cuts (g. 9)
1 Place the saw onto the work piece.
2 Place the cutting indicator with the rear arrow (A)
on the marked plunge-cut position.
3 Switch the machine on and push the saw down-
wards until you reach the set cutting depth.
4 Move the saw forwards until the cutting indication
(C) has reached the marked point.
5 After completion of the plunge-cut, move the saw
blade upwards and switch the saw o.
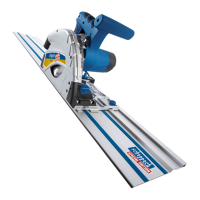
Cutting with rails (optional)
1 Place the machine in the guide rails. Can be read-
justed using the hex driver included in the delivery,
when there is the risk of the adjusting screws re-
leasing by themselves.
2 Turn on the machine by pressing the on/o switch
(4).
3 Press the dip trigger (3).
4 Press the saw downwards to reach the sawing
depth. During rst use the rubber lip is sawn o
and thus splitter protection is guaranteed up to
the saw blade.
5 Push the saw uniformly forwards.
6 Turn o the machine and tilt the saw blade to the
top when the saw cutting is complete.
Tilt Protection (g. 10)
Put the rail saws with a the supplied anti-tilt (20). This
prevents the machine from tilting sideways when tilting.
This physical injuries or damage to the machine can
be avoided.
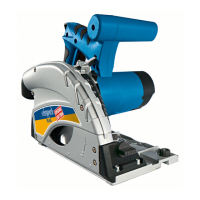
Saw blade replacement (g. 4, 5, 6)
Caution: Before you are going to make the saw
blade change, switch o the machine and unplug
the power cord.
1 Press the plunge trigger (3), bring the saw blade
into the blade-change position (Adjustment screw
for depth of cut shall be adjusted to 25 mm) and
insert the hex wrench into the blade locking screw
(17).
2 Press on the shaft lock (13) and rotate the saw
blade (10) until the lock clicks into place.
3 Hold down the locking shaft (13) and open the
blade locking screw (17) counter clockwise, while
keeping the blade in the blade-changing position.
4 Remove the outer ange (16) and the saw blade
(10).
(Caution: risk of injuries, wear protective
gloves)
5 Insert the new blade and ange.
6 Screw in and tighten the saw blade locking screw
while keeping the shaft locking mechanism
pressed again.
7 Set the plunge saw to its original position.
Adjusting the splitting wedge (g. 7)
Adjust the distance between saw blade (10) and split-
ting wedge (19) after a saw blade replacement, or
whenever necessary.
Put the saw in the same position as you do when re-
placing a saw blade.
Unfasten the adjustment screw (18) using an Allen
key and set the splitting wedge (19) 2-3 mm higher
than the saw blade (10), then retighten the adjustment
screw (18).
9. Operations
After having performed all the above procedures and
opera tions, you may begin cutting.
ATTENTION: Always keep hands away from the cut-
ting area and do not try to approach it when the ma-
chine is running.
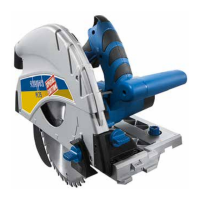
Switching the product on/o (g. 1)
To switch the plunge-cut saw on, press the on/o
switch (4). To switch o, release the on/o switch (4).
Operating and holding the plunge-cut saw (g. 8)
1 Secure the work piece so that it cannot get dis-
placed or moved while sawing.
2 Only move the saw forwards.
 Loading...