10 І 16
lowing electrical specications of the machine stated on
the motor.
15. ADJUSTING
Caution: Prior to carrying out one of the following ad-
justment steps, switch the machine off and unplug the
mains plug.
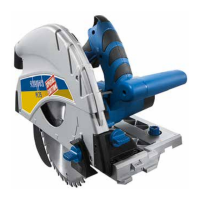
Cutting depth adjustment, Fig. 2
The cutting depth can be adjusted from 0 to 75 mm.
Unfasten the cutting depth adjustment screw (6) and set
the required depth using the scale (7) and retighten the
screw.
The dimentions on the rail shows the cutting depth wit-
hout rail.
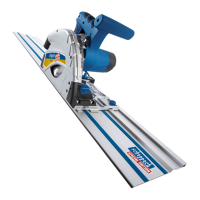
Mitre settings, Fig. 3
The mitre square can be set from 0° to 45°.
Unfasten the mitre adjustment screws (8) on both sides,
set the desired mitre square on the scale (9) and retigh-
ten both screws.
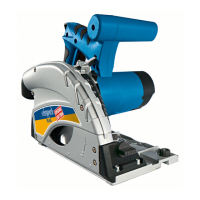
Saw blade replacement, Fig. 4, 5, 6
Caution: Before you are going to make the saw bla-
de change, switch off the machine and unplug the
power cord.
1 Press the plunge trigger (3), bring the saw blade into
the blade-change position (Adjustment screw for depth
of cut shall be adjusted to 25mm) and insert the hex
wrench into the blade locking screw (17).
2 Press on the shaft lock (13) and rotate the saw blade
(10) until the lock clicks into place.
3 Hold down the locking shaft (13) and open the blade
locking screw (17) counter clockwise, while keeping
the blade in the blade-changing position.
4 Remove the outer ange (16) and the saw blade (10).
(Caution: risk of injuries, wear protective gloves)
5 Insert the new blade and ange.
6 Screw in and tighten the saw blade locking screw while
keeping the shaft locking mechanism pressed again.
7 Set the plunge saw to its original position.
Adjusting the splitting wedge, Fig. 7
Adjust the distance between saw blade and splitting
wedge after a saw blade replacement, or whenever ne-
cessary.
Put the saw in the same position as you do when repla-
cing a saw blade.
Unfasten the adjustment screw (18) using an Allen key
and set the splitting wedge 2-3 mm higher than the saw
blade, then retighten the adjustment screw.
Justieren Sie den Abstand Sägeblatt (10) zum Spaltkeil
(19) nach dem Sägeblattwechsel, oder wenn es erfor-
derlich ist.
ces are not to be expected. (Should you have difculties,
please consult your local dealer.)
12. Remaining hazards
The machine has been built using modern technolo-
gy in accor dance with recognized safety rules. Some
remaining hazards, how ever, may still exist.
• The use of incorrect or damaged mains cables can
lead to injuries caused by electricity.
• Even when all safety measures are taken, some re-
maining hazards which are not yet evident may still
be present.
• Remaining hazards can be minimized by following the
instructions in „Safety Precautions“, „Proper Use“ and
in the entire operating manual.
• Do not force the machine unnecessarily: excessive
cutt ing pressure may lead to rapid deterioration of the
blade and a decrease in performance in terms of nish
and cutting precision.
• When cutting aluminium and plastics always use the
app ro priate clamps: all workpieces must be clamped
down rmly.
• Avoid accidental starts: do not press the start button
while inserting the plug into the socket.
• Always use the tools recommended in this manual
to obtain the best results from your plunge cut saw.
• Always keep hands away from the work area when
the ma chine is running; before performing tasks of
any kind release the main switch button located on the
handgrip, thus disconnecting the machine.
13. Suitable use
To cut:
• Hard and soft, domestic and exotic wood both longitu-
dinally and transversally and with appropriate adjust-
ments (specic blade and clamps);
Unsuitable use
Do not cut:
• Ferrous materials, steel and cast iron or any other ma-
terial not mentioned above and in particular foodstuffs.
14. Start-up
Observe the safety notes in the operating instruc-
tions before operating the machine.
ELECTRICAL CONNECTIONS
Check that the electrical system to which the machine
is connected is earthed in compliance with current sa-
fety regulations and that the current socket is in perfect
condition.
The electrical system must be tted with a magnetother-
mal protective device to safeguard all conductors from
short circuits and overload.
The selection of this device should be in line with the fol-