47GB
9. Cleaning, maintenance, storage and
transport
Switch off the motor and pull the spark plug boot from the spark plug before doing any cleaning
and maintenance work on the equipment.
Important: Switch off the machine immediately and contact your service station:
• In the event of unusual vibrations or noise
• If the engine appears to be overloaded or misres
9.1 Cleaning
• Keep all safety devices, air vents and the motor housing free of dirt and dust as far as possi-
ble.Wipe the equipment with a clean cloth or blow it with compressed air at low pressure.
• We recommend that you clean the device immediately each time you have nished using it.
• Clean the equipment regularly with a moist cloth and some soft soap. Do not use cleaning
agents or solvents; these could attack the plastic parts of the equipment. Ensure that no wa-
ter can seep into the device.
9.2. Air lter (Fig. 5/6)
• The air lter should be cleaned after every 30 hours of operation.
• Remove the air lter cover (Fig. 5).
• Remove the lter element (Fig. 6).
• Clean the lter element with soapy water, rinse with clear water and leave to dry well before
reinstalling.
• Assemble in reverse order
•
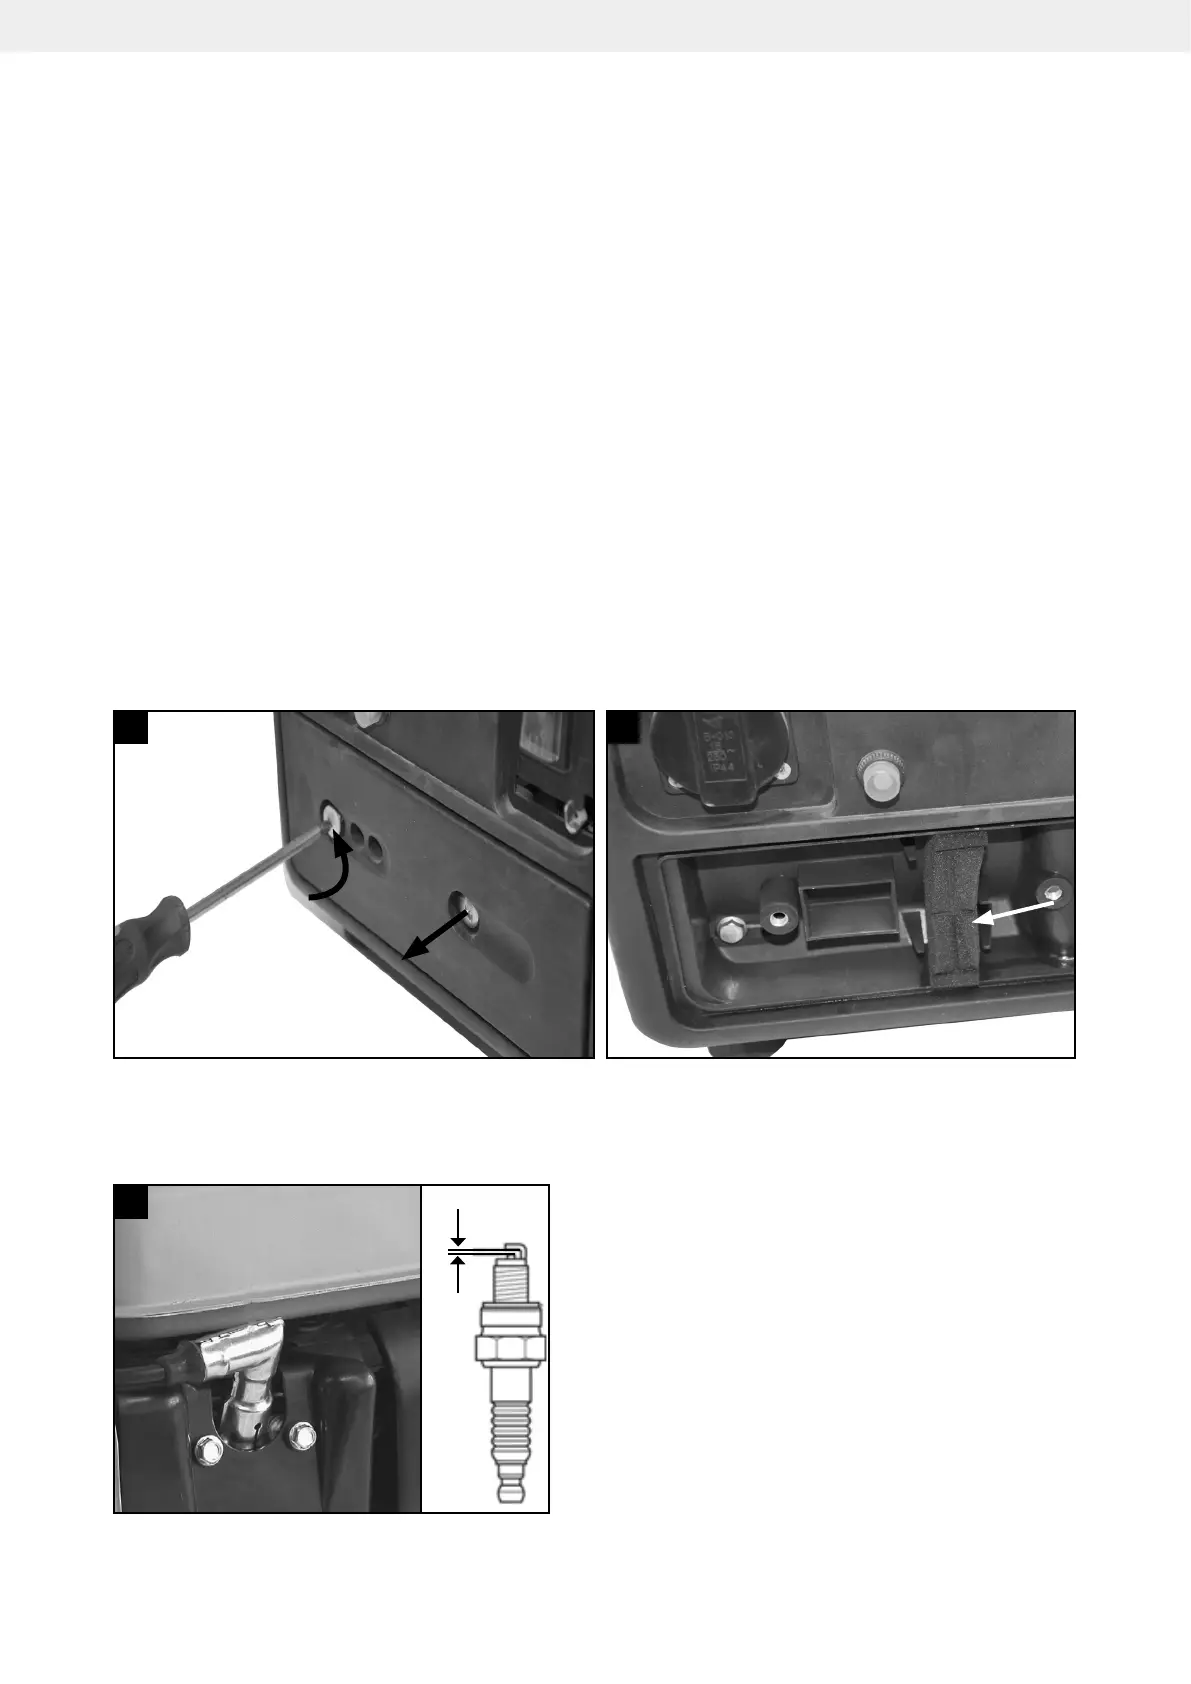
9.3. Spark plug (Fig. 7)
Check the spark plug for dirt and grime after 10 hours of operation and if necessary clean with a
copper wire brush. Thereafter service the spark plug after every 50 hours of operation.
• Remove the spark plug cap.
• Clean any dirt from around the spark plug
base.
• Use the wrench to remove the spark plug.
• Visually inspect the spark plug. Remove carbon
deposits using a wire brush.
• Check for discoloration on the top of the spark
plug. The standard color should be a tan color.
• Check the spark plug gap. The acceptable gap
should be between 0.6-0.7mm
• Install /reinstall the spark plug carefully by hand
• Once the spark plug has been seated tighten
with the spark plug wrench.
• Reinstall the spark plug cap on top of the spark
plug.
6
5
(0.60 - 0.70 mm)
1
7
 Loading...