Do you have a question about the Schumacher Electric SC1321 and is the answer not in the manual?
Manual contains essential safety and operating instructions.
Prevents unsupervised use by children.
Do not expose the charger to rain or snow.
Use only Schumacher-recommended attachments to avoid risks.
Pull by the plug, not the cord, to prevent damage.
Guidelines for necessary extension cord use.
Do not operate with a damaged cord or plug.
Do not operate a damaged charger; seek qualified service.
Do not disassemble; service by qualified personnel only.
Unplug before maintenance/cleaning to reduce shock risk.
Warning about explosive gases near lead-acid batteries.
Have someone nearby for aid when working near batteries.
Keep soap, water nearby for battery acid contact.
Wear eye and clothing protection; avoid touching eyes.
Immediate washing and medical attention for acid contact.
Never smoke or allow sparks near batteries or engines.
Be cautious to avoid dropping tools on batteries.
Remove metal items to prevent short circuits and burns.
Use only for lead-acid (STD or AGM) batteries.
Never charge a frozen battery.
Remove grounded terminal first when removing battery.
Ensure the area around the battery is well ventilated.
Clean battery terminals, avoid contact with eyes.
Add distilled water to cells, do not overfill.
Study battery manufacturer's charging precautions.
Set voltage and charge rate according to battery specifications.
Locate charger as far from battery as DC cables permit.
Do not place charger directly above battery to prevent corrosion.
Never allow battery acid to drip on charger.
Do not operate in closed areas or restrict ventilation.
Do not set a battery on top of the charger.
Connect/disconnect clips after setting switches to off.
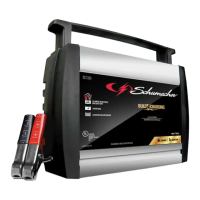
Attach clips to battery and chassis as indicated.
Route cords to reduce risk of damage from moving parts.
Stay clear of fan blades, belts, pulleys, and other moving parts.
Check battery post polarity; POSITIVE is usually larger.
Determine which battery post is grounded to the chassis.
Connect POSITIVE clip to chassis/engine block away from battery.
Connect NEGATIVE clip to chassis/engine block for positive-grounded.
Disconnect in reverse order of connection.
Check battery post polarity; POSITIVE is usually larger.
Attach a 24-inch-long cable to the NEGATIVE battery post.
Connect POSITIVE charger clip to POSITIVE battery post.
Position yourself and cable end away from battery.
Do not face the battery when making final connection.
Disconnect in reverse order, breaking first connection safely.
Marine batteries must be removed and charged on shore.
Use a properly installed and grounded 120V outlet.
Never alter the AC cord or plug; use a qualified electrician.
Guidelines for using an extension cord.
Remove cord wraps and uncoil cables before use.
Press to start charging immediately; auto-start in ten minutes.
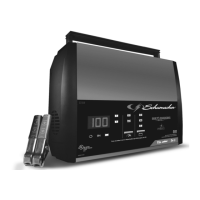
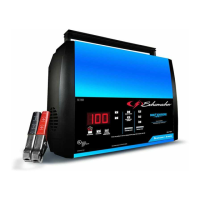
Indicates the charger is connected to an AC outlet.
Indicates reversed connections or battery problems.
Indicates the charger is actively charging the battery.
Indicates the battery is fully charged and in maintain mode.
Steps for charging a battery while it remains in the vehicle.
Steps for charging a battery removed from the vehicle.
The charge rate is automatically adjusted by the charger.
Charging begins automatically if Start/Stop is not pressed.
Estimated charging times for various battery types and sizes.
Charger switches to maintain mode automatically after charging.
What happens when charging cannot be completed normally.
Details on the desulfation process and potential outcomes.
Indicates when the battery is fully charged and in maintain mode.
Charger keeps battery fully charged with small, periodic current.
Clean clamps after charging to prevent corrosion.
Clean charger case with a soft cloth to maintain finish.
Coil cords neatly to prevent accidental damage.
Store charger unplugged in a cool, dry place.
Auto voltage detection handles 6V/12V selection.
Check AC outlet or electrical connection.
Press Start/Stop or wait ten minutes for auto-start.
Indicates potential battery defect or desulfation failure.
May indicate an overheated battery or short circuit.
Suggests low battery capacity or old battery.
May be caused by battery drain or a defective battery.
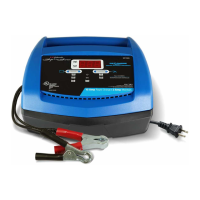
| Input Voltage | 120V AC |
|---|---|
| Output Voltage | 6V/12V |
| Battery Type | Standard, AGM, Gel, Deep-Cycle |
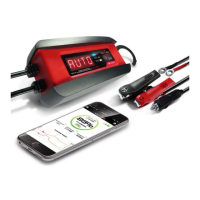
| Testing Function | Yes |
| Float Mode Maintenance | Yes |
| Reverse Hook-up Protection | Yes |
| Overcharge Protection | Yes |
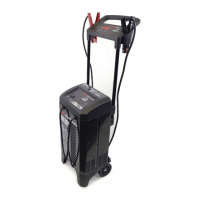
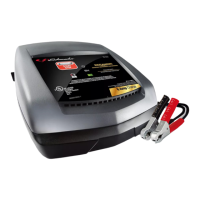
| Type | Battery Charger |
| Cable Length | 6 ft |
| Cord Length | 6 ft |
| Charging Modes | Automatic charging and maintenance mode |