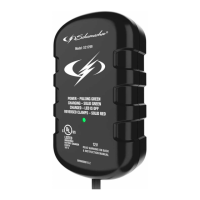
The Schumacher SPI2 is an automatic battery charger designed for safe and effective charging and maintenance of lead-acid batteries. This owner's manual provides important safety and operating instructions, emphasizing the need to read and understand all precautions before use.
Function Description
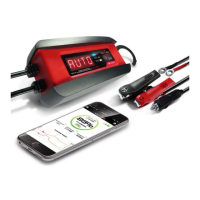
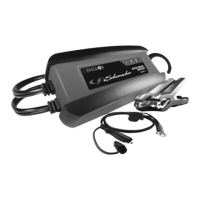
The SPI2 is an automatic battery charger and maintainer. It is designed to charge 3-cell (6V) and 6-cell (12V) lead-acid batteries with rated capacities of 12Ah (6V) and 12-35Ah (12V). The charger features an auto-start function, meaning current will not be supplied to the battery clamps until a battery is properly connected, preventing sparks if the clamps touch. The microprocessor automatically adjusts charging time for complete, efficient, and safe charging.
The device operates in several modes:
- Automatic Charging Mode: The charger automatically switches to Maintain Mode once the battery is fully charged. For batteries with a starting voltage under 1 volt, a manual charger can be used for a five-minute pre-charge to add initial voltage.
- Aborted Charge: If charging cannot be completed normally, the charger will abort, shutting off output and flashing the yellow/orange CHARGING LED. To reset, unplug the charger, wait a few moments, and plug it back in.
- Completion of Charge: Indicated by a pulsing green CHARGED LED, signifying that the battery is fully charged and the charger has switched to Maintain Mode.
- Maintain Mode (Float-Mode Monitoring): When the green CHARGED LED is pulsing, the charger is in Maintain Mode, keeping the battery fully charged by delivering a small current as needed. If the charger provides its maximum maintain current for a continuous 12-hour period, it will enter Abort Mode, typically due to a battery drain or a faulty battery. Users should ensure no loads are on the battery; if so, remove them, or have the battery checked/replaced.
- Maintaining a Battery: The SPI2 maintains 6V and 12V batteries at full charge. The maintain mode technology allows for safe charging and maintenance over extended periods. However, occasional monitoring of the battery and charging process is recommended due to potential issues like battery problems, electrical problems in the vehicle, or improper connections causing excessive current draws.
Important Technical Specifications
- Input: 230V AC~50Hz, 0.5A
- Output: 6V ⎓ 2A, 12V ⎓ 2A
- Dimensions (H x W x D): 193 mm x 84 mm x 78 mm
- Weight: 0.65 kg
- Output Protection: Yes
- Reverse Polarity Protection, Spark/Arc-Proof: Yes
- Ingress Protection Rating: IP54
- Safety Standards: Complies with EN 60335-1:2012 + A11:2014, EN 60335-2-29:2004 + A2:2010, EN 62233:2008.
- EMC Directives: 2004/108/EC (until 04/19/2016) and 2014/30/EU (from 04/20/2016).
- Low Voltage Directives (LVD): 2006/95/EC (until 04/19/2016) and 2014/35/EU (from 04/20/2016).
- RoHS Compliance: Compliant with DIRECTIVE 2011/65/EU regarding hazardous substances in electrical and electronic equipment.
Usage Features
The SPI2 offers flexible connection options:
- Battery Clamp Quick-Connect: Allows for quick connection to battery terminals.
- Connect the charger's output cable to the battery clamp quick-connect.
- Follow specific steps for connecting clamps to a battery installed in a vehicle (Section 6) or outside a vehicle (Section 7).
- Plug the power cord into an AC electrical wall outlet after a good electrical connection is made, ensuring the charger is on a dry, non-flammable surface.
- After charging, disconnect the AC cord, then the negative clamp, and finally the positive clamp.
- Ring Terminal Quick-Connect: Designed for permanent attachment to the battery, providing easy access for quick charging, suitable for motorcycles, lawn tractors, ATVs, and snowmobiles.
- Loosen and remove nuts from battery terminal bolts.
- Connect the red positive connector ring to the positive battery terminal.
- Connect the negative connector ring to the negative battery terminal.
- Replace and tighten nuts to secure.
- Connect the ring connector cable assembly to the charger, keeping wires and plug away from hot and moving parts.
- Plug the charger power cord into an AC electrical wall outlet, ensuring the charger is on a dry, non-flammable surface.
- After charging, disconnect the AC cord, then the negative connector, and finally the positive connector.
LED Indicators:
- CLAMPS REVERSED (red) LED flashing: Indicates reversed connections.
- CHARGING (yellow/orange) LED lit: Indicates the charger is charging the battery.
- CHARGING (yellow/orange) LED flashing: Indicates the charger is in abort mode.
- CHARGED (green) LED pulsing: Indicates the battery is fully charged and the charger is in maintain mode.
Charger Location:
- Locate the charger as far from the battery as DC cables permit.
- Never place the charger directly above the battery being charged to prevent corrosion from battery gases.
- Do not set the battery on top of the charger.
- Avoid dripping battery acid onto the charger.
- Operate the charger in a well-ventilated area, not in a closed-in space.
Extension Cord Usage:
- Only use an extension cord if absolutely necessary.
- Ensure the extension cord's plug pins match the charger's plug in number, size, and shape.
- The extension cord must be properly wired and in good electrical condition.
- The wire size must be large enough for the charger's AC ampere rating (refer to section 8 for specifications).
- For cords 100 feet (30.5 meters) or less, use 18 gauge (1.0 mm²) extension cord.
- For cords over 100 feet (30.5 meters), use 16 gauge (1.25 mm²) extension cord.
Maintenance Features
- Cleaning: After use and before maintenance, unplug and disconnect the charger. Use a dry cloth to wipe off battery corrosion, dirt, or oil from connectors, cords, and the charger case.
- Component Check: Ensure all charger components, such as plastic boots on battery clips, are in place and in good working condition.
- No User-Serviceable Parts: The unit does not require opening for maintenance as it contains no user-serviceable parts. All other servicing should be performed by qualified service personnel.
- Cord Replacement: If the supply cord is damaged, it must be replaced by the manufacturer, its service agent, or similarly qualified persons to avoid hazards.
- Storage: Store the charger unplugged and in an upright position in a cool, dry place. Do not store connectors clipped together, on or around metal, or clipped to cables.
- Transport: When moving the charger, take care to prevent damage to cords, connectors, and the charger itself to avoid personal injury or property damage.