Do you have a question about the Schumacher SE-1252MA and is the answer not in the manual?
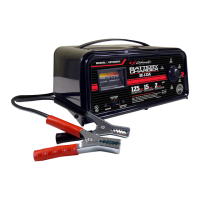
Contains important safety and operating instructions for the battery charger model.
Before using the charger, read all instructions and cautionary markings on the charger, battery, and product.
To reduce injury risk, charge only lead-acid type rechargeable batteries.
Use only manufacturer-recommended attachments to avoid fire, shock, or injury.
Pull by the plug, not the cord, to reduce damage risk to the electric plug and cord.
Ensure the cord is positioned to avoid damage or stress from being stepped on or tripped over.
Use extension cords only if necessary, ensuring proper plug, wiring, and wire size.
Do not operate the charger with a damaged cord or plug; replace them immediately.
Do not operate a damaged charger; take it to a qualified serviceman.
Do not disassemble the charger; service or repair should be done by a qualified serviceman.
Unplug the charger from the outlet before any maintenance or cleaning to reduce electric shock risk.
Lead-acid batteries generate explosive gases; read manual and follow instructions exactly before use.
Ensure someone is within hearing range or close enough to assist when working near a lead-acid battery.
Keep fresh water and soap nearby for use if battery acid contacts skin, clothing, or eyes.
Wear complete eye and clothing protection and avoid touching eyes while working near the battery.
Wash skin/clothing immediately with soap and water; flush eyes with cold water for 10 minutes and seek medical attention.
Never smoke or allow sparks or flames near a battery or engine.
Be cautious not to drop metal tools onto the battery, which can cause sparks or short circuits.
Remove personal metal items like rings and watches when working with lead-acid batteries to prevent severe burns.
Use the charger for lead-acid batteries only; do not use for dry-cell batteries.
Never attempt to charge a frozen battery, as it may burst and cause injury.
Handling cords may expose you to lead, a chemical known to cause cancer and birth defects; wash hands after.
If removing battery, disconnect the grounded terminal first and turn off vehicle accessories.
Ensure the area around the battery is well-ventilated during charging; use a fan to blow gases away.
Clean battery terminals carefully, avoiding contact of corrosion with eyes.
Add distilled water to each cell to the specified level, but do not overfill.
Study battery manufacturer's specific precautions, such as removing cell caps or recommended charge rates.
Locate the charger as far away from the battery as the DC cables permit.
Never place the charger directly above the battery being charged to prevent corrosion damage.
Never allow battery acid to drip onto the charger when checking specific gravity or filling the battery.
Connect and disconnect DC clips only after removing the AC cord from the outlet. Never let clips touch.
Position AC and DC cords to reduce risk of damage from moving engine parts.
Stay clear of fan blades, belts, pulleys, and other parts that can cause injury.
Check battery post polarity; POSITIVE (+) is usually larger diameter than NEGATIVE (-).
Determine which battery post is grounded to the chassis (refer to step 5 or 6).
Connect POSITIVE (RED) to battery POSITIVE, NEGATIVE (BLACK) to chassis/engine block away from battery.
Connect NEGATIVE (BLACK) to battery NEGATIVE, POSITIVE (RED) to chassis/engine block away from battery.
Disconnect AC cord, then chassis clip, then battery terminal clip.
Check battery post polarity; POSITIVE (+) is usually larger diameter than NEGATIVE (-).
Attach at least a 24-inch-long 6-gauge insulated cable to the NEGATIVE (-) battery post.
Connect the POSITIVE (RED) charger clip to the POSITIVE (POS, P. +) post of the battery.
Position yourself away from the battery and connect the NEGATIVE (BLACK) clip to the free end of the cable.
Do not face the battery when making the final connection.
Disconnect in reverse sequence of connecting, breaking the first connection as far from the battery as practical.
Charger must be grounded via a three-prong plug and properly installed, grounded outlet.
Temporary adapters may be used if a grounded outlet is unavailable, but a proper outlet should be installed.
Ensure adapter's ground connection is secured to a properly grounded outlet plate screw.
Used for batteries larger than 10 AH, primarily for 10-30 AH batteries (motorcycles, garden tractors).
Used for batteries larger than 30 AH; avoid using on smaller batteries to prevent gassing and overheating.
Provides up to 50 Amp for cranking; limited to 10 seconds on, 3 minutes off; not for charging.
Groups Deep Cycle/Maintenance Free and Conventional batteries; sets charge voltage accordingly.
Do not use Deep Cycle setting on conventional batteries as it may cause overcharging.
Charge current cycles on/off as battery approaches full charge; off time increases with charge state.
No sparks on connection; current flows after delay. Charger requires battery terminal voltage above 3 volts.
Indicates charge current drawn by the battery; current decreases as the battery approaches full charge.
Review Section D for battery preparation before charging.
Set battery type and charge rate switches, then connect to a 12-volt battery and plug into AC outlet.
Charge time depends on battery size (AH), current charge level, and charge rate (chart provided).
Meter pointer rests on 0 Amp with occasional pulse up.
Hydrometer reading of electrolyte indicates 1.250 to 1.285.
Bubbles may appear on fluid surface at 80-85% charge; discontinue if bubbles become more vigorous.
Check AC outlet connection and battery charger clips for clean, tight connections.
May indicate a severely discharged battery or a defective battery requiring replacement.
| Type | Automatic Battery Charger |
|---|---|
| Input Voltage | 120V AC |
| Battery Types Supported | AGM, Gel |
| Safety Features | Overcharge Protection |
| Output Voltage | 6V/12V |
| Charging Current | 2 Amps |
| Cable Length | 6 ft |
| Output Amperage | 2/10/25A |
| Charging Modes | Maintenance |
| Output Current | 2/10/25A |