Do you have a question about the Schumacher SE-1250 and is the answer not in the manual?
Read all instructions and cautions printed on the battery charger, battery, and vehicle.
Use only on lead-acid batteries; do not use for dry-cell batteries.
Use only recommended attachments; pull charger by plug, not cord.
Do not operate with damaged cord/plug or if dropped; seek professional repair.
Unplug before maintenance; use extension cords carefully; charge in ventilated area.
Keep charger away from battery, avoid rain/snow, never charge frozen battery.
Prevent acid drip on charger; do not place battery on or above charger.
Never touch battery clips together when energized.
Position cords, stay clear of moving parts, check battery polarity.
Determine if battery post is grounded to chassis.
Connect RED clip to POSITIVE battery post, BLACK clip to chassis/engine block.
Connect BLACK clip to NEGATIVE battery post, RED clip to chassis/engine block.
Attach clips to posts, rock back and forth for good connection to prevent slipping.
Select the appropriate amperage setting.
Unplug charger from AC source when fully charged.
Remove charger clips from chassis/pole in order.
Clean and store battery charger.
Check battery polarity, use insulated cable, position yourself safely.
Connect RED clip to POSITIVE post, BLACK clip to free end of cable.
Select the appropriate amperage.
Unplug charger from AC power source when battery is fully charged.
Remove clips from cable end and battery post in order.
Clean and store battery charger.
Ensure area around battery is well ventilated during charging.
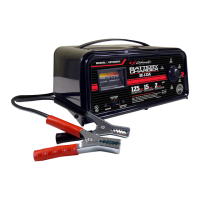
Select charging voltage (6V/12V) or charging rates (amps) based on model.
Use timer to prevent overcharging; HOLD position keeps charger on indefinitely.
Self-resetting breaker protects charger from temporary overloads.
Antimony/lead batteries requiring periodic water addition.
Calcium/lead batteries that typically do not require water additions.
Heavy duty batteries for boats, construction, etc., marked 'DEEP CYCLE'.
Ensure electrolyte is at correct level before charging; not required for maintenance-free.
Set switches/timers to Off or lowest charge rate.
Follow vehicle/out-of-vehicle instructions; plug power cord into AC outlet.
Set power switch to desired charge position; monitor closely.
Time depends on Ampere Hours (AH) depleted; add 25% for tapering.
Specific gravity 1.25-1.285; bubbles appear at 80-85% charge, becoming vigorous.
Meter indicates near the dotted line (about 1/2 of selected charge rate).
Connect charger, set to Off/2 amp, plug in, move switch to Engine Start.
Charge battery for a few minutes before attempting engine start.
Crank the engine by turning the ignition key.
If engine fails to start, charge battery further and try again.
Do not operate in closed areas; keep off carpets; do not set battery on charger.
Never allow battery acid to drip on charger.
Never place charger directly above battery being charged.
2-year warranty against defects; repair/replacement at manufacturer's option.
Void if misused, handled carelessly, or repaired by unauthorized personnel.
Excludes implied warranties; limitations may vary by state.
Scale is for 6 or 10 amp rates; red triangle for 2 amp rate; accuracy varies by battery.
Indicates amp draw; shows taper as battery nears full charge; 2 amp is hard to see.
Test battery voltage with engine off; check pointer position after headlights are on.
Check alternator output; meter pointer should be in green zone for proper function.
Wear complete eye protection and clothing when working with lead-acid batteries.
Ensure someone is within range of your voice or can come to your aid.
Have water and soap nearby; wash skin/clothing immediately if acid contacts.
Avoid touching eyes; flood with cold water for 10 min if acid enters; seek medical attention.
Remove metal items to prevent short circuits and severe burns.
Avoid dropping metal tools on battery to prevent sparking or short circuits.
Always operate battery charger in an open, well-ventilated area.
Never smoke or allow sparks/flames near battery or engine due to explosive gases.
Charger cord has grounding conductor; plug into properly installed/grounded outlet.
Plug must fit receptacle; use adapter only temporarily if needed.
Ensure adapter's grounding means is connected to a properly grounded outlet.
Never alter AC cord or plug; have proper outlet installed by electrician.
Ensure battery voltage and charger voltage match; select correct switch.
Clean battery terminals, taking care to avoid contact with eyes.
Add distilled water if required, do not overfill; follow manufacturer's instructions.
Study battery manufacturer's specific precautions for charging.
Ensure area is well ventilated; use cardboard as a fan if needed.
Remove grounded terminal first; ensure vehicle accessories are off.
Marine batteries must be removed and charged on shore.
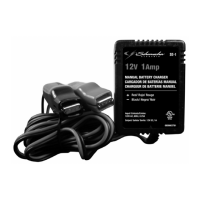
| Type | Automatic Battery Charger |
|---|---|
| Input Voltage | 120V AC |
| Output Voltage | 6V/12V |
| Output Amperage | 2A |
| Battery Types Supported | AGM, Gel |
| Engine Start | 50A |
| Display Type | LED |
| Cable Length | 6 feet |