Assembly and settings
01.00 | IN / INK | Assembly and Operating Manual | en | 1596635 9
4 Assembly and settings
4.1 Mechanical connection
NOTE
The assembly instructions in this chapter are generally
applicable.
Module-specific assembly instructions for the sensor can be
found in the Assembly and Operating Manual for the module,
which can be downloaded at schunk.com
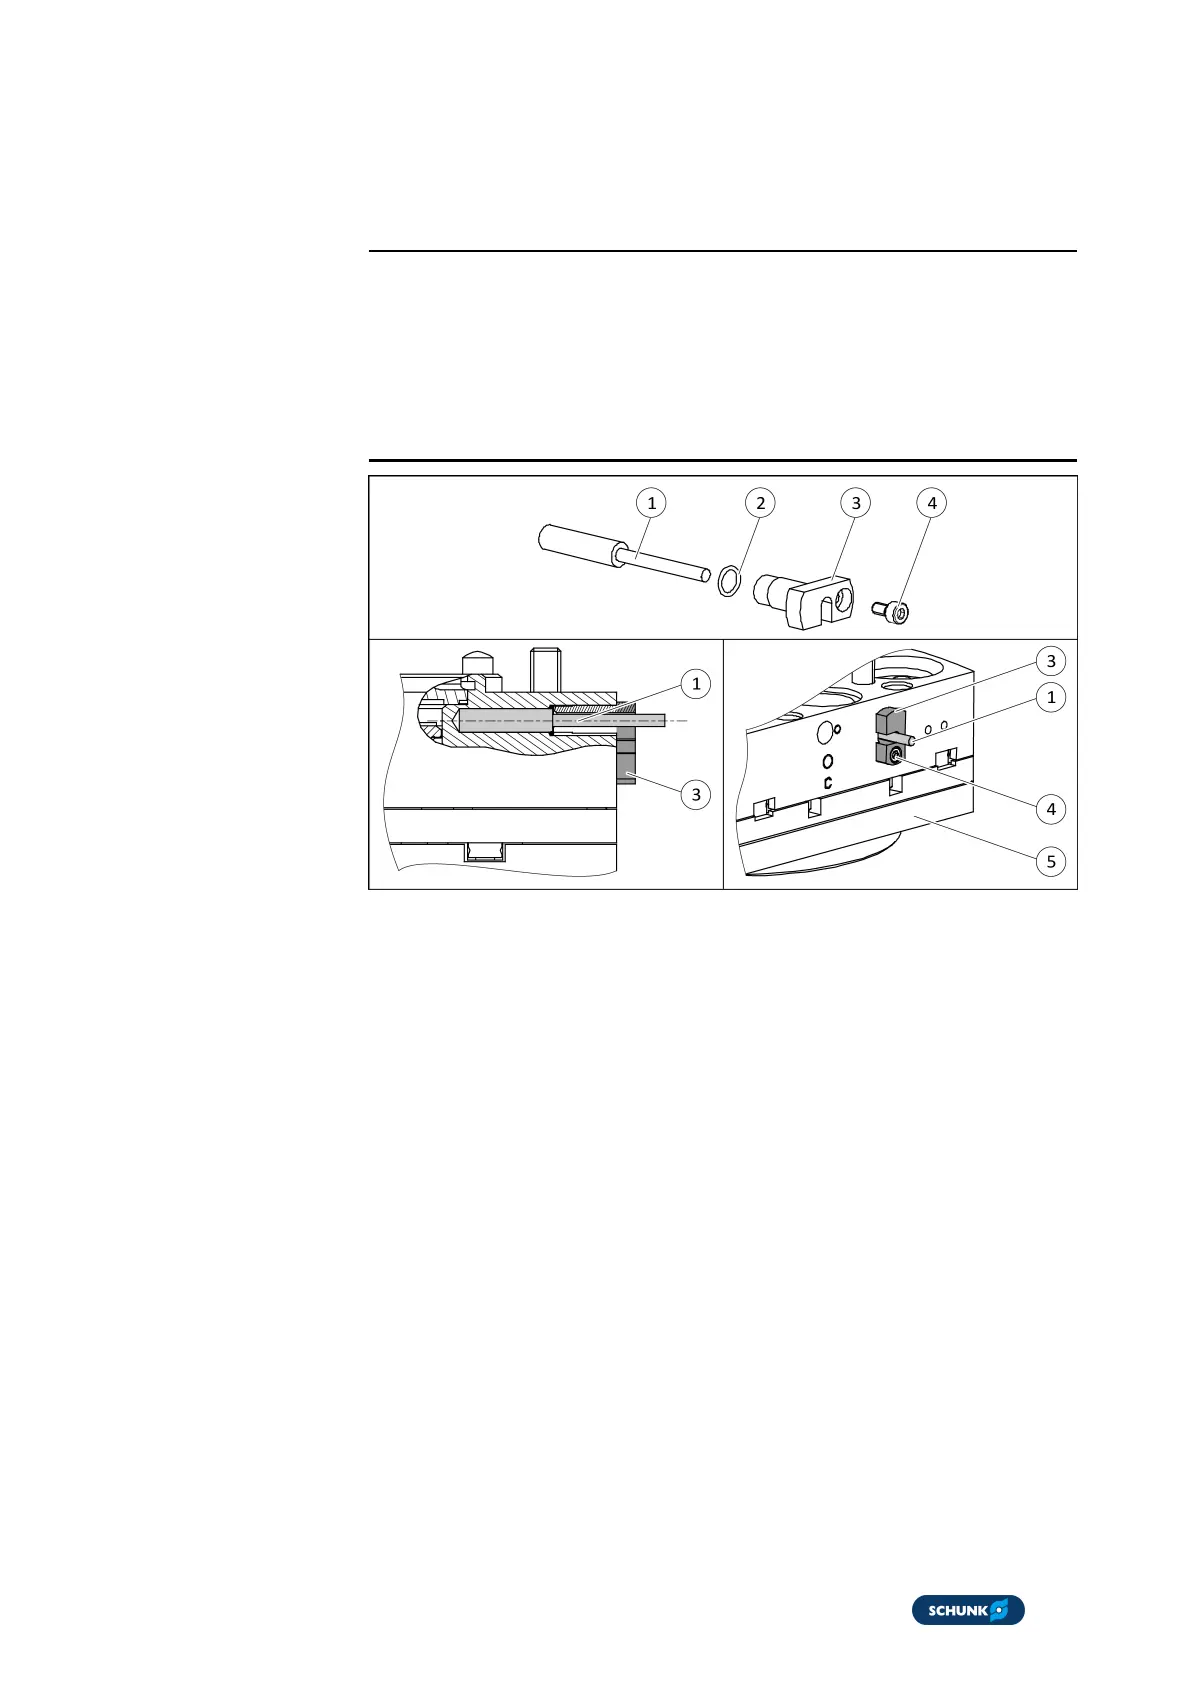
1. Slide O-ring (2) onto the sensor (1).
2. Connect sensor (1).
3. Lay the sensor cable (1) in the nut of the clamping element
(3).
4. Slide sensor (1) into the bore hole of the housing (5) until it
stops.
5. Slide clamping elements (3) into the bore hole of the housing
(5) and slightly tighten the screw (4).
ð The O-ring (2) is between sensor (1) and bracket (3).
6. Turn sensor (1) on its axis until sensor (1) switches.
7. Screw bracket (3) with the screw (4).
ð The sensor (1) is fixed.