Assembly and settings
01.00 | MMS 22-IOL | Assembly and Operating Manual | en | 1598377 11
Adjusting sensor with teach-in tool (sensor in SIO mode)
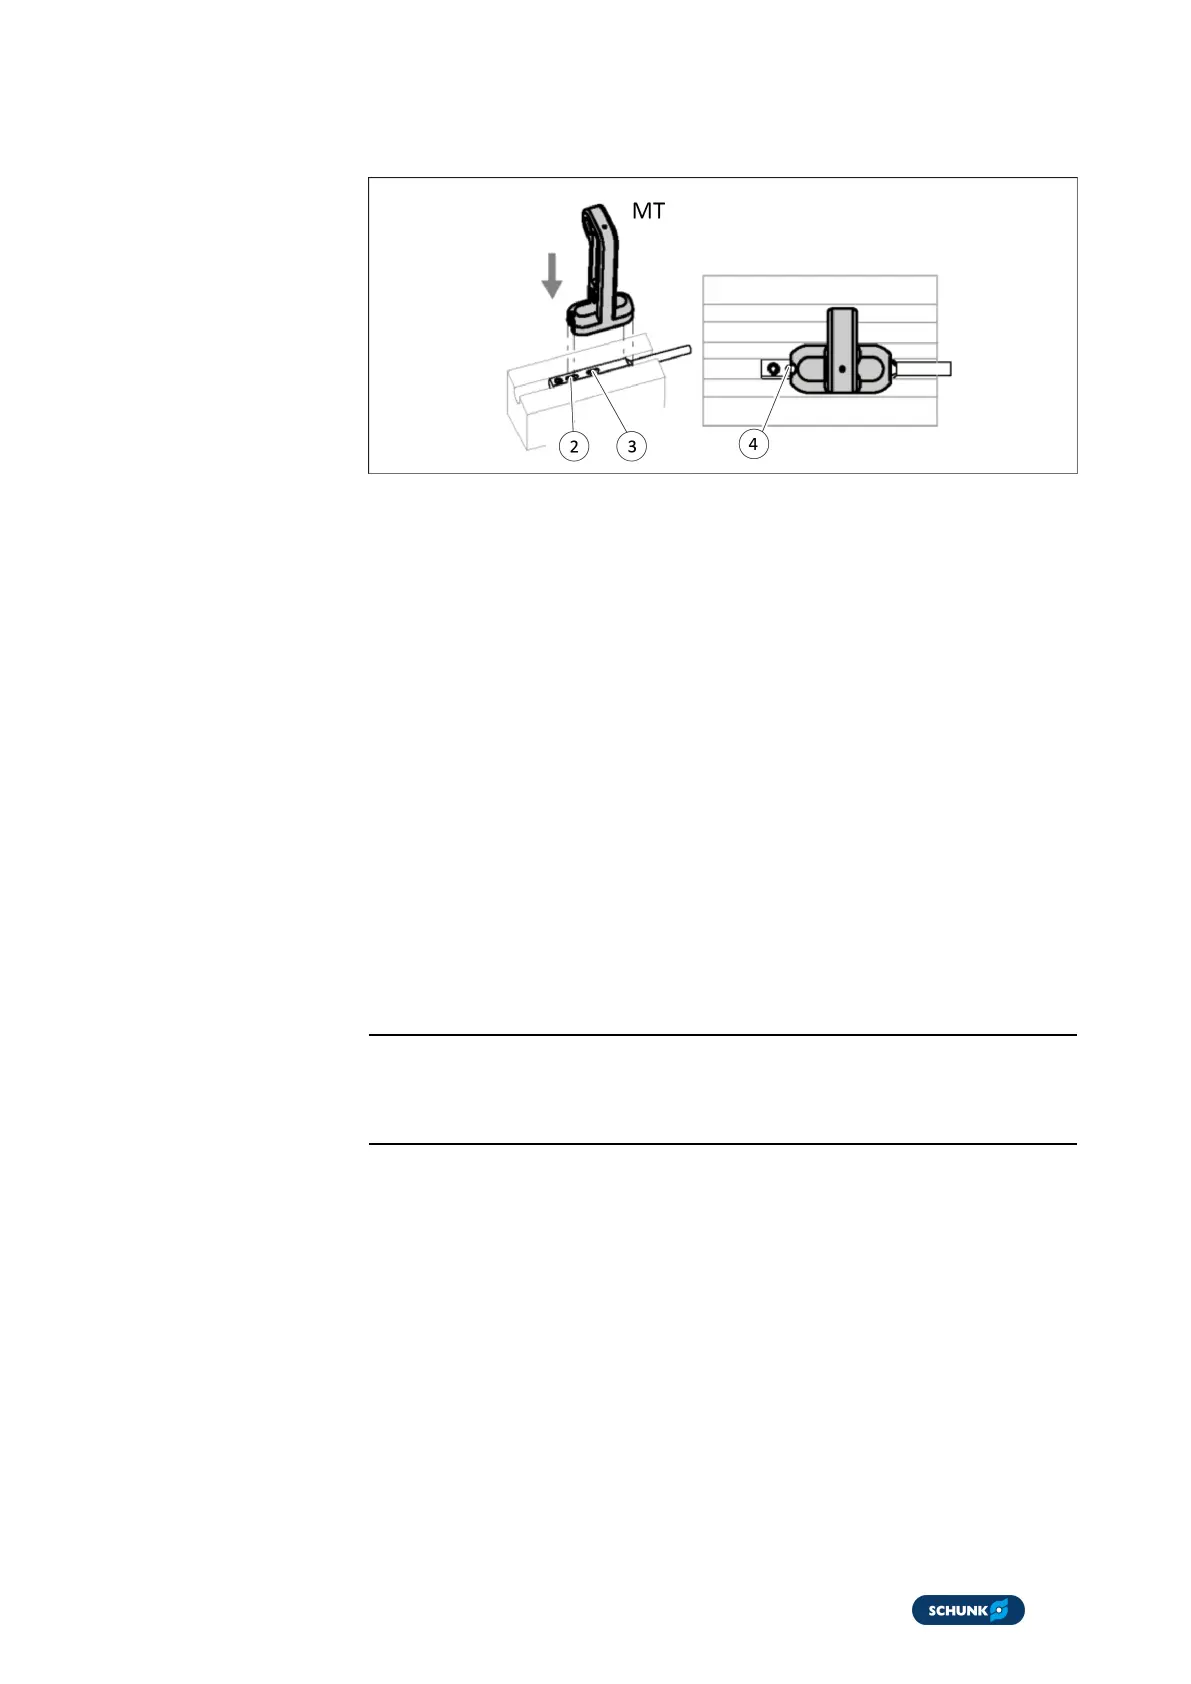
Positioning the magnet teach-in tool (MT)
1. Move module to end position 1 (e.g. gripper open).
2. Place the magnet teach-in tool (MT) on the sensor (4) for
approx. 1second.
3. Remove the MT
ð After 3 seconds, the LED flashes at 1 Hz (50% duty cycle).
4. Move module to end position 2 (e.g. gripped closed).
ð LED flashes at 2 Hz.
5. Place the MT on the sensor (4) for approx. 1second.
ð LED flashes at 6 Hz.
6. Remove the MT
ð LED flashes for a further 5 seconds at 6 Hz.
ð The switching positions of the end positions are now set.
7. In case of poor magnetic field:
ð LED flashes at 10 Hz for 10 seconds }6.2.2 [/14].
NOTE
The adjusting procedure is canceled after 30s if the MT is not
inserted again.
Adjusting sensor with software (via IO-Link master – sensor in IO-
Link mode)
n LED flashes at 1 Hz (90% duty cycle) if there is an IO-Link
connection.
1. Move module to end position 1.
2. Sensor Teach command: Select [3] Start teaching Magnetic
field.
3. Run Write to device (download).
ð After 5 seconds, the LED flashes at 1 Hz (50% duty cycle).
ð Sensor Command Reply: [1] Teaching started is displayed.
4. Within 12 seconds, move module to end position 2.