Assembly and settings
10 02.00 | MMS 22-PI1-EX/MMSK 22-PI1-EX | Assembly and Operating Manual | en | 1566685
4.4 Installing and configuring the sensor
There are two possible ways of installing and configuring the
sensor. Without teach mode, the sensor is installed as described
in chapter }4.4.1 [/10]. In the case of greater precision and
hysteresis requirements, the sensor must be installed as
described in chapter }4.4 [/10] and configured in teach
mode.
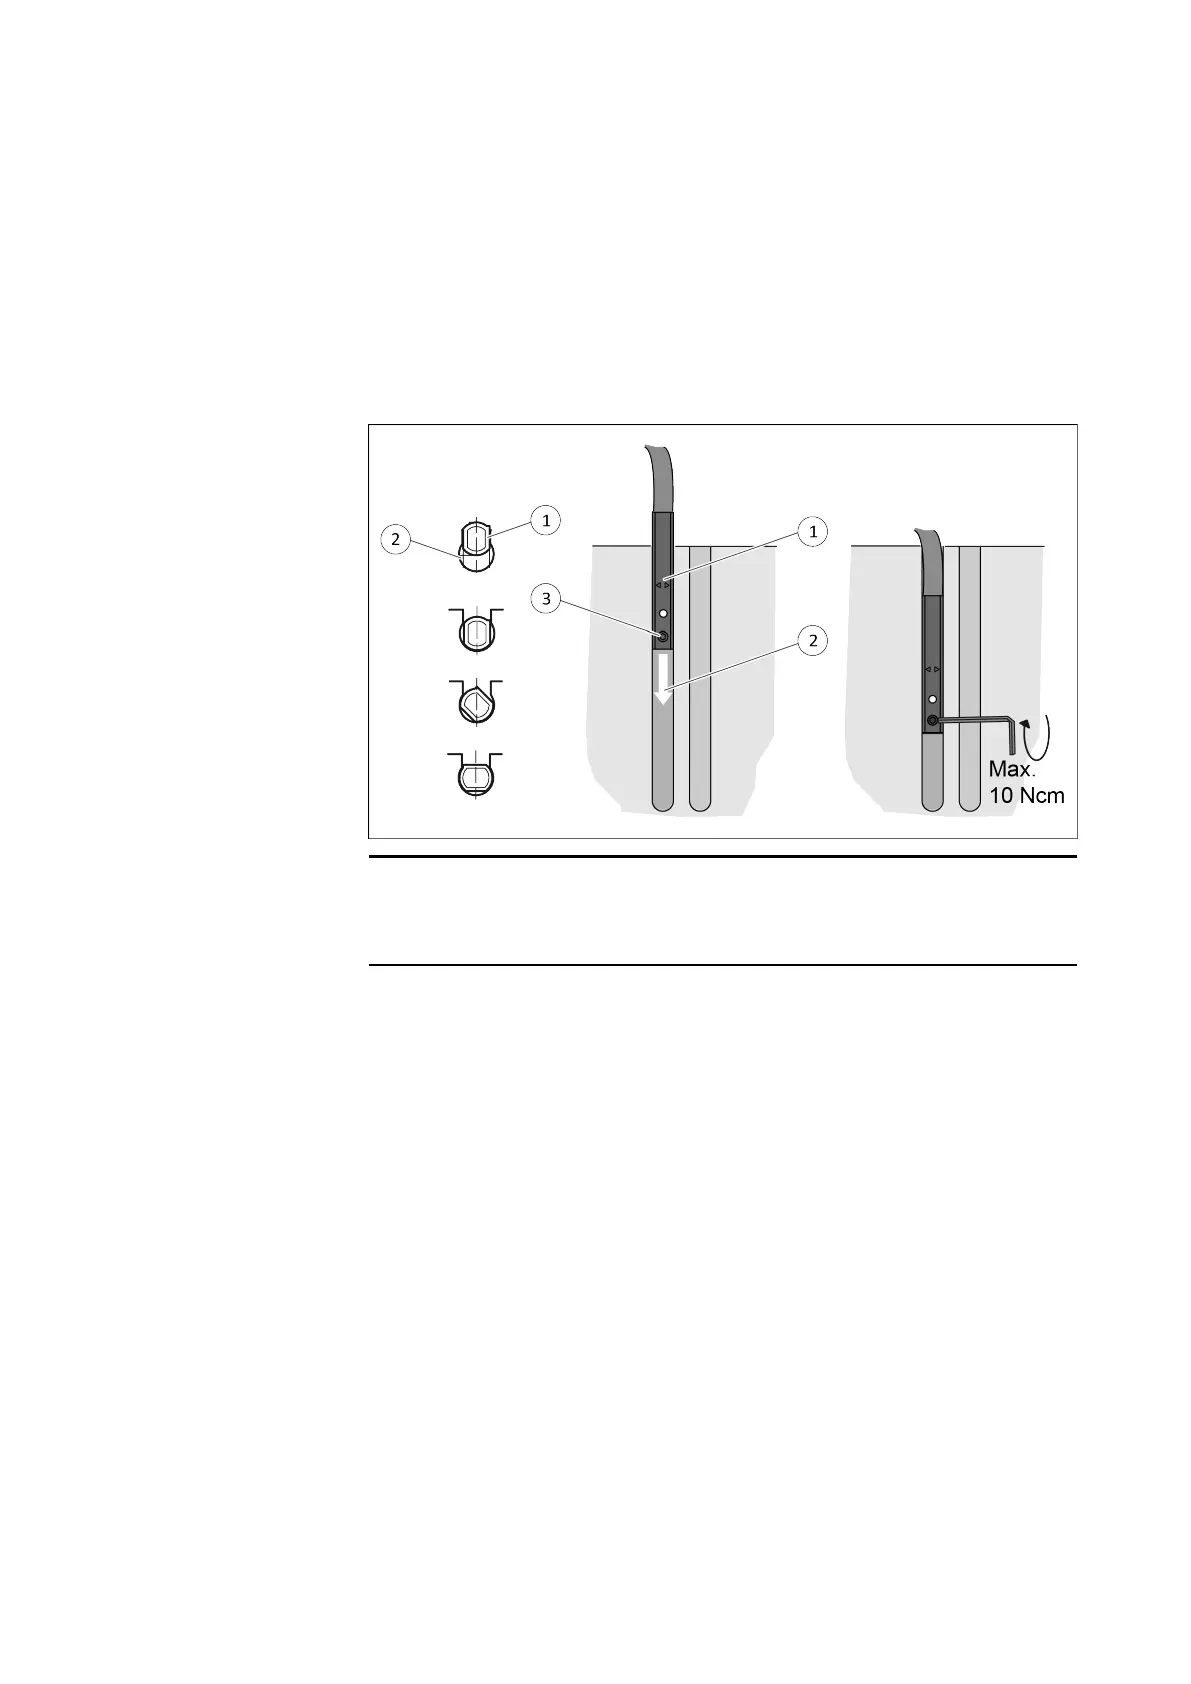
4.4.1 Installing the sensor
NOTE
The sensor is adjusted against the direction of motion of the
magnet/control cam to be measured.
1. Place the monitored module in switching position.
2. Connect the sensor (1).
3. Push the sensor (1) into the groove (2) until it stops at the
housing.
OR: Turn and push the sensor (1) into the groove (2) until it
stops at the housing.
4. Pull the sensor (1) back again slowly until it operates (LED
lights up).
5. Tighten the set-screw (3) to clamp the sensor (1) in this
position in the groove (2).
ð Observe the maximum tightening torque of 10Ncm.
6. Test the switching position.
 Loading...