Assembly and settings
02.00 | MMS 22-PI1-EX/MMSK 22-PI1-EX | Assembly and Operating Manual | en | 1566685 11
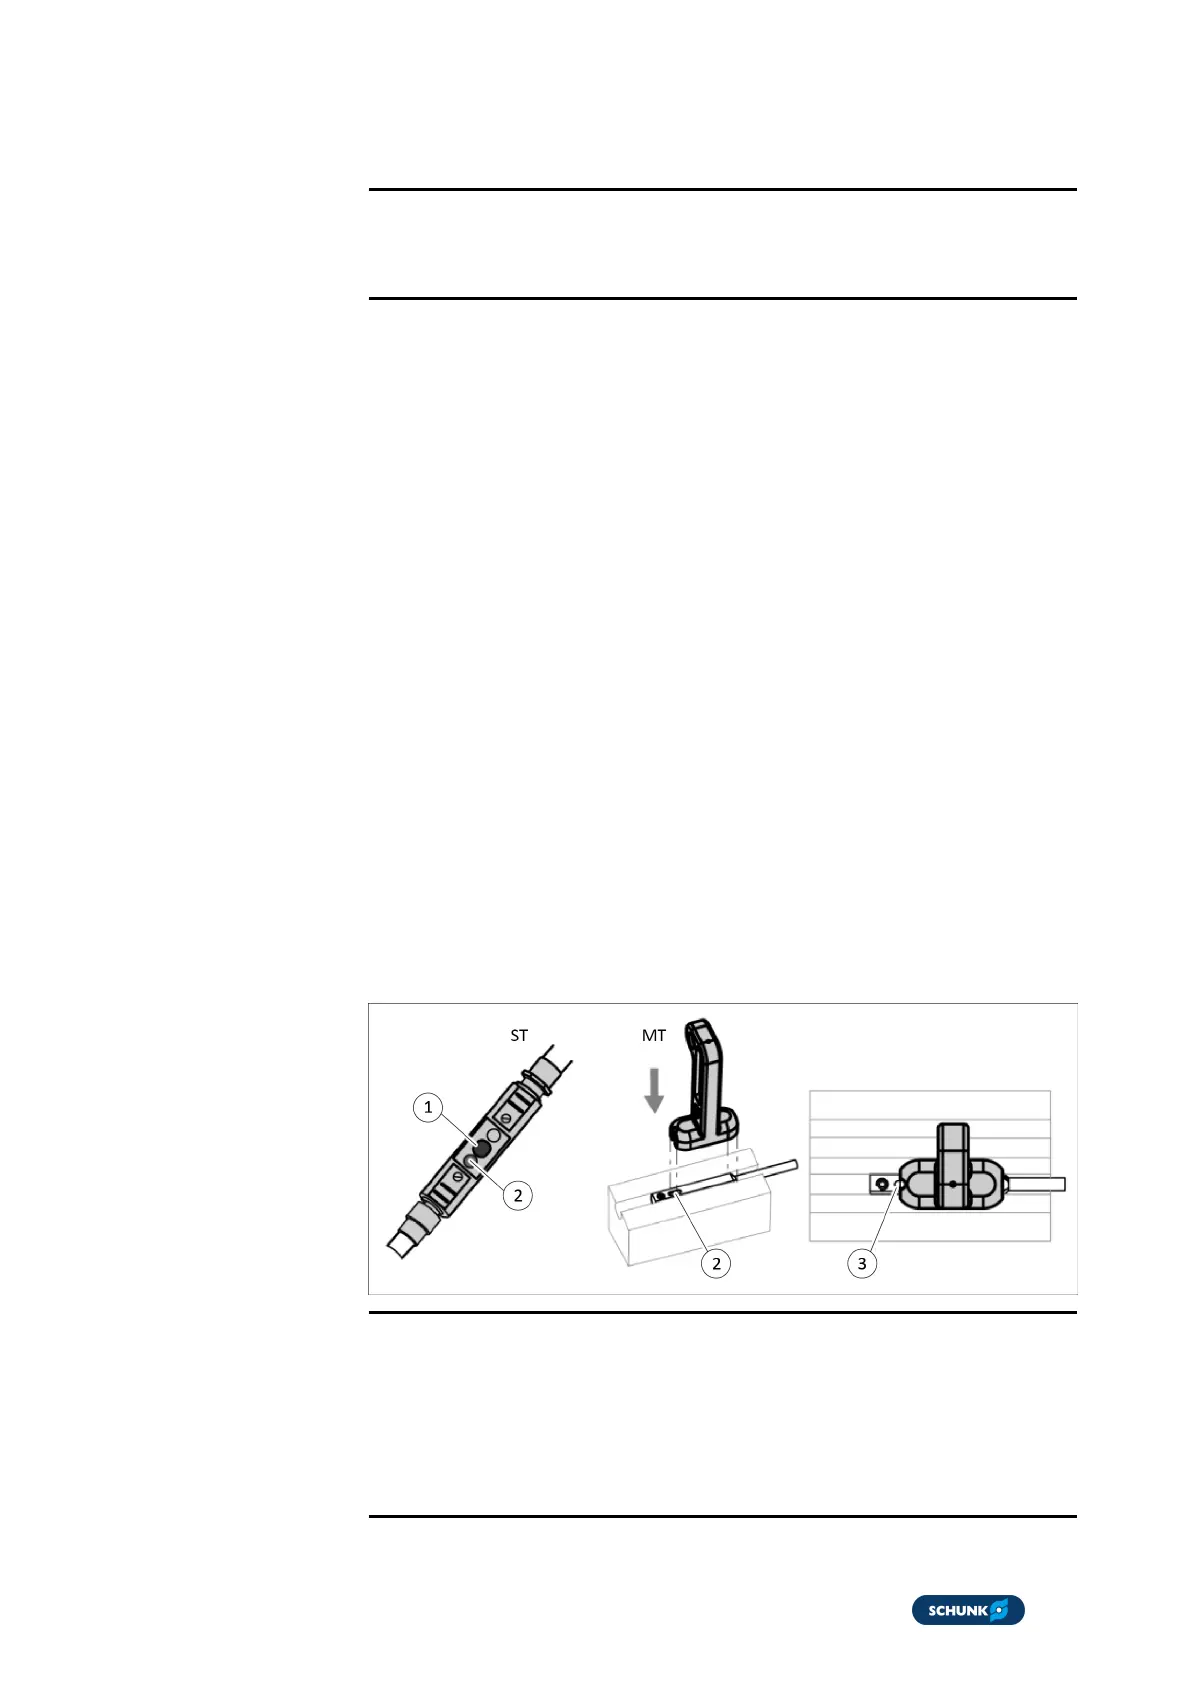
4.4.2 Installing and configuring the sensor in teach mode
NOTE
The difference between the teach and operating temperatures
must not exceed 30 K.
1. Place the sensor (1) in the groove (2) and in the specified
position (see the Assembly and Operating Manual of the
monitored module).
2. Tighten the set-screw (3) to clamp the sensor (1) in this
position in the groove (2).
ð Observe the maximum tightening torque of 10Ncm.
3. Place the monitored module in switching position.
4. Place the magnet teach tool (MT) on the sensor (3) for at least
2s.
Or: Press the button (1) on the connector teach tool (ST) for at
least 2s.
ð The LED (2) flashes after 2s.
5. Remove the MT.
Or: Release the button (1) on the ST.
6. Place the MT back on the sensor (3) for at least 0.3s, then
remove it.
Or: Press the button (1) on the ST for at least 0.3s and then
release it.
7. Wait 2s.
ð The LED (2) lights up continuously.
NOTE
The setting procedure is canceled after 30s if the MT is not placed
on the sensor again or the button (1) on the ST is not pressed. The
LED (2) flashes quickly for 2s if the magnetic field is too large or
too small. If there is a duplicate or unsuitable switching point,
the sensor (3) should be moved by 2mm and taught again.
 Loading...