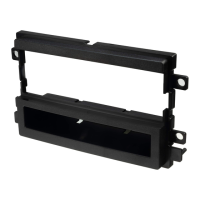
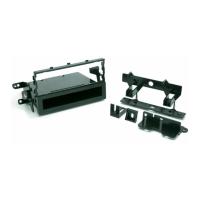
1978-02 Dodge Van
Read pages 2-4
1978-83 Plymouth Van
for kit assembly.
RADIO REMOVAL:
1. Remove the ashtray from the dash, extract the two screws
securing the ashtray bracket to the dash and remove the bracket.
2. Open up the cup holder and extract the two screws securing it to the dash.
3. Carefully pry out on the perimeter radio dash bezel using a panel removal tool to release the
fastening clips, disconnect all connectors and remove the bezel.
4. Extract the two screws securing the radio to the dash, pull the radio from the dash cavity,
unplug all connectors, disconnect the ground strap and remove the radio.
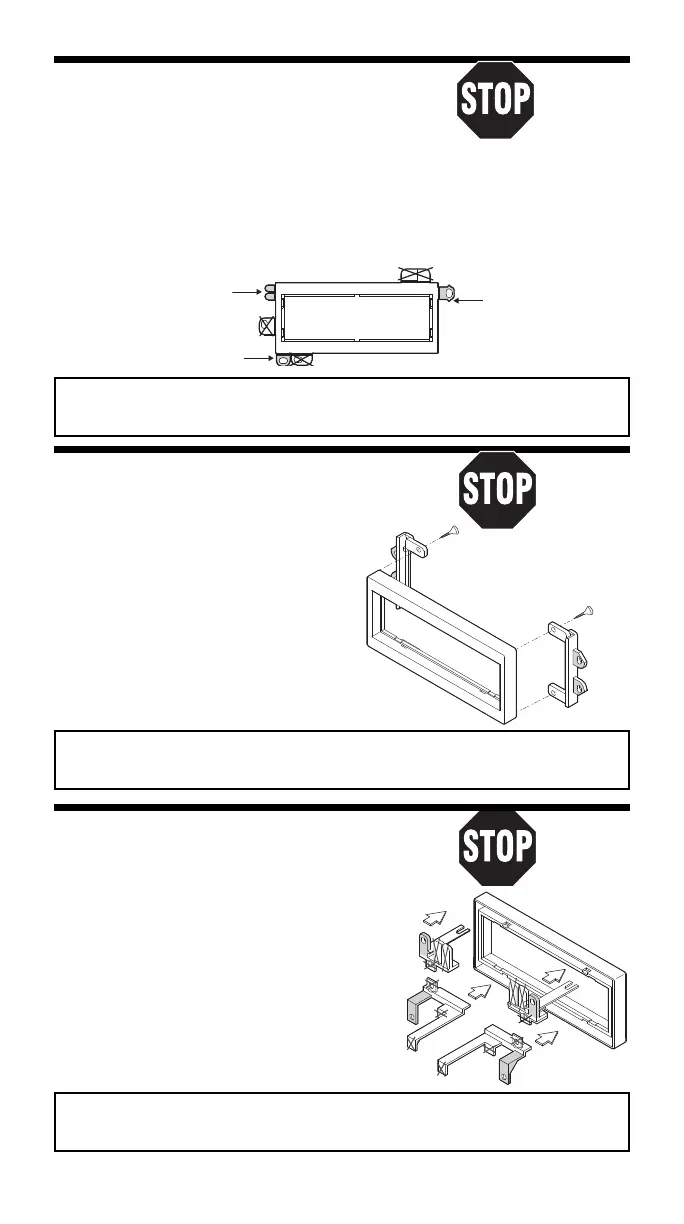
USE THESE SUPPORT
#2190 PANEL
TABS AS REQUIRED
Usar tantas de estas
pestañas como sea
necesario
USE THIS BRACKET
Usar este braquete
REMOVE ALIGNMENT
PIN - BOTTOM
Sacar la clavija de
alineamiento - Inferior
Read pages 2-4
for kit assembly.
USE THE SHADED MOUNTING TABS AND THE INDICATED BRACKETS. CUT OFF THE REMAINING TABS
AND DISCARD. FOR DIN ISO INSTALLATION, SEE PAGE 4.
Usar las pestañas sombreadas y los braquetes indicados. Cortar las pestañas restantes y descartarlas.
Para la instalación de radios DIN ISO ver la página 4.
USE THE SHADED MOUNTING TABS AND THE INDICATED BRACKETS. CUT OFF THE REMAINING TABS
AND DISCARD. FOR DIN ISO INSTALLATION, SEE PAGE 4.
Usar las pestañas sombreadas y los braquetes indicados. Cortar las pestañas restantes y descartarlas.
Para la instalación de radios DIN ISO ver la página 4.
SECURE THE BRACKETS TO THE BOSSES LOCATED
ON THE BACK SIDE OF THE KIT WITH THE SUPPLIED
HARDWARE. SEE PAGE 3.
Asegurar los braquetes en sus ranuras en la parte
posterior del juego usando los tornillos autoenroscantes
provistos. Ver la página 3.
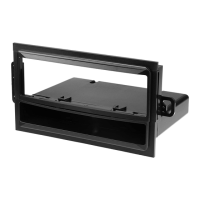
1985-91 Ford Aerostar
RADIO REMOVAL:
1. Remove two screws from the bottom edge of the radio trim panel.
2. Pull down two snaps above the air-conditioning
outlet vents and remove the radio trim panel.
3. Pull out the radio. Remove four screws from the
radio mounting bracket; disconnect the wiring,
and remove the radio.
1980-86 Ford Bronco - Pickup
RADIO REMOVAL:
1. Remove knobs from radio when vehicle is equipped with a radio.
2. Remove two screws from the top of the radio panel. Pull the top out
and up to release the tabs on the bottom of the panel.
3. Remove four screws from the radio mounting bracket.
Remove the assembly.
4. Disconnect the power, antenna, and all speaker
and electrical connections.
NOTE: INSTALLATION OF A DIN UNIT MAY REQUIRE
DASH MODIFICATIONS.
NOTA: La instalación de una unidad DIN puede requerir
modificar el tablero del vehículo.
SECURE THE BRACKETS TO THE BOSSES LOCATED ON THE BACK
SIDE OF THE KIT WITH THE SUPPLIED HARDWARE. SEE PAGE 3.
Asegurar los braquetes en sus ranuras en la parte posterior del juego
usando los tornillos autoenroscantes provistos. Ver la página 3.
Read pages 2-4
for kit assembly.
USE THE SHADED MOUNTING TABS AND THE INDICATED BRACKETS. CUT OFF THE REMAINING TABS
AND DISCARD. FOR DIN ISO INSTALLATION, SEE PAGE 4.
Usar las pestañas sombreadas y los braquetes indicados. Cortar las pestañas restantes y descartarlas.
Para la instalación de radios DIN ISO ver la página 4.
17
 Loading...