12 scott-sports.com 13
GAMBLER
BIKE OWNER’S MANUAL
BASIC SET-UP OF REBOUND
“Rebound” describes the speed the shock comes back to its original length after
absorbing an obstacle.
By using the red rebound screw you can adjust the rebound step by step.
Please refer to the following instruction:
Ride your bike off a pavement (remain in the saddle) and check how many times it
bounces.
1. if it bounces 1-2 times, the set up is good.
2. If it bounces more than 3 times the rebound is too fast. Turn the screw 1-2 “clicks”
clockwise
3. If it does not bounce the rebound is too slow. Turn the screw 1-2 “clicks” counter
clockwise.
Important:
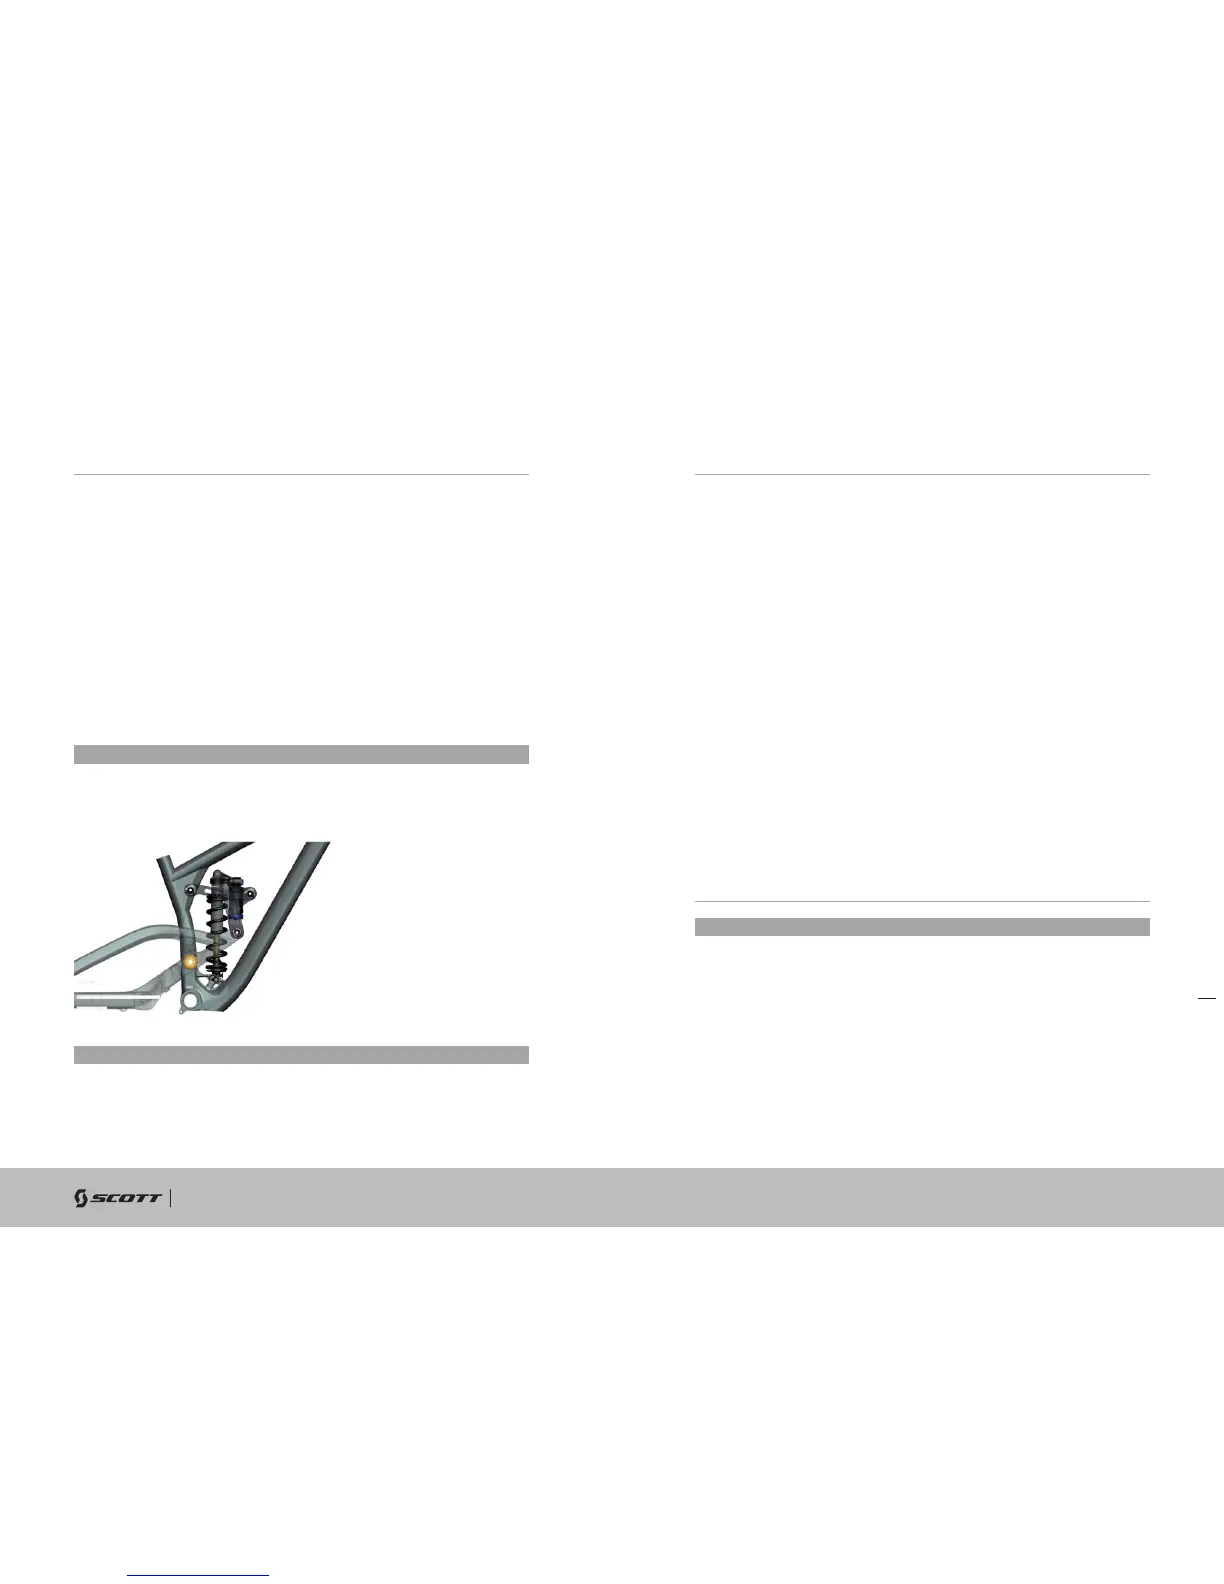
Note that you have to mount the rear shock always as shown underneath.
Mounting the rear shock in a different position can cause severe damages to the
frame, the linkage levers and the rear shock.
Important:
After a dismantlement of the rear shock, both fixing bolts should be tightened with a
tightening torque of 35Nm/308in-lbs.
If this is not done correctly the rear shock can be damaged.
SET-UP OF OTHER SHOCK MODELS
SCOTT strongly recommends using only the originally specified shock with the
Gambler bike, as we have chosen carefully both parts for a perfect matching
combination.
If you want to use a different rear shock model than the one originally on the bike,
please make sure that the shock will not in any position hit the frame and cause a
damage to the frame.
Please follow the instruction below:
Please make sure that the rear shock or its accessory parts do not touch the frame
when mounting or suspending.
For doing so release the air/remove the coil, install the shock and compress the shock
completely.
If the shock touches the frame while doing so, do not use this shock in order to avoid
damage to frame, swingarm or shock!
ADJUSTMENT OF SEATPOST-HEIGHT
Important:
The seatpost has to be inserted into the seattube at a minimum of 80mm.
Never use another seatpost diameter than 31.6mm or try to use a shim/reducer
between seatpost and frame.
ENGLISH