• 1 •
..
Rubber
Belt
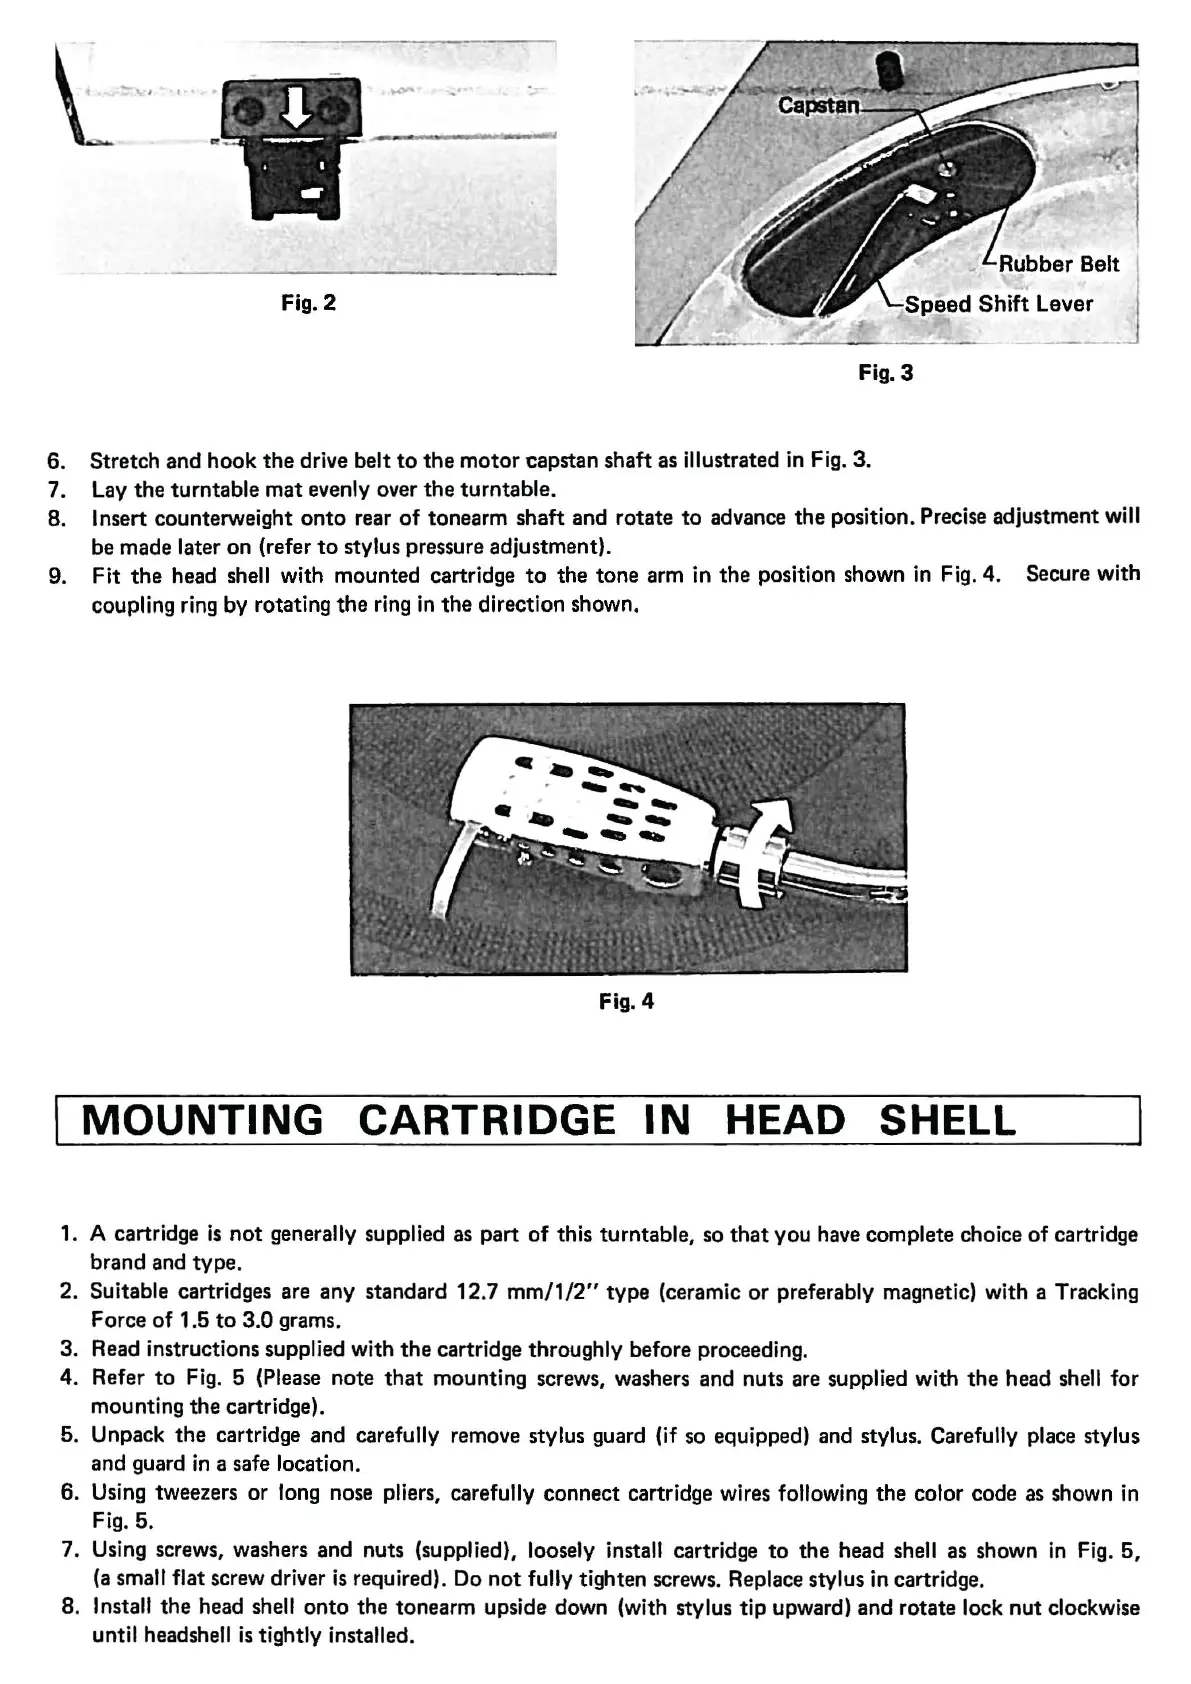
Fig. 2
......._
_
__
____
_
__
s_p_e_e_d_Shift Levej
Fig. 3
6. Stretch
and
hook
the
drive belt
to
the
motor
capstan shaft as illustrated in Fig. 3.
7. Lay
the
turntable
mat
evenly over
the
turntable.
8.
Insert counterweight
onto
rear
of
tonearm
shaft
and rotate
to
advance
the
position. Precise adjustment will
be made later on (refer
to
stylus pressure adjustment).
9.
Fit
the
head shell with mounted cartridge
to
the
tone
arm in
the
position shown in Fig.
4.
Secure with
coupling ring by rotating
the
ring in
the
direction shown.
Fig.
4
MOUNTING
CARTRIDGE
IN
HEAD SHELL
1. A cartridge
is
not
generally supplied as
part
of
this turntable, so
that
you have complete choice
of
cartridge
brand and
type.
2. Suitable cartridges are
any
standard
12
.7
mm/1/2"
type
(ceramic
or
preferably magnetic) with a Tracking
Force
of
1.5
to
3.0
grams.
3.
Read instructions supplied with
the
cartridge throughly before proceeding.
4.
Refer
to
Fig. 5 (Please
note
that
mounting screws, washers and nuts are supplied with
the
head she
ll
for
mounting
the
cartridge).
5.
Unpack
the
cartridge and carefully remove stylus guard (if so equipped) and stylus. Carefully place stylus
and guard
in
a safe location.
6.
Using tweezers
or
long nose pliers, carefully
connect
cartridge wires following
the
color code as shown in
Fig. 5.
7.
Using screws, washers
and
nuts (supplied), loosely install cartridge
to
the
head shell as shown in Fig. 5,
(a
small flat screw driver
is
required). Do
not
fully tighten screws. Replace stylus in cartridge.
8.
Install
the
head shell
onto
the
tonearm upside down (with stylus
tip
upward)
and
rotate lock
nut
clockwise
until headshell
is
tightly installed.
 Loading...