Page 11 of 36
P/N 595225-01 Rev C 4/12
CAUTION
HAND TIGHTEN ONLY. TIGHTENING WITH
A WRENCH MAY CAUSE DAMAGE TO THE
COUPLING GASKET.
4. Verifythatthereplacementcylinderisfullandhasacurrenthydrostatictest
date and is free of damage as described in the CYLINDER INSPECTION
section of this instruction.
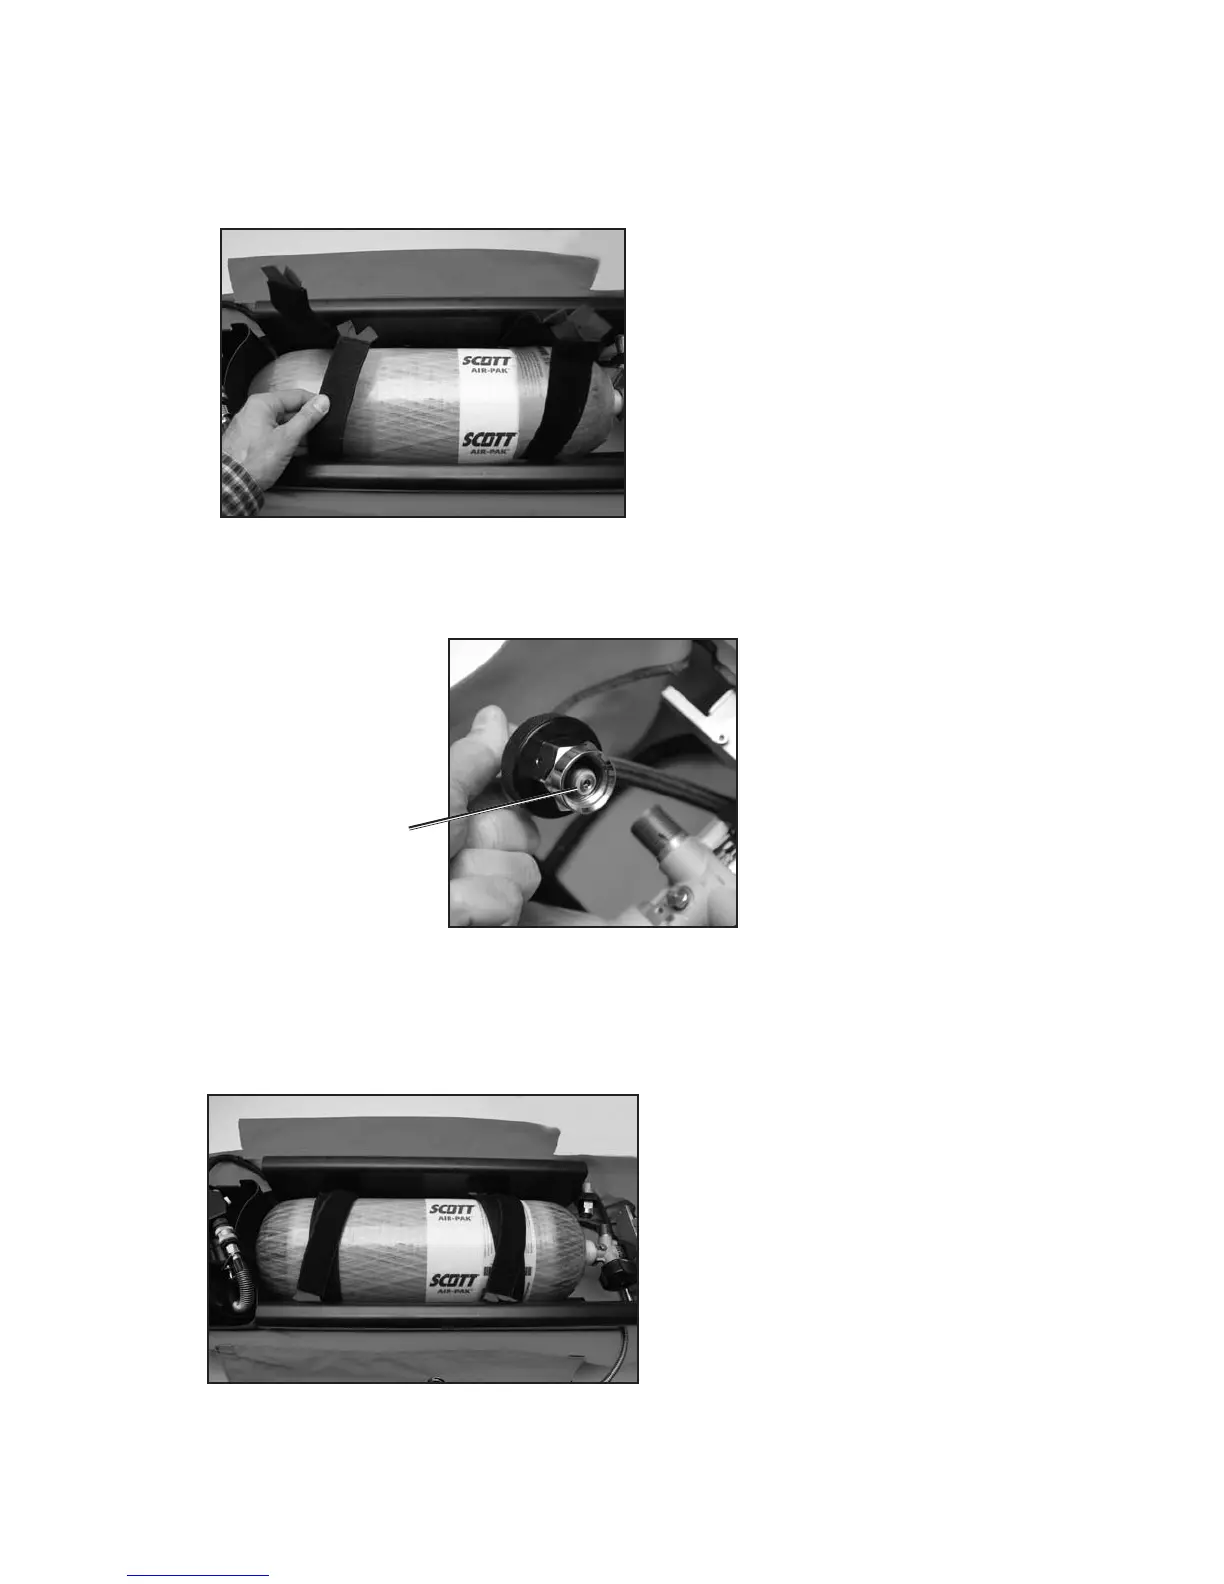
5. Fitthecylinder into the cylindercompartmentoverthecylinderstrapsand
with the cylinder valve next to the pressure reducer. See FIGURE 8. Pull up
on each cylinder strap to ensure that they are not twisted or trapped under
the cylinder.
FIGURE 8
FIGURE 10
6. Rotate the cylinder in the bag to align the cylinder valve with the cou-
pling on the airline assembly.
7. Checktoensurethecylindercouplingiscleanandfreefromdirt.
8. Check to ensure the coupling
gasket is not damaged. See
FIGURE 9.
9. Check to ensure the cylinder valve
outlet is clean and free from dirt.
10. Thread the cylinder coupling clockwise onto the cylinder valve. The coupling
must be hand tightened to the cylinder valve outlet. Wrenches shall not be
used as damage to the coupling gasket may result.
11. Pull the straps around the cylinder snug and secure the hook-and-loop fas-
teners. Each pair of straps is made up of one that is all “hook” and the other
that is all “loop” so it does not matter which half goes on top in each pair.
See FIGURE 10.
Before placing the RIT-PAK III portable air supply into service, perform a REGULAR
OPERATIONAL INSPECTION as described in this instruction.
The removed cylinder shall be inspected and refilled by authorized personnel. For
more information, contact your authorized SCOTT distributor or call SCOTT Safety
at1-800-247-7257.
FIGURE 9
COUPLING
GASKET
 Loading...