SECTION 3:
READING THE VEHICLE INFORMATION
POWERING UP THE BDX
1. Using the provided HDMI/OBDII Cable from section 1, plug the
BDX device into the vehicle’s OBDII Port commonly found within
24” of the steering column under the driver’s side dash.
READING THE VEHICLE’S INFORMATION
1. At this point, the key should be in the ignition, but in the OFF
position until prompted to turn key ON/RUN position.
2. From the Main Menu, select Program Vehicle.
3. Processing Data: The BDX
is now reading your
vehicle information.
4. Updates: Internet Required.
In order to install the most
up-to-date files the BDX now
requires internet
access. You can access
these files via two
methods found
in Section 4.
SECTION 4:
THREE METHODS FOR UPDATING THE BDX
METHOD #1: UPDATING VIA WIFI
INSIDE THE VEHICLE
1. Select Continue from the Internet
Required screen.
2. Select the WiFi network you would
like to connect to. Use the middle
button to confirm your selection.
3. Enter the network pass code using
the arrow keys and the middle
button to select.
4. Confirm the WiFi settings and
select Continue.
METHOD #2: UPDATING VIA WIFI USING USB POWER
1. Plug the BDX into a computer or wall charger using the provided
Micro USB Cable.
2. Select “Program Vehicle” from the main menu .
3. “Vehicle Updates” select “Confirm”.
4. “Device Updates” select “Continue”.
5. “Internet Required” select “Continue”.
6. Follow on screen instruction to set up WiFi.
7. Follow on screen prompts until the “Up-To-Date” screen.
8. Unplug and return to the vehicle .
METHOD #3: UPDATING USING UPDATER SOFTWARE
1. Go to: sctflash.com and click on the “Support” tab at the top
of the page.
2. Locate and click the "BDX" option and then select "Downloads".
You will see "Download Now" under the "Updater" section. Click
"Download Now" to begin downloading and installing updater
on your computer.
3. Wait for that program to download, then double click and “Run”
the SCTDeviceUpdater.exe file if it does not open automatically.
4. Follow the on-screen directions of the Device Update Software
Installer until it allows you to click “Finish”.
5. Connect your BDX to your Windows™ based PC using the
provided Micro USB™ cable.
We do not offer support for Apple computers at this time.
6. Double click and open the Device Updater Software.
7. Click “Automatically Check for Updates”.
8. Confirm the update by pressing the “Update” button. The update
will now begin.
9. Let the updater run until it says “Your device is now up to date".
10. Unplug the BDX from your computer and proceed to Section 5.
SECTION 1:
PARTS & CHECKLIST
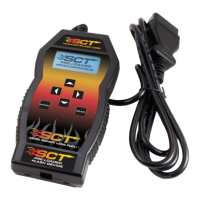
BDX DEVICE MICRO USB™ CABLE
HDMI/OBD II CABLE
QUICK START GUIDE
SECTION 5:
TUNING THE VEHICLE
1. Cloud Check – If your dealer has
sent you a custom tune using
the cloud select “continue” to
download the custom tune. If not
select “Skip” and follow prompts.
2. Select your tune from the
following menu items:
Pre-Loaded Tune Files
Preloaded SCT tunes for use
on stock vehicles only.
Custom Tune
Custom Tuning Dealer files, if there are any on the device.
Return to Stock
Restore original factory file to vehicle.
3. Highlight the tune you wish to use and select confirm.
4. Read and acknowledge the
street use notice.
5. Depending on your vehicle there
may be further parameters you
can change under "Additional
Tune Option". Select "Change"
to view the available options
or "S kip" to continue with
downloading the tune only.
6. The Tune and any Additional
Tune Options will now be
installed. Follow the on-screen
directions to finish the process.
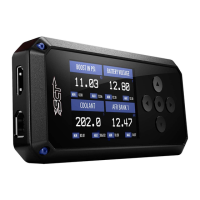
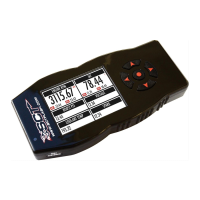
MAIN MENU
PROGRAM VEHICLE
GAUGES / DATA LOG
VEHICLE FUNCTIONS
VEHICLE INFO
DEVICE INFO
DEVICE SETTINGS
PROGRAM VEHICLE
UPDATE REQUIRED
Update required. Please check
for updates
EXIT CONTINUE
PROGRAM VEHICLE
STREET USE NOTICE
This device is NOT LEGAL for
sale or use in California on
any pollution controlled
motor vehicles.
Press CONTINUE to start
programming.
EXIT CONTINUE
NOTE: Unplug the BDX from your computer before proceeding.
SECTION 6:
LOADING CUSTOM TUNES
The BDX is capable of having custom tune files sent over the Cloud straight to the device from a Custom Tuning Dealer. If your Custom Tuning Dealer
has chosen to email your file, you can load them onto the device using the Device Updater software.
1. From your e-mail, save your Custom Tunes
(.cef files) to your computer’s Desktop.
2. Open the Updater software and click
the Load Custom Tune File button.
3. Click Browse and locate your custom tunes
on your Desktop. Alternatively, you can also
click Locate Custom Tunes.
4. Highlight the Tune you wish to load. The tune
you selected should move to the Available
Tunes section.
5. Select the listed tune in the Available Tunes
section, then click the >> button to move the
selected tune to the On Device section.
6. Highlight the tune under the On Device
section, then click program. Tunes can only
be loaded one at a time. Repeat steps 3-7
for each tune, the device can hold up to ten
custom tunes.
2.
4.
3.
7.
6.
NOTE: During the installation the
BDX will be paired to your (One)
vehicle. Once paired, there is an
unlock fee to un-pair the device
from your vehicle in order to install
it on another vehicle.
NOTE: Custom Tunes are built by SCT's network of
Custom Tuning Dealers and any questions related to them
need to be directed toward the tuning dealer.
NOTE: Make sure the "Updater Software" from Section 4 Has been completed before proceeding with Section 6.
NOTE: Please make sure that all stock electronics are turned off and disconnect any aftermarket electronics as well.
NOTE: To edit the name of the file as it appears on your device, you must highlight the file after transferring the file to the
On Device section of Updater. Next to Edit Name, change the name of the file here. Select Save, then Program.
EXIT CONFIRM
VEHICLE LICENSE
This BDX is not paired.
Select CONFIRM to pair your
BDX to this vehicle.
407-774-2447 | WWW.SCTFLASH.COM
SECTION 2:
PRE-INSTALL CHECKLIST
INTERNET ACCESS
During the installation process you will need to connect the
BDX to the Internet using the built-in WiFi.
ALLOW TIME FOR INITIAL SETUP
Make sure you allow up to 30 minutes to complete the
initial setup and installation process.
NEED FURTHER SUPPORT?
Technical Support is available Monday to Friday, between
9 A.M. and 6 P.M. Eastern Standard Time, and can be
contacted via phone at (407) 774-2447 or live chat at
www.sctflash.com. Please have your BDX with you when
contacting Technical Support.