__________________ Quickwash
Plus
1
6.0 MEASUREMENT GUIDE
We have included a 7-1/2 inch square and 10-inch square plastic template
for you
to use as a guide for cutting and marking your samples. The 7-1/2
inch template has 5-inch holes for easy marking of the fabric. The 10-inch
square template can be used to cut 10-inch samples on the bios and marked
with 10 inch marks from point to point. This is only a guide as we have found
this size sample works very well in
the Quickwash unit. Some heavier and
stiffer types of fabric, such as denim, work better if cut in a 6" square on the
bios with the 5" marks running from point to point
on the bios cut to give actual
length and width data.
If you do not want to use the template to mark your samples, then once the
samples are cut to size, just lay the ruler on the fabric and place 5" marks in the
length and width direction. After the sample has been washed, use the ruler to
read the
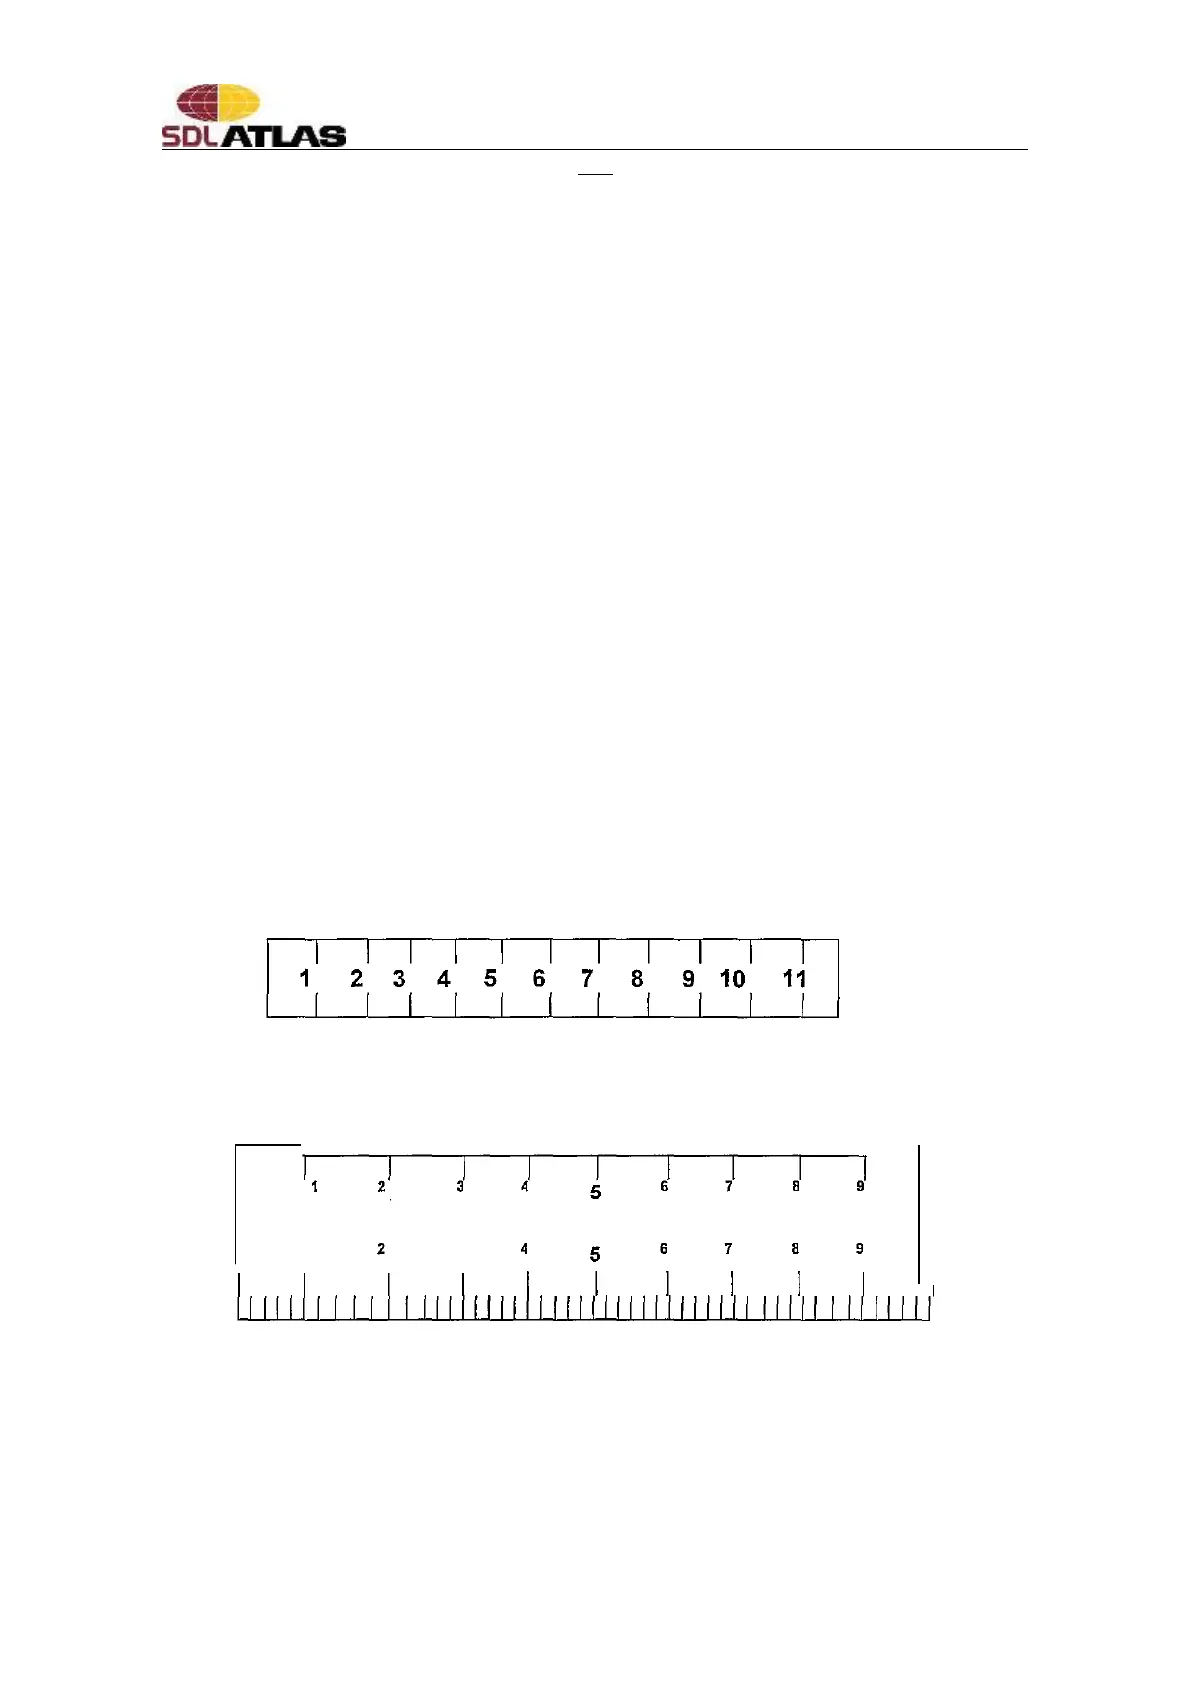
percent (%) Dimensional Change (shrinkage) in the following way.
Refer to Figure 1 and place the ruler with the 5" spot on the ruler directly in the
middle of the right hand mark on the washed fabric. Now look at where the left-
hand mark on the fabric intersects the ruler. In this example, it is a 3.6 on the
ruler. Now double this value (7.2) to read the percent shrinkage and then repeat
in the other direction on the fabric.
Figure #1
•
•
Blow up View,
•
Exhibit A
 Loading...