WARNING! YOU MUST FOLLOW THE SAFETY INSTRUCTIONS
5. CHARGING INSTRUCTIONS
5.1. INTIAL CHARGING OF THE ROADSTART UNIT
NOTE: This product may arrive partially charged. The unit must be fully charged immediately after purchase and before using for
thersttime.
5.1.1. TheunitshouldbechargedusingtheACchargersupplied(seeg.6)foraperiodof38hours.Subsequentchargesusing
the AC Charger should be for a period of 34 to 36 hours. Never charge the unit for more than 40 hours.
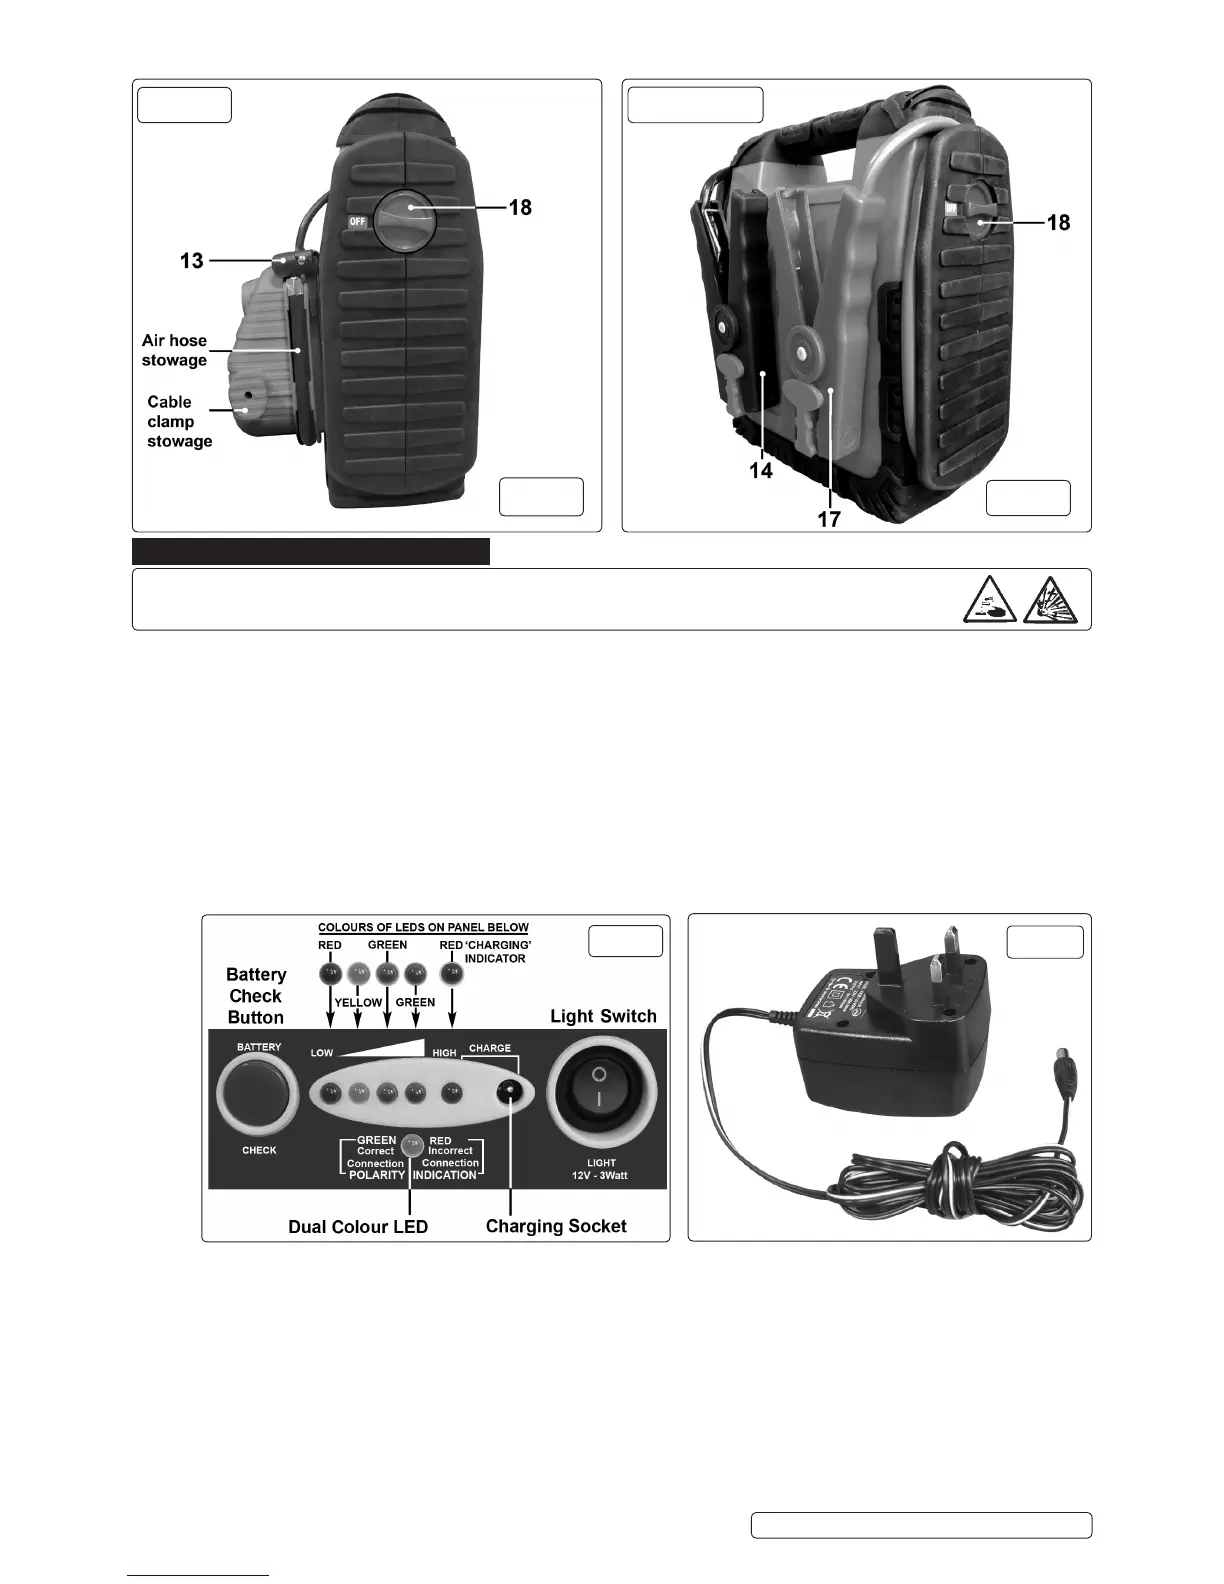
5.2. READINGTHELEDPOWERLEVELINDICATORSSeeg.5
5.2.1. The charge level of the unit during use can be seen at any time by pressing the Battery Check Button and noting which power level
lights that are illuminated.
5.2.2. When both green LEDs are illuminated the unit is fully charged and is ready to be used for starting a vehicle.
5.2.3. If only one green LED is illuminated the unit is partially discharged but can be used to operate most 12 volt accessories.
5.2.4. If only the yellow LED is illuminated the power level is low and only a short operating time remains. The unit should be recharged
as soon as practical.
5.2.5. If there is only one red light illuminated the unit cannot be used and must be recharged immediately.
5.2.6. To gain an accurate reading of battery status, press the Battery Check Button.
5.3. RECHARGING WITH THE AC CHARGING ADAPTOR
Note:Onlychargewiththeadaptorsuppliedwithyourspecicmodel.Chargingadaptorsarenotinterchangeable.
5.3.1. Ensurethebatteryclampsaresecurelyattachedtotheclampingbarsontheunitasshownings.2&4.Turnthesafetyswitchon
thesideoftheunittoOFFasshownings.3&4.
5.3.2. PlugtheACchargercableintothechargingsocketonthefrontcontrolpanel.Seeg.5.
5.3.3. Plugthechargeritselfintoany230VoltACwalloutlet.Thered‘Charging’indicatorwillilluminate,seeg.5.Chargingwillnow
commence but the charge level must be regularly monitored to prevent overcharging. Monitor the charge by pressing the
Battery Check Button.
5.3.4. Charging a unit with a very low charge (i.e.showing 1 red LED only) should take 34 to 36 hours. When the two green charge
indicators are illuminated the unit is fully charged and the charger should be disconnected from the unit and from the AC supply.
5.4. RECHARGING WITH THE DC CHARGING CABLE
V IMPORTANT: Always ensure that the vehicle voltage matches the voltage of the Roadstart unit. Do not operate any of the units
functions during the charging process.
g.3
g.4
g.5
RS131.V3
RS132
RS131.V3 RS132 | Issue 5(I) 04/01/16
Original Language Version
© Jack Sealey Limited
g.6
 Loading...