16
SEASTAR Hydraulics
DC POWER STEERING UNIT
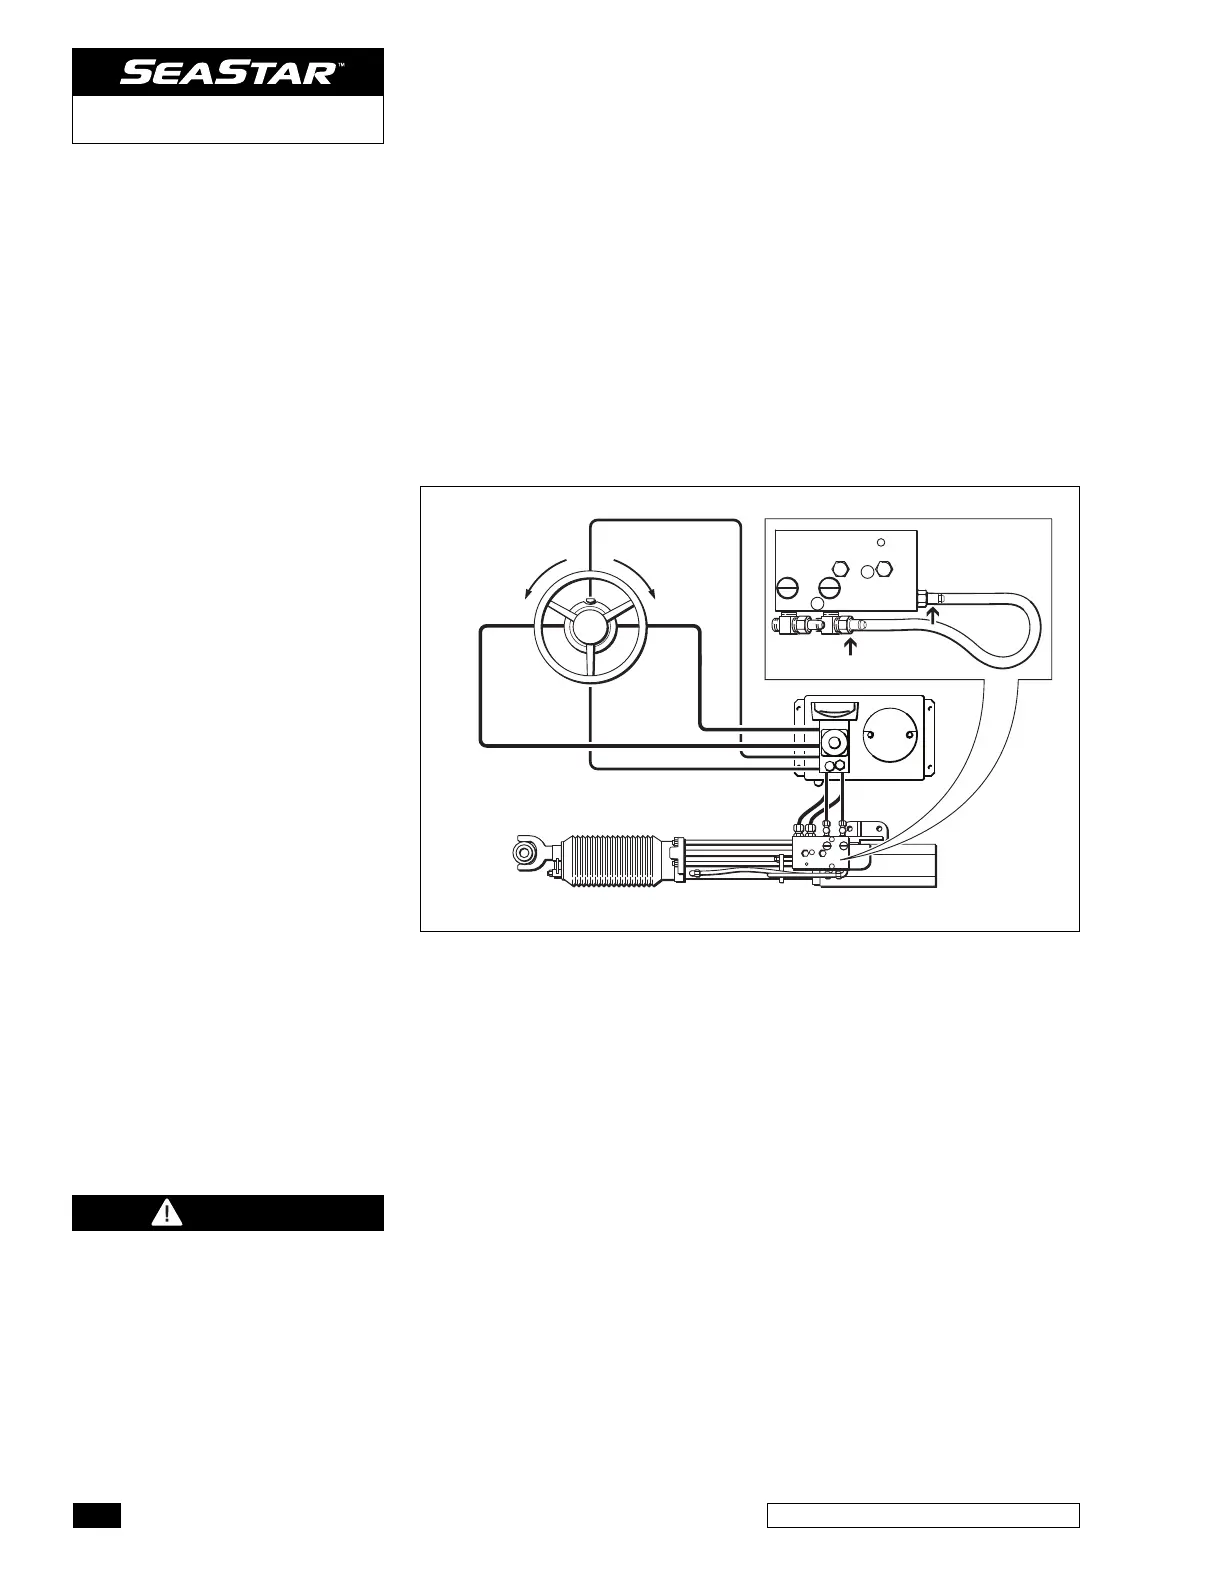
7 Referring to Table 1 and Figure 13 and starting at your highest
helm station, turn the wheel starboard (configuration A) or port
(configuration B) until cylinder is fully retracted. If cylinder is
already fully retracted, proceed to the next step.
8 Turn the wheel 10 turns in the opposite direction. The cylinder
may not move at this point, this is OK. Repeat, turning in the
same direction for each station from highest to lowest.
9 If equipped with an autopilot, jog the a/p controller in both
directions at this time.
TURN TO
PORT
TURN TO
STARBOARD
AB
AUXP AUXS
HP HS PRS TNK
Figure 14.
10 Close the cylinder bleed fittings. Remove the bleeder tube from
the HP bleeder tee and connect it to the HS bleeder tee on the
cylinder (Refer to Figure 14). Open bleed fittings 1/4 – 1/2 turn.
11 Referring to Table 1 and again starting at your highest helm
station,
turn the wheel port (configuration A) or starboard
(configuration B)
until cylinder is fully extended. If cylinder is
already fully extended, proceed to the next step.
12 Turn the wheel 10 turns in the opposite direction. The cylinder
may not move at this point, this is OK. Repeat, turning in the
same direction for each station from highest to lowest.
13 Repeat steps 7 through 11, 4 times or until no air can be
seen in the bleeder tube when the cylinder is taken to full
extension/retraction.
14 Close all the cylinder bleed fittings (torque to 15 ft-lb).
15 Close the purge valve completely. Torque to 80 in-lb.
Ensure purge valve is fully
closed and tightened to 80 in-lb
before operating vessel.
Failure to comply may lead to
loss of steering control causing
property damage and/or
personal injury or death.
WARNING