DiSEqC 1.1: 16 select 1 switch ( Require the user device
support DiSEqC1 .0 protocol) Equipment needs support
DiSEqC 1.1 protocol, Most control 16
LNB. Press to
select LNB1~LBN16/None.
LNB 1-LNB 16: Corresponding to a satellite, After select-
ing the corresponding list will appear in the satellite list.
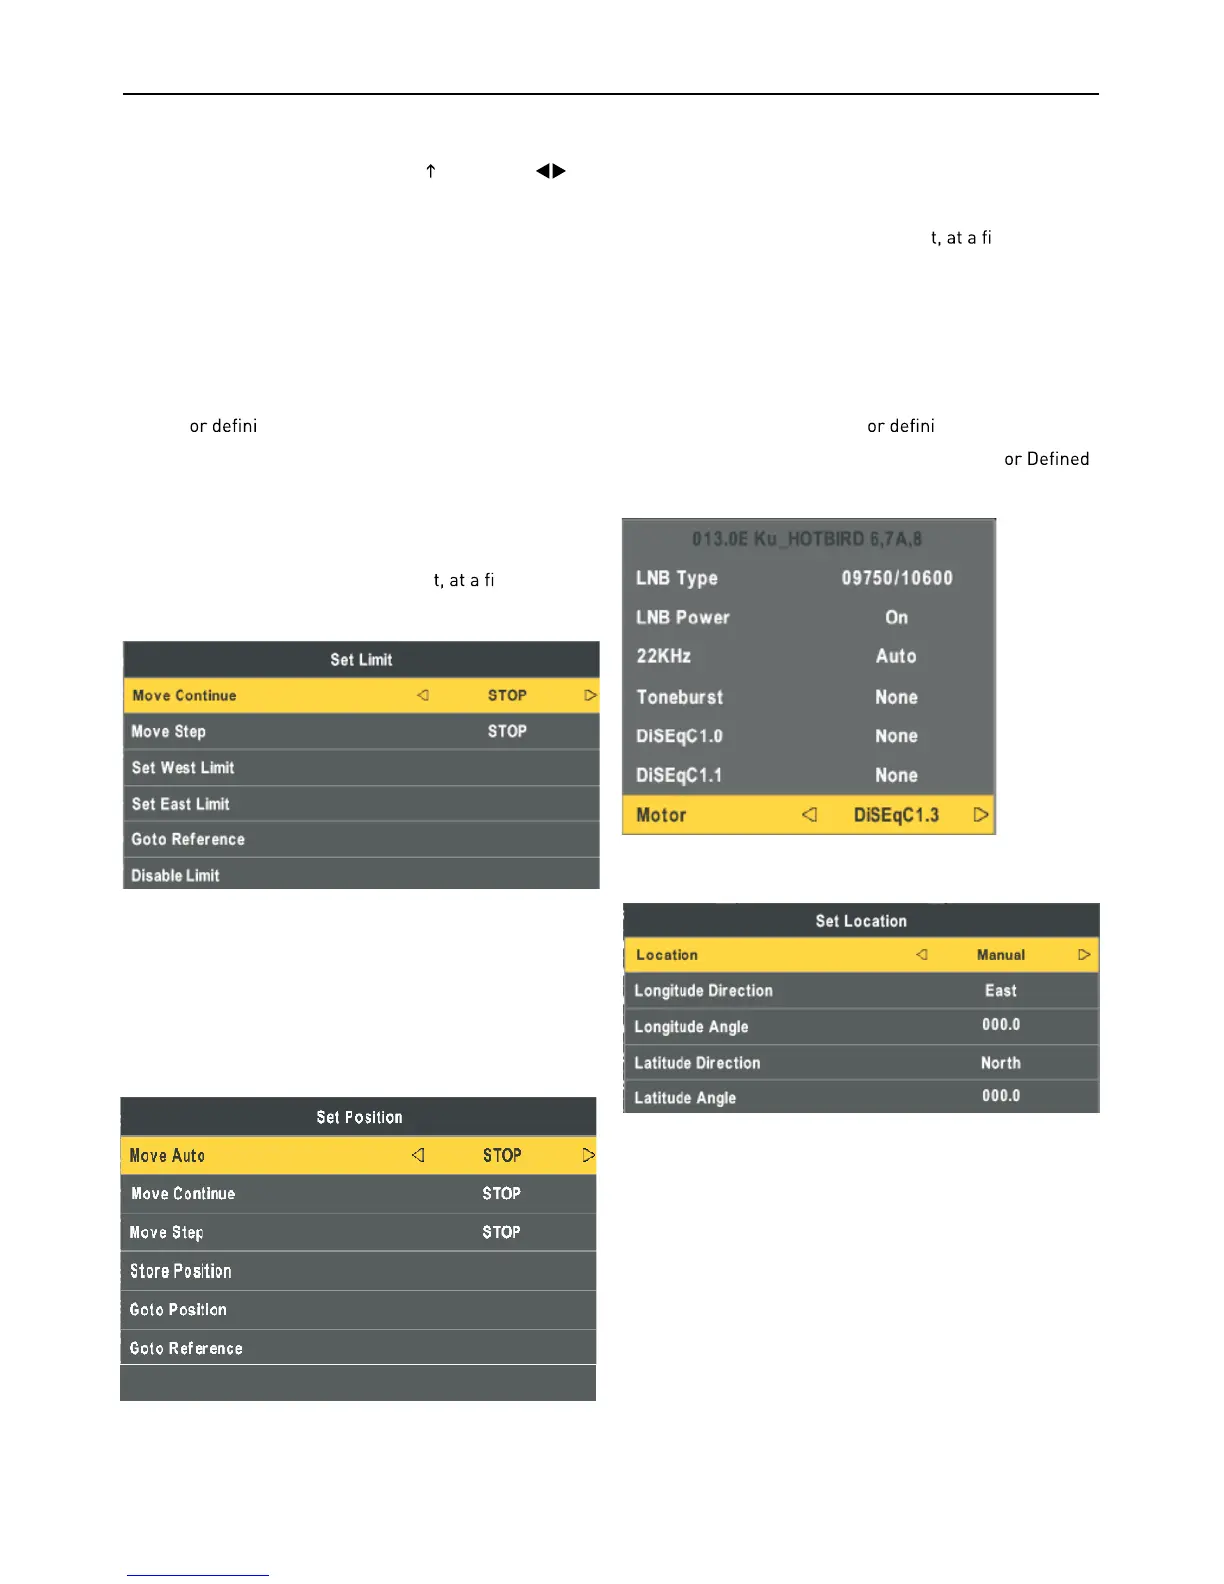
Motor: Control of multi-satellite polar (Require the user
device support DiSEqC1.2 or DiSEqC1.3 protocol), Left
and right buttons to select DiSEqC1.2/ DiSEqC1.3/None.
DiSEqC1.2: DiSEqC1.2 Protocol selection
DiSEqC1.3: DiSEqC1.3 Protocol selection
For Mot
te “DiSEqC1.2“ , Operating Instructions:
Press RED button to enter “Set Limit" menu.
Press OK button to enter Set Position menu.
Move Continue: Control of the east or the west continued
to turn the polar axis to the desired position.
Move Step: Control of the east or wes
xed polar
axis step rotation.
Set West Limit: The current position is set to the maxi-
mum point of the west.
Set East Limit: The current position is set to the maxi-
mum point of the east.
Goto Reference: Back to the default values.
Disable Limit: Abolish the current limit set.
Move Auto: East or west of Automatic Control continued
to turn the polar axis to the desired position.
Move Continue: Manual control of the east or the west
continued to turn the polar axis to the desired position.
Move Step: Control of the east or wes
xed polar
axis step rotation.
Store Position: Save the current rotation angle of polar
axis.
Goto Position: Control the polar angle automatically to
the previously saved.
Goto Reference: Control the angle of polar axis automati-
cally to the default. When Mot
te “DiSEqC1.3“.
P
ress RED button to enter “Set Limit“ and Mot
as “DiSEqC1.3“ “Set Limit’ menu same.
Press GREEN button to enter Set Location menu.
Location: Select the user area or similar areas, if the user
is not in the system default settings when in these areas,
can select Manual custom settings.
Longitude Direction: Select the user area in the east
longitude or longitude.
Longitude Angle: Longitude angle. Select the user area in
which the longitude, Enter the appropriate values to move
the cursor.
Latitude Direction: Select the user area in the latitude or
latitude.
Latitude Angle: Select the user latitude area, Enter the
appropriate values to move the cursor.
Press OK button to enter Set Position menu.
GotoX
 Loading...