Cal. 5M84A
10/21
TECHNICAL GUIDE
35 RECHARGEABLEBATTERYUNIT
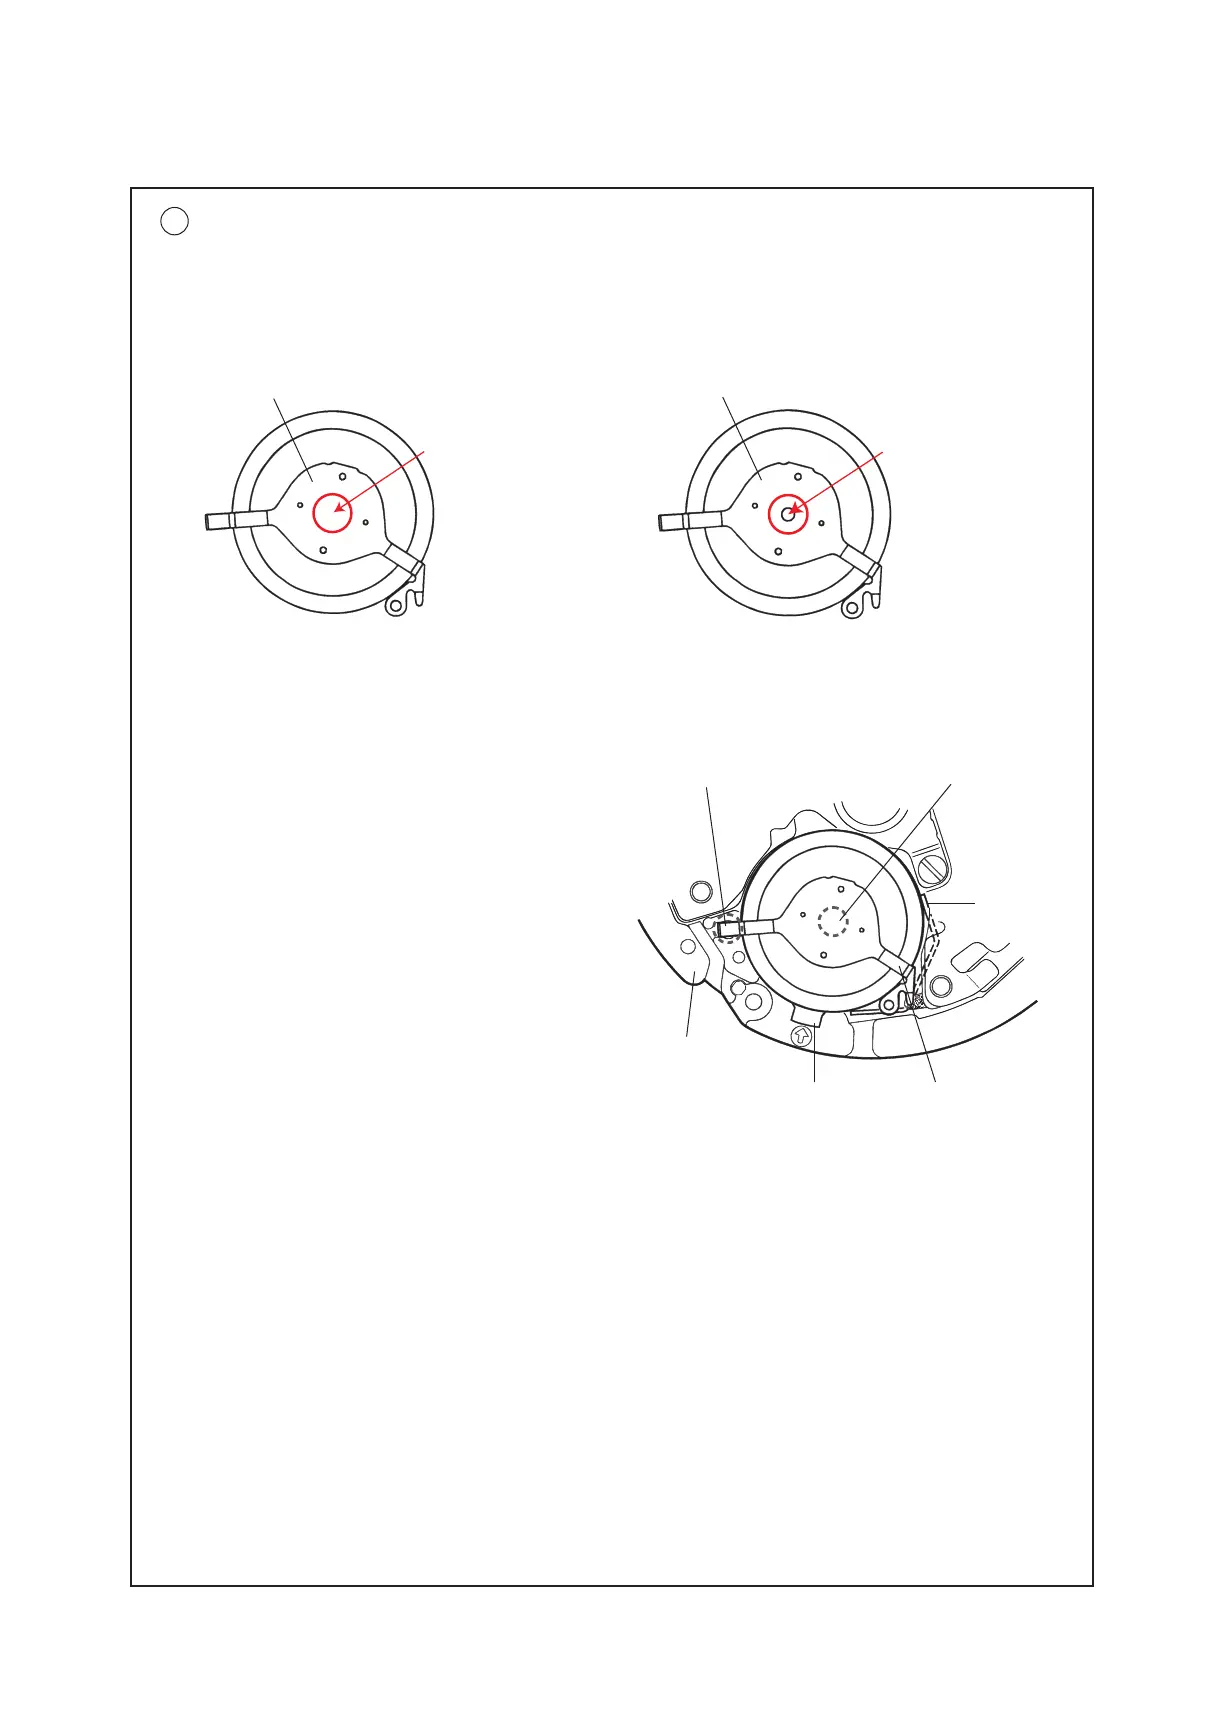
ThoughtheRECHARGEABLEBATTERYUNITforCal.5M8Seriesisofacompletelydifferentfrom
Cal.5M6Series,theyhaveacloseresemblanceinshape.Theycanbediscriminatedbytheshapes
oftheirminusleadterminalsasillustratedbelow.MakesuretouseappropriateRECHARGEABLE
BATTERYUNIT,inservicingbycheckingthis.
Minus lead terminal
[ RECHARGEABLE BATTERY UNIT
for Cal. 5M8 Series ]
• How to remove
Insertthetipoftweezersintothe“C”モportion
gapintheillustrationatright,andpryupthe
R E C H A R G E A B L E B AT T E R Y U N I T t o r e m o v e i t .
• How to install
Setthe“A“ portion of the minus lead terminal
totheholeofthemainplate,andpushthe
“B“ portion down vertically so that the
RECHARGEABLE BATTERY UNIT is well
seated in position.
Note: Takecarenottoshort-circuitthe(+)and
(-)terminals,asthiswilldeterioratethe
battery unit.
“A“ portion
Main plate
メ“C“ portion
Minus lead terminal
Rechargeable
battery plus
terminal
メ“B“ portion
Minus lead terminal
[ RECHARGEABLE BATTERY UNIT
for Cal. 5M6 Series ]
No hole With hole