7D** Technical Instruction
No.2
No. PROSESS ILLUSTRATIONS AND SPECIAL INSTRUCTIONS
Assembling the
switching unit
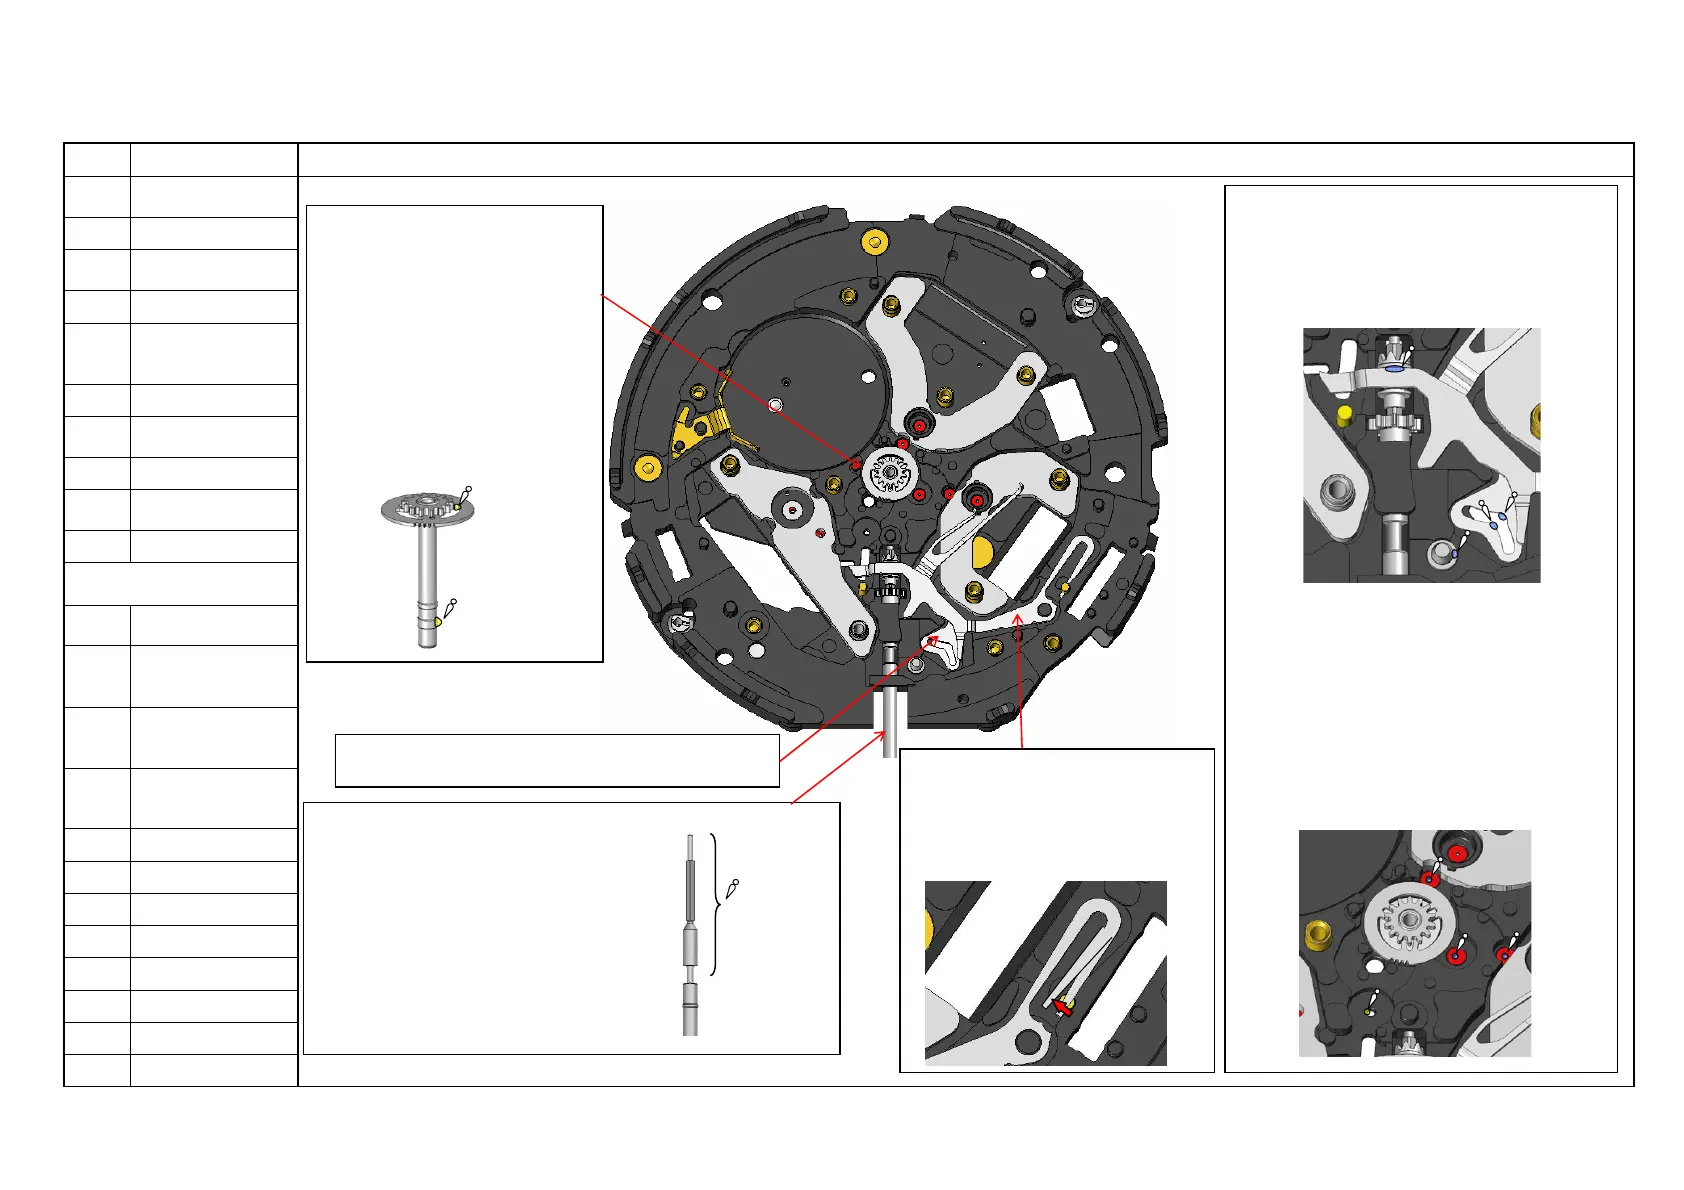
83
Set and lubricate
the winding stem.
↓
82
Set and lubricate
the center wheel &
pinion.
↓
81
Set the train wheel
setting lever.
↓
80
Set the yoke and
hook the arm of it.
↓
Lubricating points of the
switching unit-1
-Stem of the setting
lever
-Point of contact
between the yoke
and clutch wheel
-Lower pivots of the
wheels
(4#, 3#, 50#, 75#)
-Guiding slit of the
train wheel setting
lever
Lubricating points of the switching unit-1
1. Point of contact between the yoke and
clutch wheel
*Type of oil, oil quantity: A0-3III-1 (To prevent
parts from wearing)
2. Axes of the setting lever
*Type of oil, oil quantity: A0-3II-1
(To prevent parts from wearing)
3. Guiding slit of the train wheel setting lever
*Type of oil, oil quantity: A0-3I-2
(To prevent parts from wearing)
4. Lower pivots of the wheels
(4#, 3#, 50#, 75#)
*Type of oil, oil quantity: A0-3II-1
(To maintain good performance)
<81> Set the train wheel setting lever.
<83> Set and lubricate the winding stem.
*Type of oil, oil quantity: A0-3 Lubricate the
entire profile of the winding stem.
(To prevent parts from wearing)
*Securely install the winding stem, giving
it gentle rotations so that the flat face of
the winding stem will be engaged with
both the clutch wheel and the 1st
intermediate wheel for calendar corrector.
<82> Set and lubricate the center
wheel & pinion.
* Lubricating point: convex part
(Refer to the illustration below.)
*Type of oil, oil quantity: A0-3II-1
(To prevent parts from wearing)
*Lubricating point: inner edge of
the ring (Refer to the illustration
below.)
*Type of oil, oil quantity: A0-3II-1
(To prevent parts from wearing)
<80> Set the yoke and hook the
arm of it.
Securely set the arm of the yoke
inside the pin, taking care not to
deform or damage the yoke.
1
3
2
4#
3#
75#
50#
Lubricating
area