7D56A Technical Guide
No. 11
No. PROCESS
ILLUSTRATIONS AND SPECIAL INSTRUCTIONS
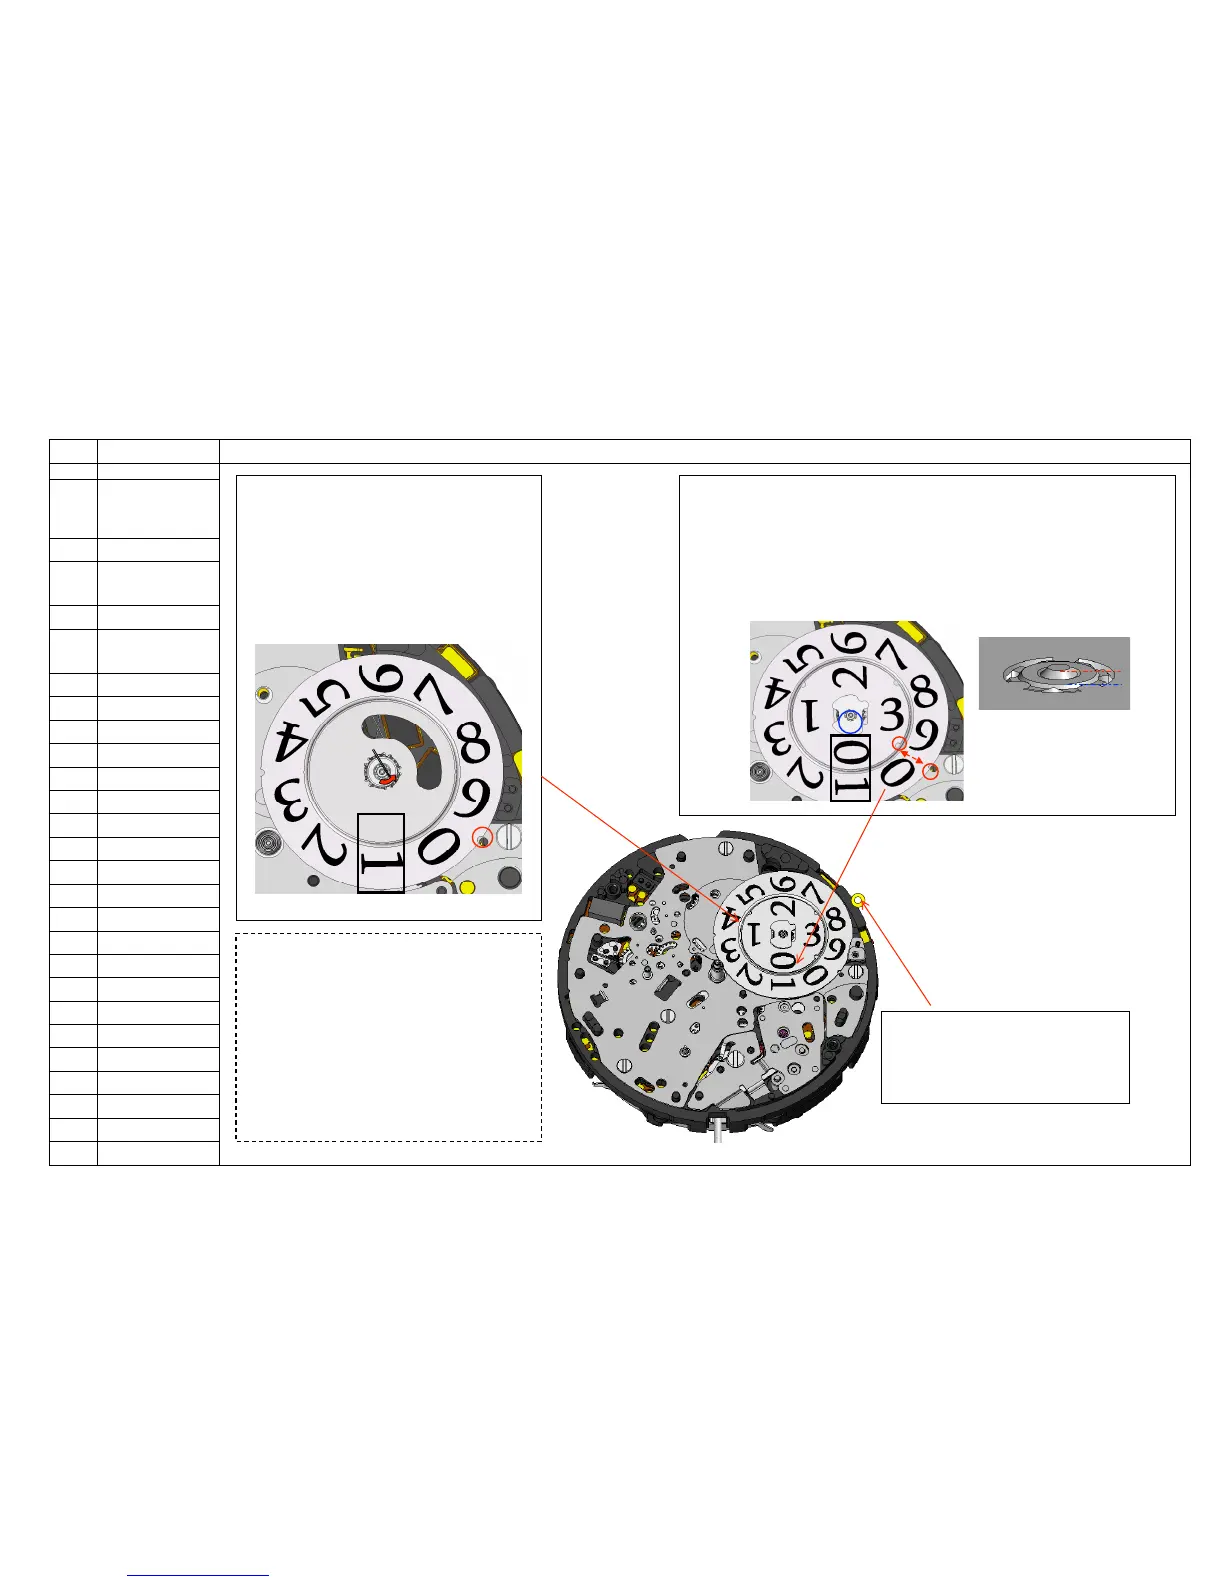
◆Remarks on handling the date dials
*Extra attention must be paid when handling
The date dials. Scratches or stains on the
Printed sides may cause malfunction.
*When removing the date dial for ten’s digit,
Insert a tool from the “2”direction of the date dial
for ten’s digit and from the directions other than
the “6”,”7”,”8”or “9”of the date dial for units digit,
and then remove the date dial for ten’s digit. (To
prevent any scratches to the backside, and
damages to parts.)
<10> Assemble the DATE DISK FOR UNIT’S
DIGIT and secure the jumper to it.
*Set “1” at the position of the date display, and
then align the notch of the disk and a hole of the
bridge. (See the illustration and Fig. 11-1).
*Push the jumper outwards to secure it to the
teeth of the wheel assembled to the backside of
the disk. (see Fig.11-1)
<8> Assemble the DATE DISK
HOLDER
*Assemble the holder with the gilt circle
<9> Assemble the DATE DISK FOR TEN`S DIGIT.
Set “0” at the position of the date display, and then align its notch of the
unit’s digit date and the bridge (see Fig.11-2).
Press the guide of the disk straight down to the same level of the upper
end of the pinion (see Fig.11-3).
Do not press too strong so as to prevent friction between the two date
disks.
Guide of the DATE
DISK FOR TEN’S
DIGIT.
Fig.11-2
Fig.11-3