7D56A Technical Guide
No. 10
PROCESS
ILLUSTRATIONS AND SPECIAL INSTRUCTIONS
Check the
alignments of
wheels before
assembling the
train bridge.
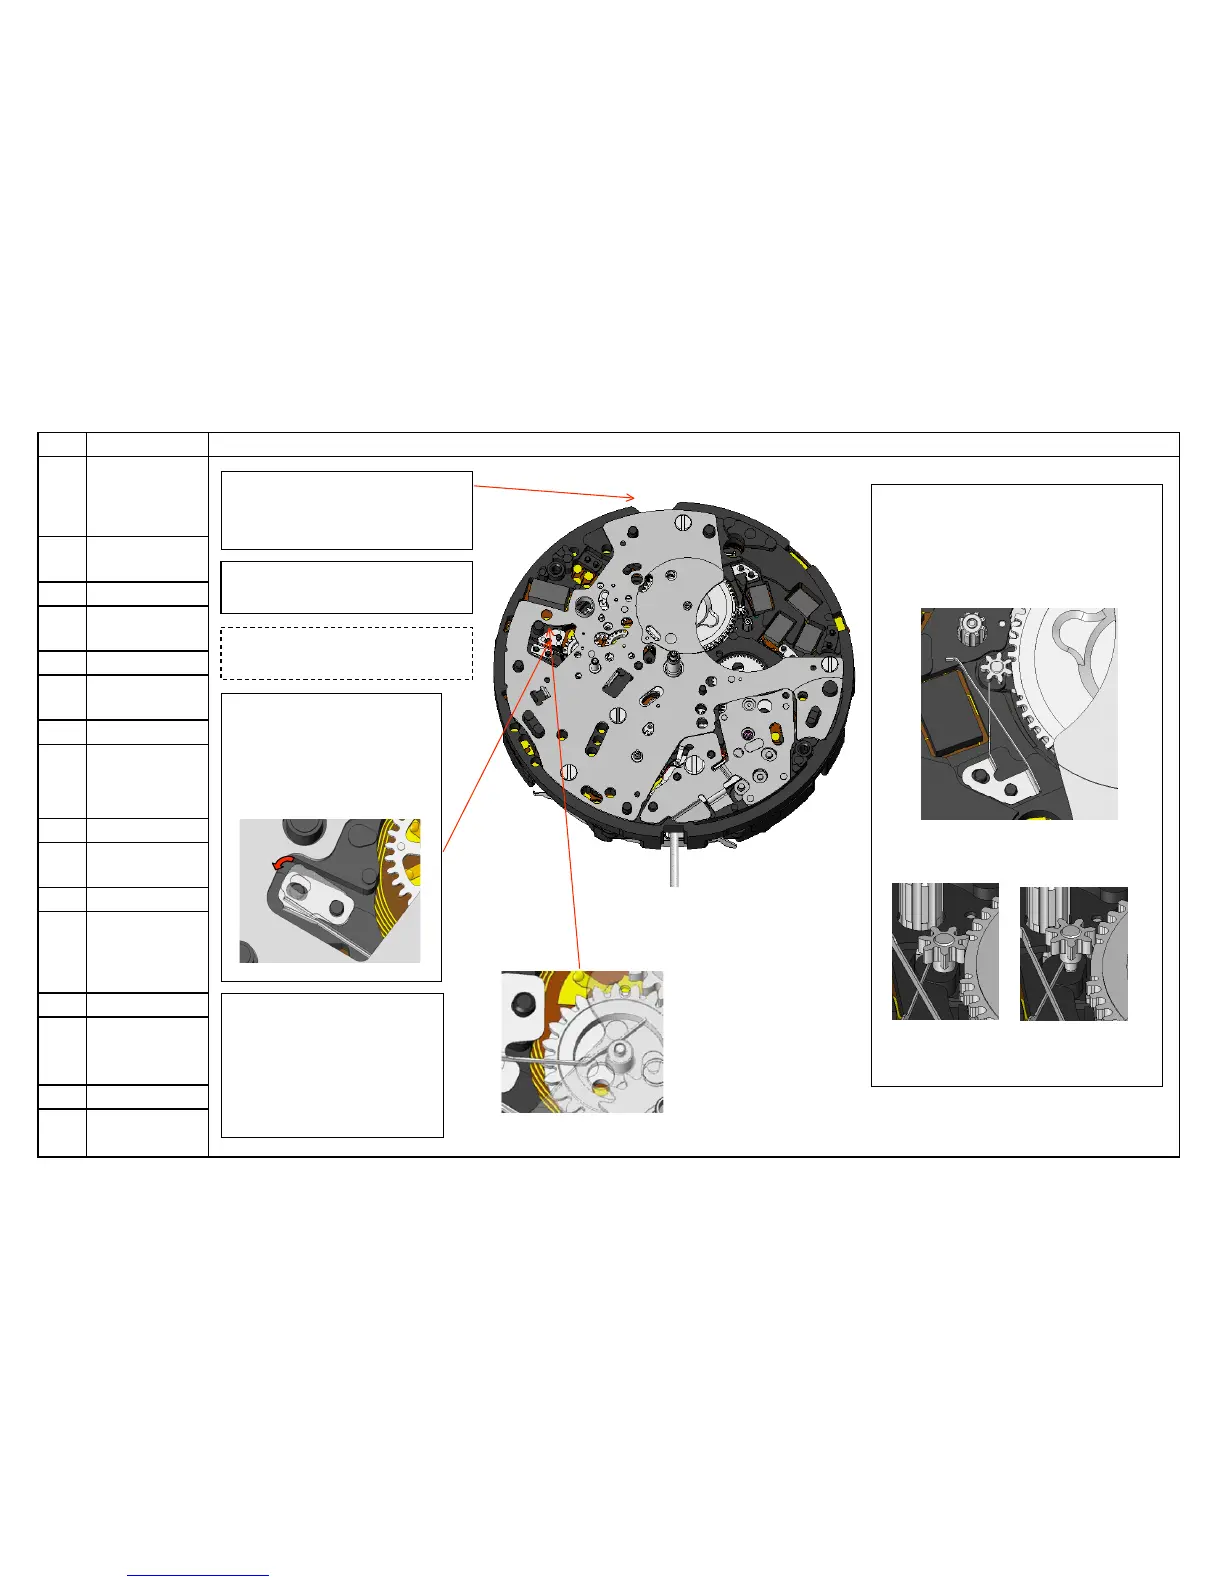
14
Assemble the
CALENDAR TRAIN
BRIDGE
↓
13
Tighten the
CALENDAR TRAIN
BRIDGE SCREW.
↓
◆
Remove the
POSITIONING PIN
A and B.
↓
◆
Lubricate the upper
pivot of the 3
rd
intermediate wheel
for calendar
corrector.
↓
34
Secure the MONTH
INDICATOR
WHELL JUMPER.
↓
12
engage it.
11
Set the DATE
JUMPER FOR
UNIT’S DIGIT.
<12> Set the YEAR
INDICATOR DRIVING
WHEEL SPRING
Insert the spring underneath
the bridge, then engage it with
the arbor of the YEAR
INDICATOR DRIVING
WHEEL
<14> Assemble the CALENDAR
TRAIN BRIDGE.
Make sure that all the pivots fall in the
relevant
<13>Tighten the CALENDAR TRAIN
BRIDGE SCREW.
Remove the POSITIONING
PIN A and B.
<34> Secure the MONTH
INDICATOR WHEEL JUMPER.
Secure the jumper to the teeth
WHEEL underneath the
bridge (See Fig.10-1).
<11> Set the DATE JUMPER FOR
UNIT’S DIGIT.
Hook it to the arbor of the DATE
DRIVING WHEEL FOR UNIT’S DIGIT
which is pre-assembled to the
CALENDAR PLATE (see Fig. 10-3).