2
* If Buttons A, B, C and D are pressed at the same time, all the data in memory will be erased. Refer to "HOW TO RESET THE BUILT-IN IC" on page 5 for further details.
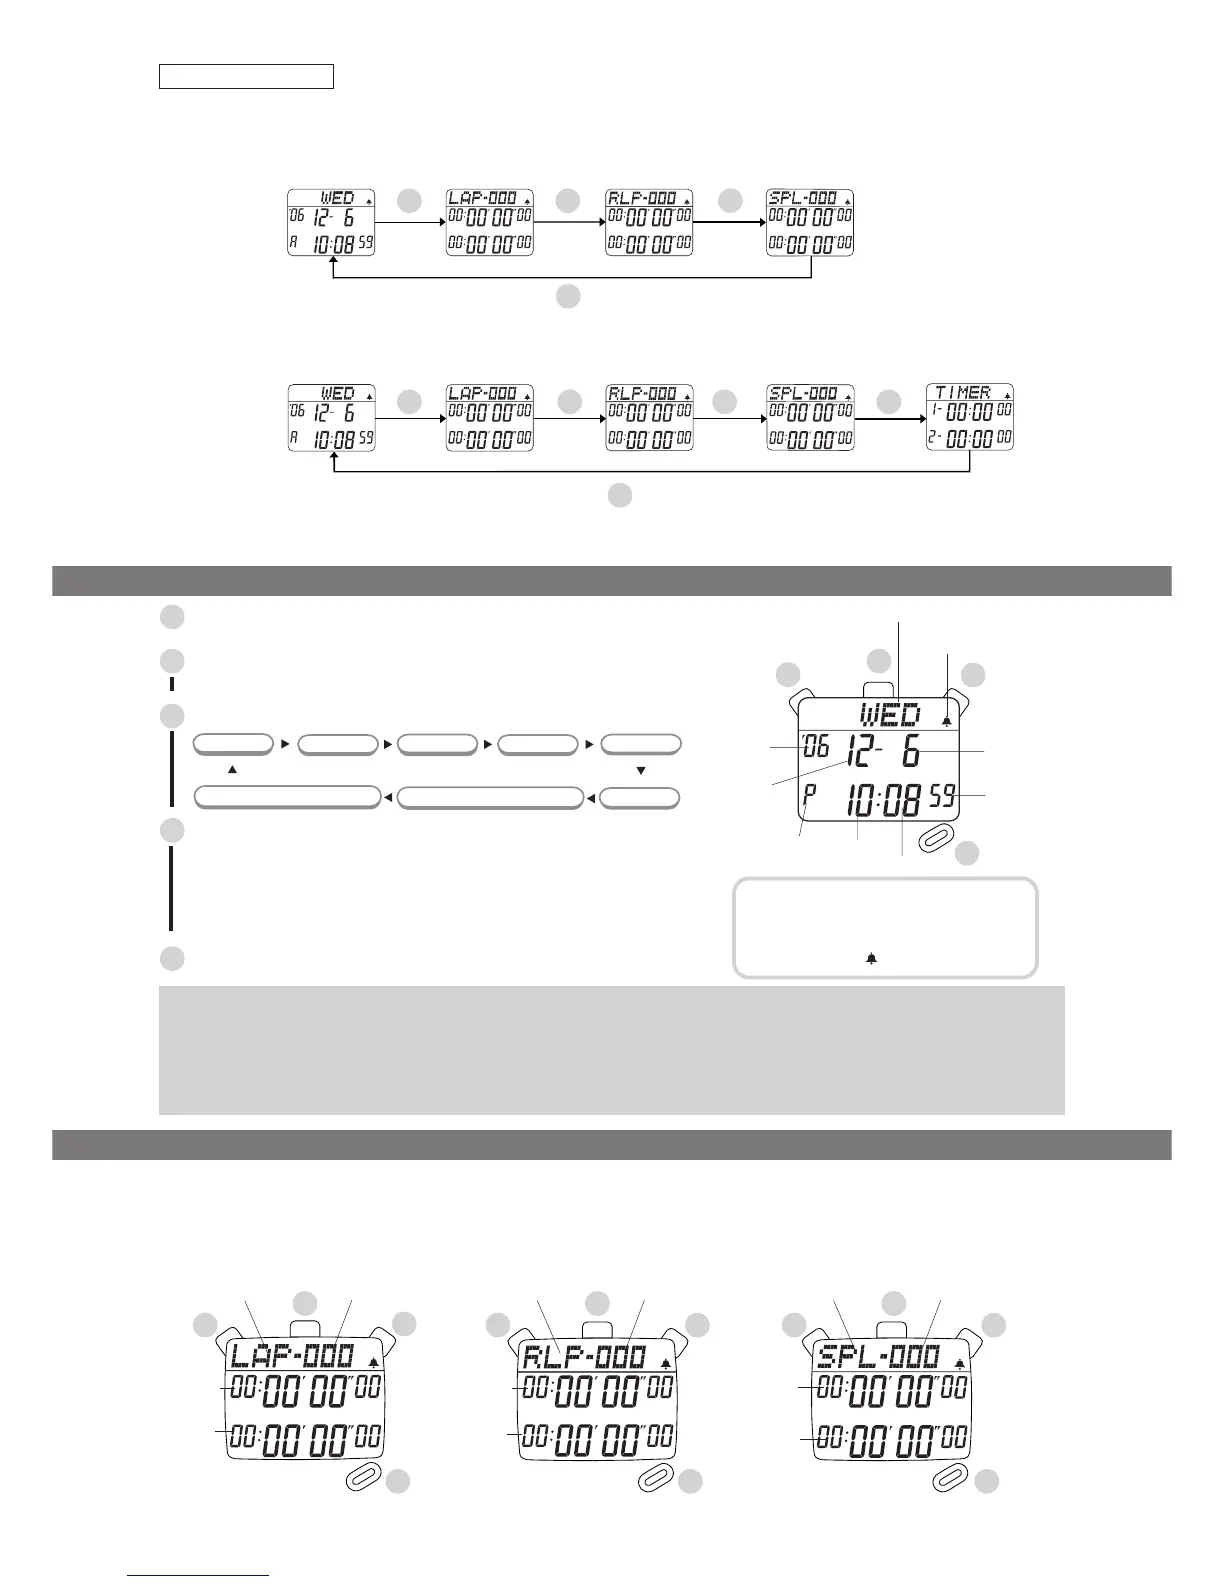
CHANGE OF DISPLAYS
DDD
D
D
<S056>
<S057>
TIME/CALENDAR
display
STOPWATCH
<LAP TIME>
display
STOPWATCH
<LAP TIME IN PROGRESS>
display
STOPWATCH
<SPLIT TIME>
display
TIME/CALENDAR
display
STOPWATCH
<LAP TIME>
display
STOPWATCH
<LAP TIME IN PROGRESS>
display
STOPWATCH
<SPLIT TIME>
display
TIMER
display
D D D
Press Button D to change the display mode.
D
B
A
C
“A” (AM)/“P” (PM) mark
Hour
Year
Month
D
Date
Day
Seconds
Minutes
* With each press of Button C in TIME/CALENDAR
display, the confirmation sound for button
operation is alternately switched "ON" and "OFF."
While the confirmation sound for button operation
is set to "ON," the mark appears on display.
Confirmation sound
for button operation
TIME/CALENDAR SETTING
●
The DAY is automatically set once the YEAR, MONTH and DATE are set.
●
To quit the time/calendar setting, press Button B. When the stopwatch is left untouched in the TIME/CALENDAR SETTING display, it automatically returns to the
TIME/CALENDAR display within two to three minutes.
●
The calendar adjusts automatically for odd and even months including February of leap years from January 1, 2006 to December 31, 2055.
●
When setting the HOUR digits in the 12-hour indication, check that “A” (AM)/“P” (PM) mark is correctly set. In the 24-hour indication, no mark is displayed.
●
If Button A and C are pressed simultaneously, all the digital segments light up. This is not a malfunction. Press any of Button A, B, C or D to return to the TIME/
CALENDAR display.
Press to show the TIME/CALENDAR display.
Press and hold for 2 seconds to show the TIME/CALENDAR SETTING display.
Press repeatedly to select the digits (flashing) to be adjusted.
Press to set the flashing digits or reset the SECONDS to “00.”
* The DAY disappears and the SECOND digits start flashing.
* The digits move quickly if Button A is kept pressed.
● 12-/24-hour indication setting:
Change between 12- and 24-hour indications is made alternately with each press of Button A.
● Automatic shut-off function setting (ECO):
With each press of Button A, the automatic shut-off function is alternately set to "ON" and
"OFF."
After all the adjustments are completed, press to return to the TIME/CALENDAR
display.
▼
D
B
▼
C
A
▼
▼
B
MINUTES
YEAR
12-/24-HOUR INDICATION
MONTH
HOUR
SECONDS
DATE(DAY)
AUTOMATIC SHUT-OFF (ECO)
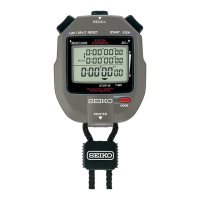
● The stopwatch can measure up to 100 hours in 1/100 second increments.
● Three separate measurement displays are available; lap time, lap time in progress and split time displays.
[LAP TIME IN PROGRESS display]
[SPLIT TIME display]
[LAP TIME display]
A
C
B
D
“LAP” mark Lap No.
Lap time
Accumulated
elapsed time
A
C
B
D
“RLP” mark Lap No.
Lap time
A
C
B
D
“SPL” mark Split No.
Accumulated
elapsed time
Split time
Lap time
in progress
STOPWATCH