10
Roof Guy Installation
Ensure that the chimney is plumb. Square up the flashing plate and
nail in place to the roof deck. Use 12 nails with neoprene washers
or cover the heads with a suitable waterproof mastic. At the top edge
of the flashing plate, lift the shingles and nail the plate to the roof
deck. Then cement shingles to the plate with a suitable waterproof
mastic.
Wrap the Storm Collar around the chimney above the flashing.
Secure the ends together loosely with the nut and bolt supplied.
Slide the collar down the chimney until it contacts the flashing.
Tighten the nut and bolt and seal the Storm Collar to the chimney
with a suitable waterproof non-combustible mastic. After installa-
tion check to ensure that the ventilation slots are not obstructed (See
Figure 16).
NOTE: A Rubber Boot Flashing Kit (URBFK1) is available as an
option for passing through a corrugated or metal roof. See separate
instructions packaged with the Rubber Boot Flashng Kit. On metal
or steep roof, it is recommended that a chimney cricket fabricated
from heavy-guage galvanized steel be installed. This will protect the
Chimney and the Flashing by routing the snow load and ice around
the chimney. This is not a supplied item. Contact a sheet metal
fabrication shop in your area for your custome chimney cricket.
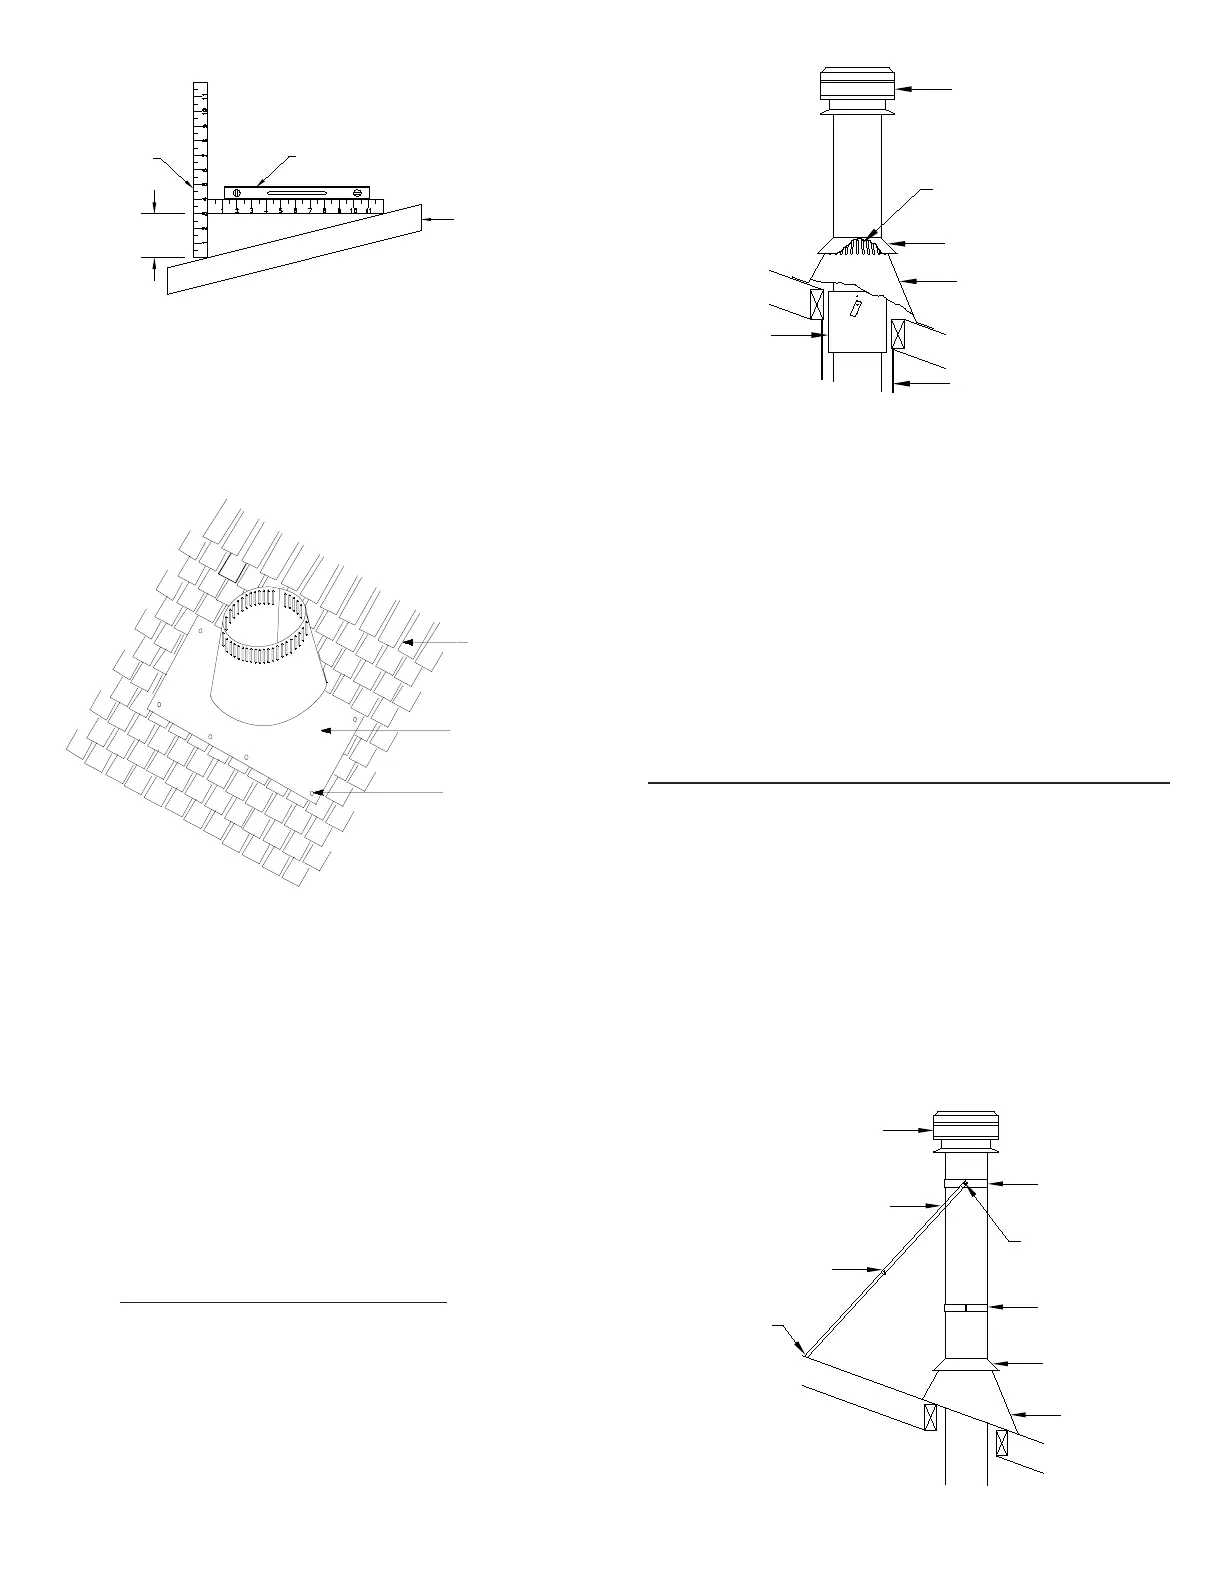
Shingles
Flashing
Nails
Level
Roof
Pitch is 3/12
3"
12" Ruler
FIGURE 14 Roof Pitch Calculation
Slide a Roof Flashing Assembly suitable to your roof slope over the
chimney. Place the top edge of flashing plate under the shingles.
Place both sides and the lower edge on top of the shingles (See figure
15). Do not nail in place at this time.
Roof Flashing Installation
FIGURE 15
Enclosure
Rafter Radiation
Shield
Flashing
Storm Collar
Ventilation Slots
Raincap
WARNING: DO NOT BLOCK THE VENTILATION
SLOTS ON THE FLASHING.
The flashing and storm collar should be painted to match the roof
shingles. This will extend its life and improve the appearance.
Clean, prime and paint with suitable painting products.
Continue adding chimney lengths until the proper height is achieved
(See figure 1). Install the rain cap and lock it in place by turning
clockwise until tight.
FIGURE 16 Storm Collar/Flashing Installation
FIGURE 17
Clamp
Storm Collar
Flashing
Locking Band
Nut & Bolt
Raincap
Roof Guy Band
Roof Guy Legs
Screws
or Nails
If the chimney extends 5 feet or more (1.5m) above the roof deck,
roof guys are required. The Roof Guy kit containing telescopic legs
and draw band are suitable for this application. The draw band must
be clamped around the chimney. Use suitable fasteners such as #10
or #12 x 2" wood screws to secure the legs to the roof. Make sure
the fasteners are into the rafters and not just the roof sheathing.
Position the band around the chimney approximately two thirds of
the way up the chimney height. The preferred location for the band
is next to a chimney joint, immediately above or below a Locking
Band. The two telescopic legs should form an angle of about 60
degrees to give support to the chimney in all directions.
ROOF GUY INSTALLATION