7
Stove Pipe Adaptor
Elbow Support Bands
Ceiling Joist
(Framed all 4 sides)
Floor, Ceiling Joist
(Framed all 4 sides)
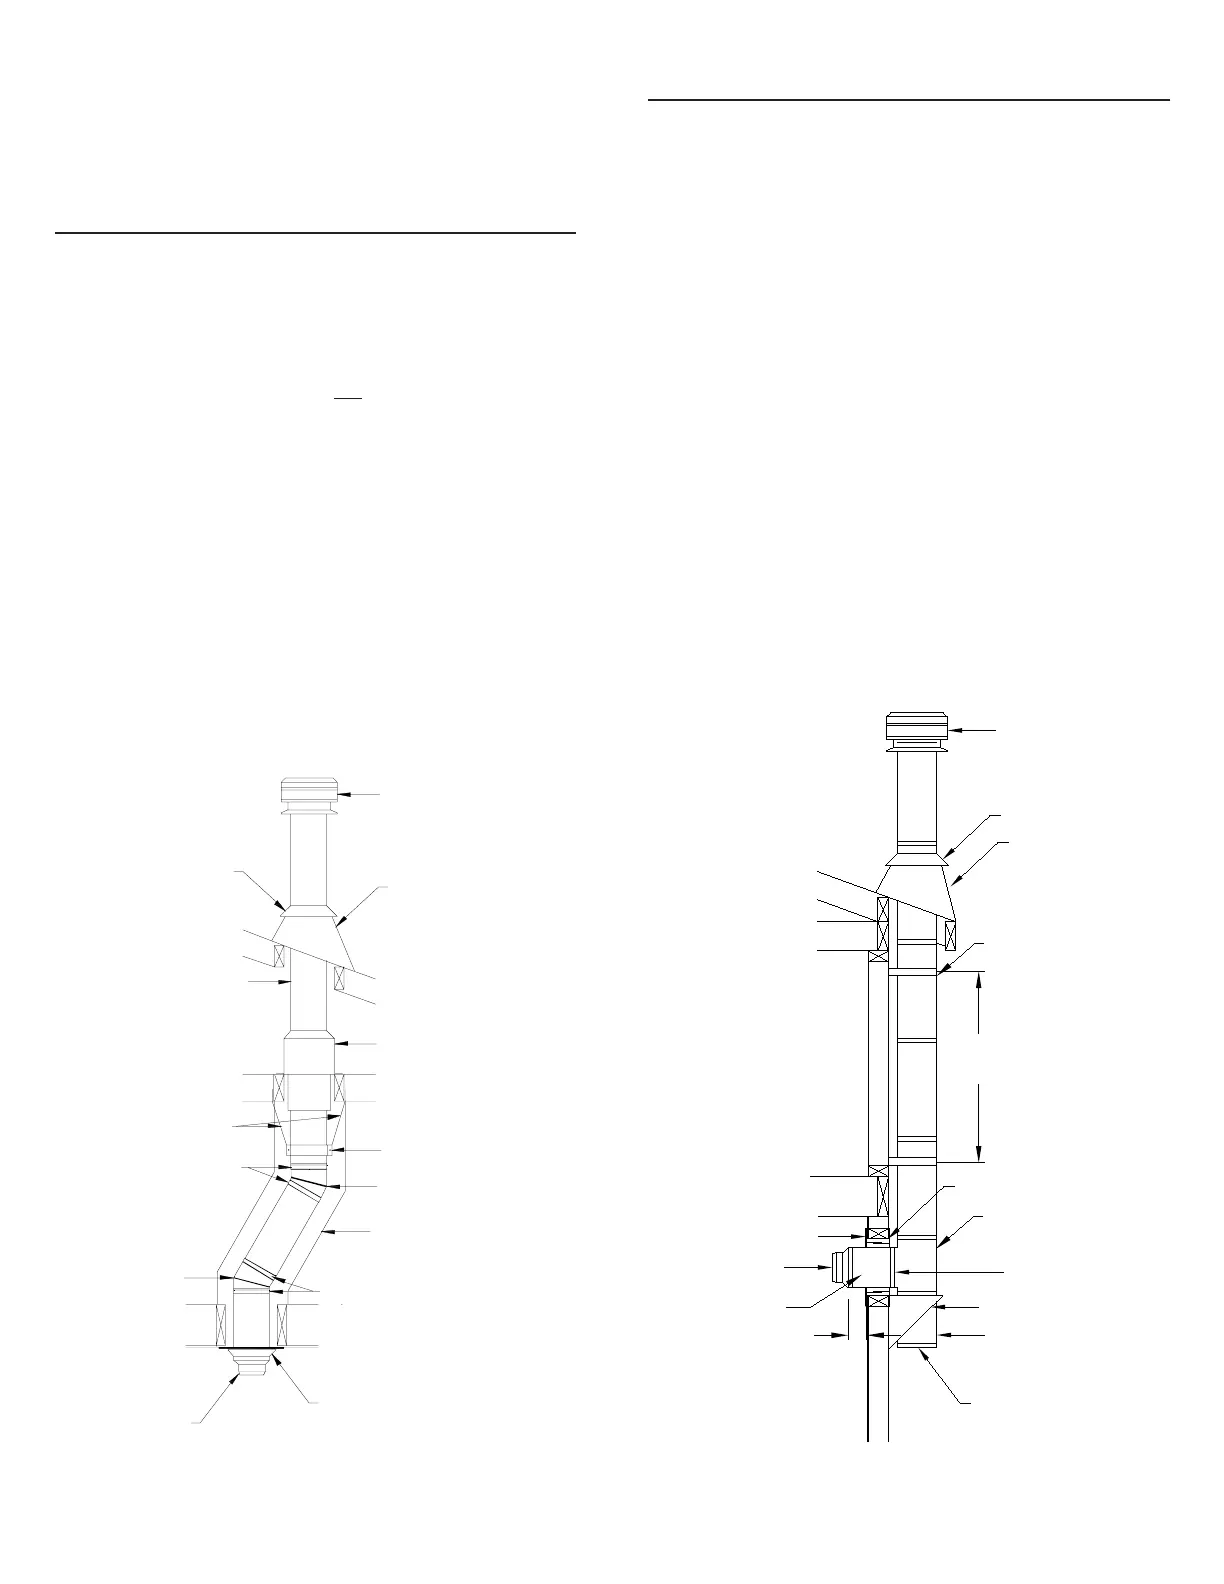
Wall Support Installation
WALL SUPPORT
To complete a proper Wall Support installation, the following parts
may be required:
- Adjustable Wall Support: JSC AWS.
- Roof Flashing Assembly: JSC AAF, JSC AF2
- Required when the chimney penetrates a roof or a roof overhang.
- Rafter Radiation Shield: JSC RRS - Required when the chimney
is enclosed immediately below the roof.
- Wall Bands: JSC WB.
- Suitable lengths of chimney (Model FC). The chimney diameter
should be sized to suit the appliance.
- Rain Cap: JSC RC or DRC - Standard or Deluxe model.
NOTE: NEVER OFFSET AN EXTERIOR CHIMNEY.
FIGURE 9
The SuperVent/SuperPro Adjustable Wall Support will support up
to 38 feet (11.5m) of chimney, all of which must be above the
support with the exception of the 1 foot cleanout section and/or the
Insulated Tee Plug, which is installed below the support.
One pair of (two) 15
o
or 30
o
elbows may be used to provide an offset
in order to avoid cutting of joists and to clear other obstructions.
Each elbow support will support 15 feet (4.5 m) of chimney and the
Maximum length of chimney allowed between the elbows is 6 feet
(2 m).
The female end of the elbows are not lanced, in order to ensure
proper alignment of the chimney system can be maintained. Lock-
ing bands must be used at all chimney joints.
Never install an elbow in a joist area. Chimney sections must pass
vertically through framed joist areas.
During installation provide supplementary support for the offset
section to avoid undue stress on connected elbows.
Install an elbow support just above the highest elbow. Attach the
Support Band to the chimney with 4 of the nuts and bolts, and then
install the four stainless steel sheet metal screws through the pre-
punched holes. Attach the Support Straps to the Support Band
assembly and nail the Support Straps to the framing using 6d (or 2”)
nails. See figure 8.
ELBOW INSTALLATION
Roof Joist
(Framed all 4 sides)
Elbow Support Straps
Decorator Ceiling Support
Living Space
Attic Space
Offset (Elbow) Installation
Raincap
Storm Collar
Wall Band
Locking Band
Insulated Tee
Wall Support
1 Foot
Chimney Section or
an Insulated Tee Plug
Chimney Section
Stove Pipe Adaptor
Wall Thimble
Inner Half
Wall Thimble
Outer Half
Ventilated Flashing
Attic Insulation Shield
Ventilated Flashing
FIGURE 8
Locking Bands
Elbow
Storm Collar
Enclosure
Locking Bands
8 Feet
(Max)
Tee Plug
3" Minimum
Elbow
Raincap
Chimney Sections
Install the Firestop Joist Shield from either above or below the joist
framing and nail in place using 1" spiral nails. Ensure no insulation
is within the 2" air space clearance around the chimney. This
includes the air spaces between the Firestop Radiation Shield and
the joist framing.